Tutorial #A07/3 : Fine Registration – point cloud registration (ICP)
Point cloud registration (ICP)
Welcome to the 3DF Zephyr tutorial series.
In the following tutorial, you will learn how to apply the Point Cloud Registration algorithm (ICP). The practical application in this tutorial is to use the photogrammetry information in order to colorize a laser scan point cloud. This is the third part of three tutorials on the subject
3DF Zephyr can import many file formats as well as some native laser scan formats. Native file formats (such as .fls and .fws) support can be installed by installing the correct plugin from this page.
Intro
This step is a reminder of the first part of the tutorial that allows you to have all needed to run ICP algorithm.
For the first part of this tutorial we will generate a quick point cloud from a few photos, import an external point cloud into Zephyr that will then be aligned and scaled and then colorized. The reference object can be either the external point cloud or the photogrammetry one.
Use the pictures provided in the example dataset to extract a dense point cloud (Urban/default in both the SfM and MvS steps will work) or open the Zep file that has already laser scan imported.
In order to import the external point cloud (in this specific case, mirandola_laserscan.ply – a laser scan point cloud saved as ply and simplified for tutorial purposes) simply drag and drop the desired file into the workspace or use the import menu.When asked, click merge. Zephyr will import the file in its workspace as an unstructured object.
In order to make it structured, the two point clouds must be aligned first.The external point cloud will be out of scale, rotation and position. Use the Gizmo to bring the two point clouds to close together and approximatively of the same size.
This process is extremely easy since it’s a visual process, however, can be tricky recognizing different point clouds. We will tackle this possible issue later in this same tutorial. Make sure to select the correct object in the object selection menu. When the point clouds are roughly aligned and scaled, click OK.
Step 1 – ICP Registration
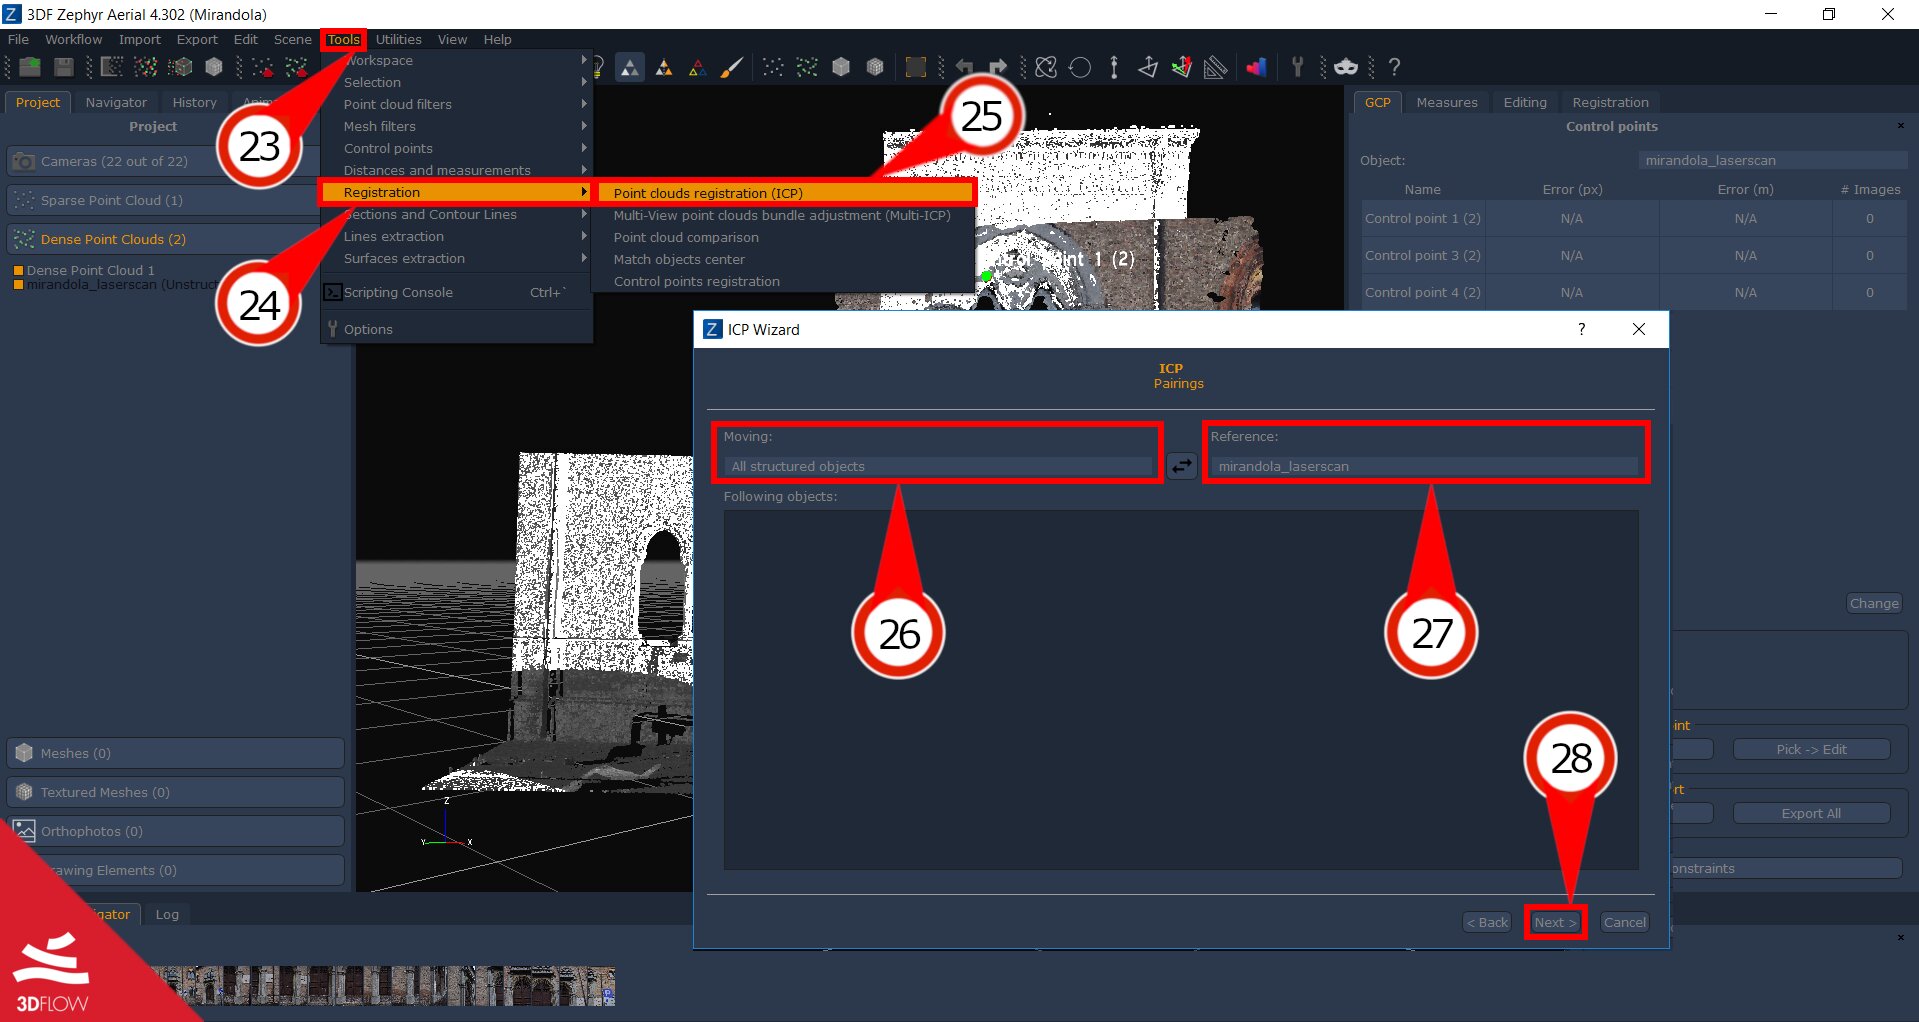
You are now ready to run the ICP wizard: from the “Tools” (23) menu, select “Registration” (24) and then select “Point cloud Registration (ICP)” (25).
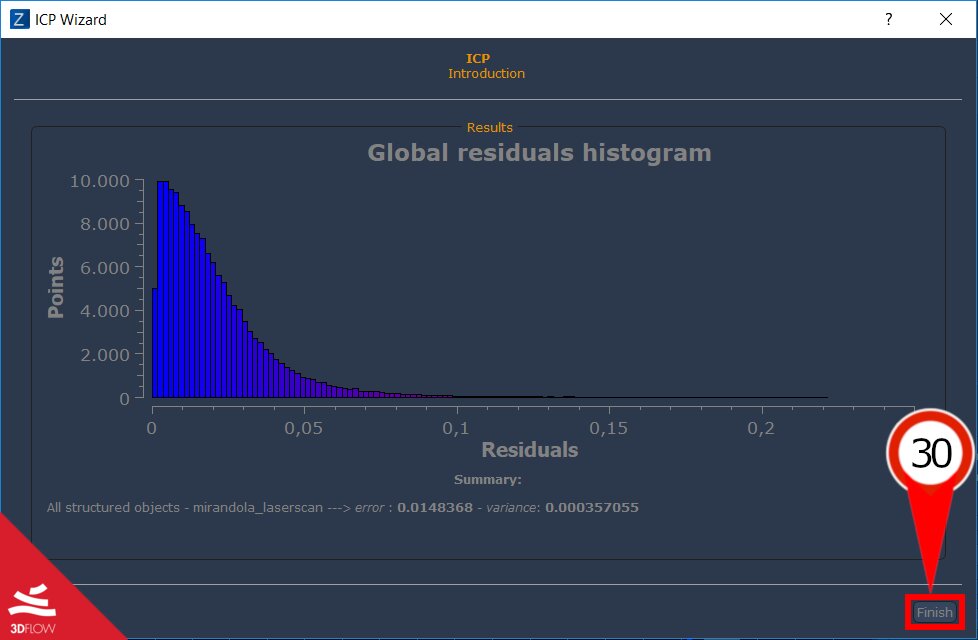
When the computation has finished, a residual histogram will be shown onscreen.
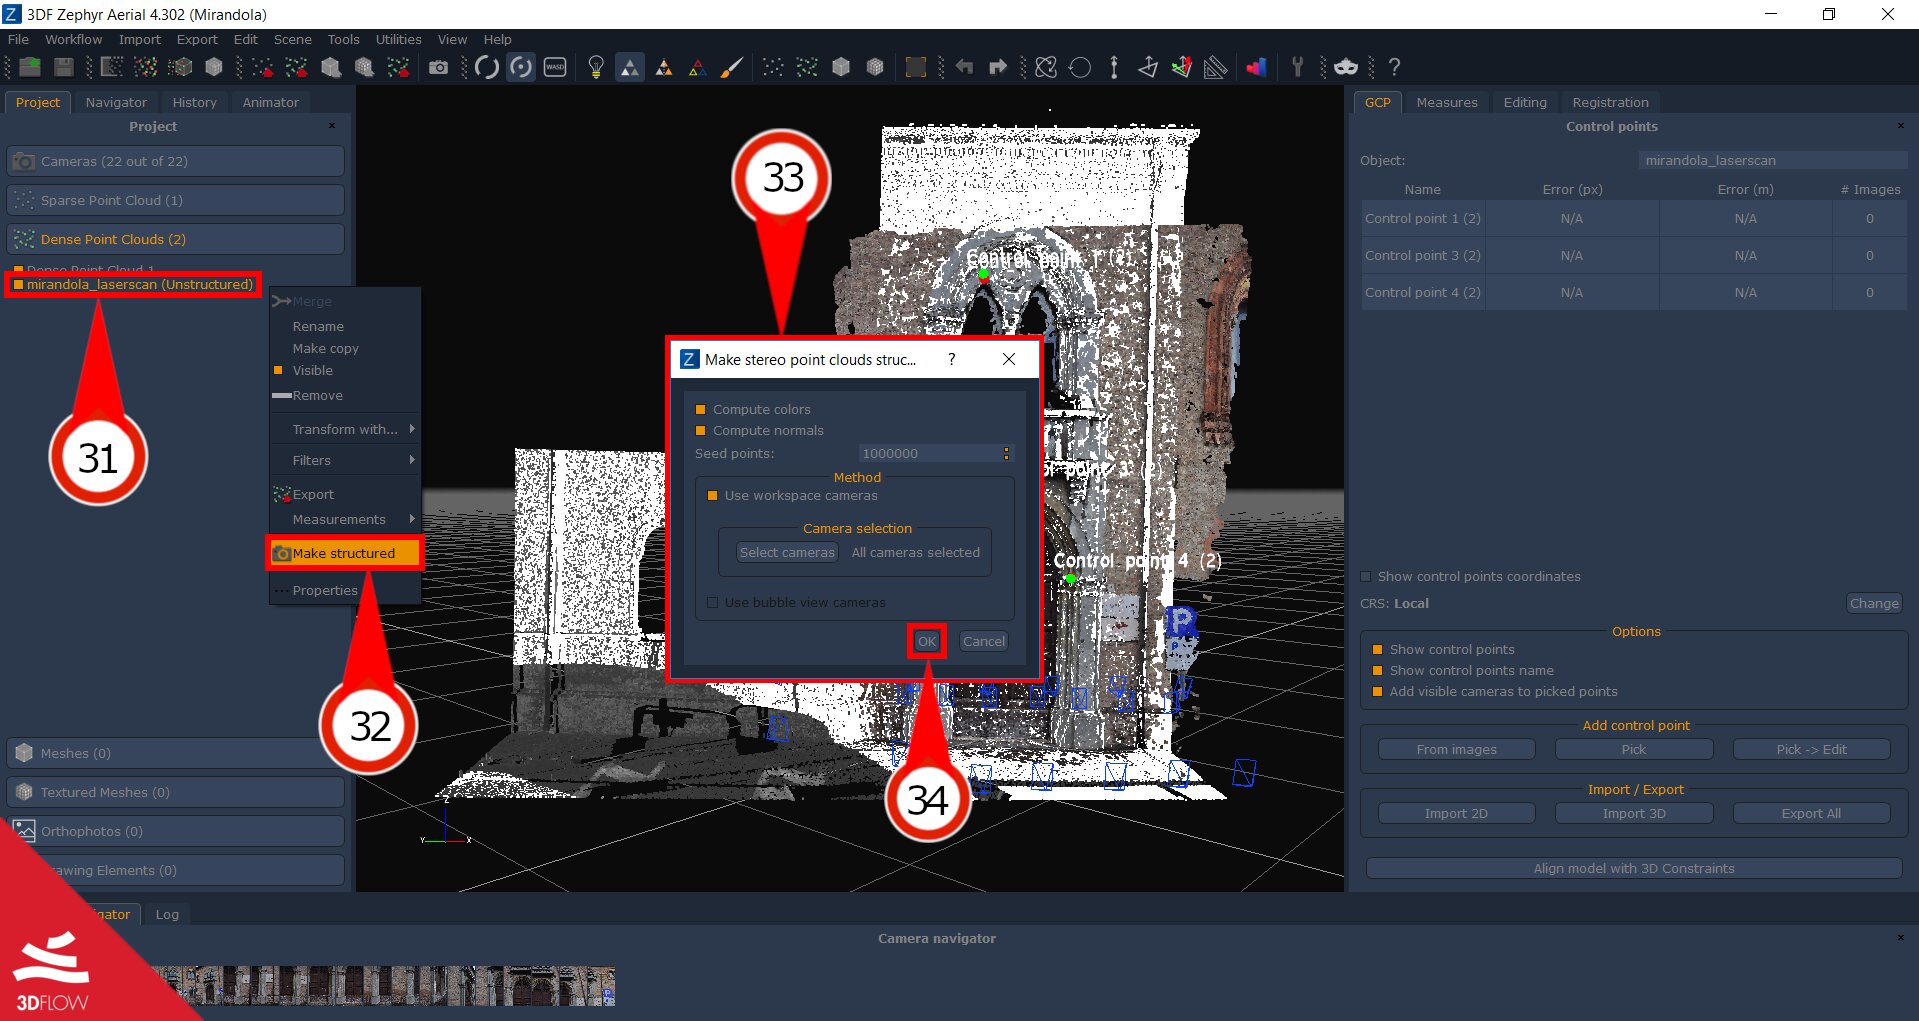
Step 2 – Make structured
All that is left to do now is to simply right click the “unstructured object” (31) and then select “make structured” (32).