Tutorial #05 : point cloud cleaning
Point cloud cleaning
Welcome to the 3DF Zephyr tutorial series. In this recipe, you will learn good practices when cleaning point clouds.
This tutorial is targeted to all 3DF Zephyr Versions, with some exceptions when noted.
You may use any dataset you like.
Step 1 – Introduction
Manual editing is often used to remove noise in the generated point clouds, and although Pro and Aerial users usually can use the confidence removal tool in order to automatically clean the most noise out of the point cloud, sometimes some manual editing is in required for even better results.
Step 2 – Point cloud cleaning
Load any dataset you wish to experiment with and make sure to have generated at least the sparse point cloud.
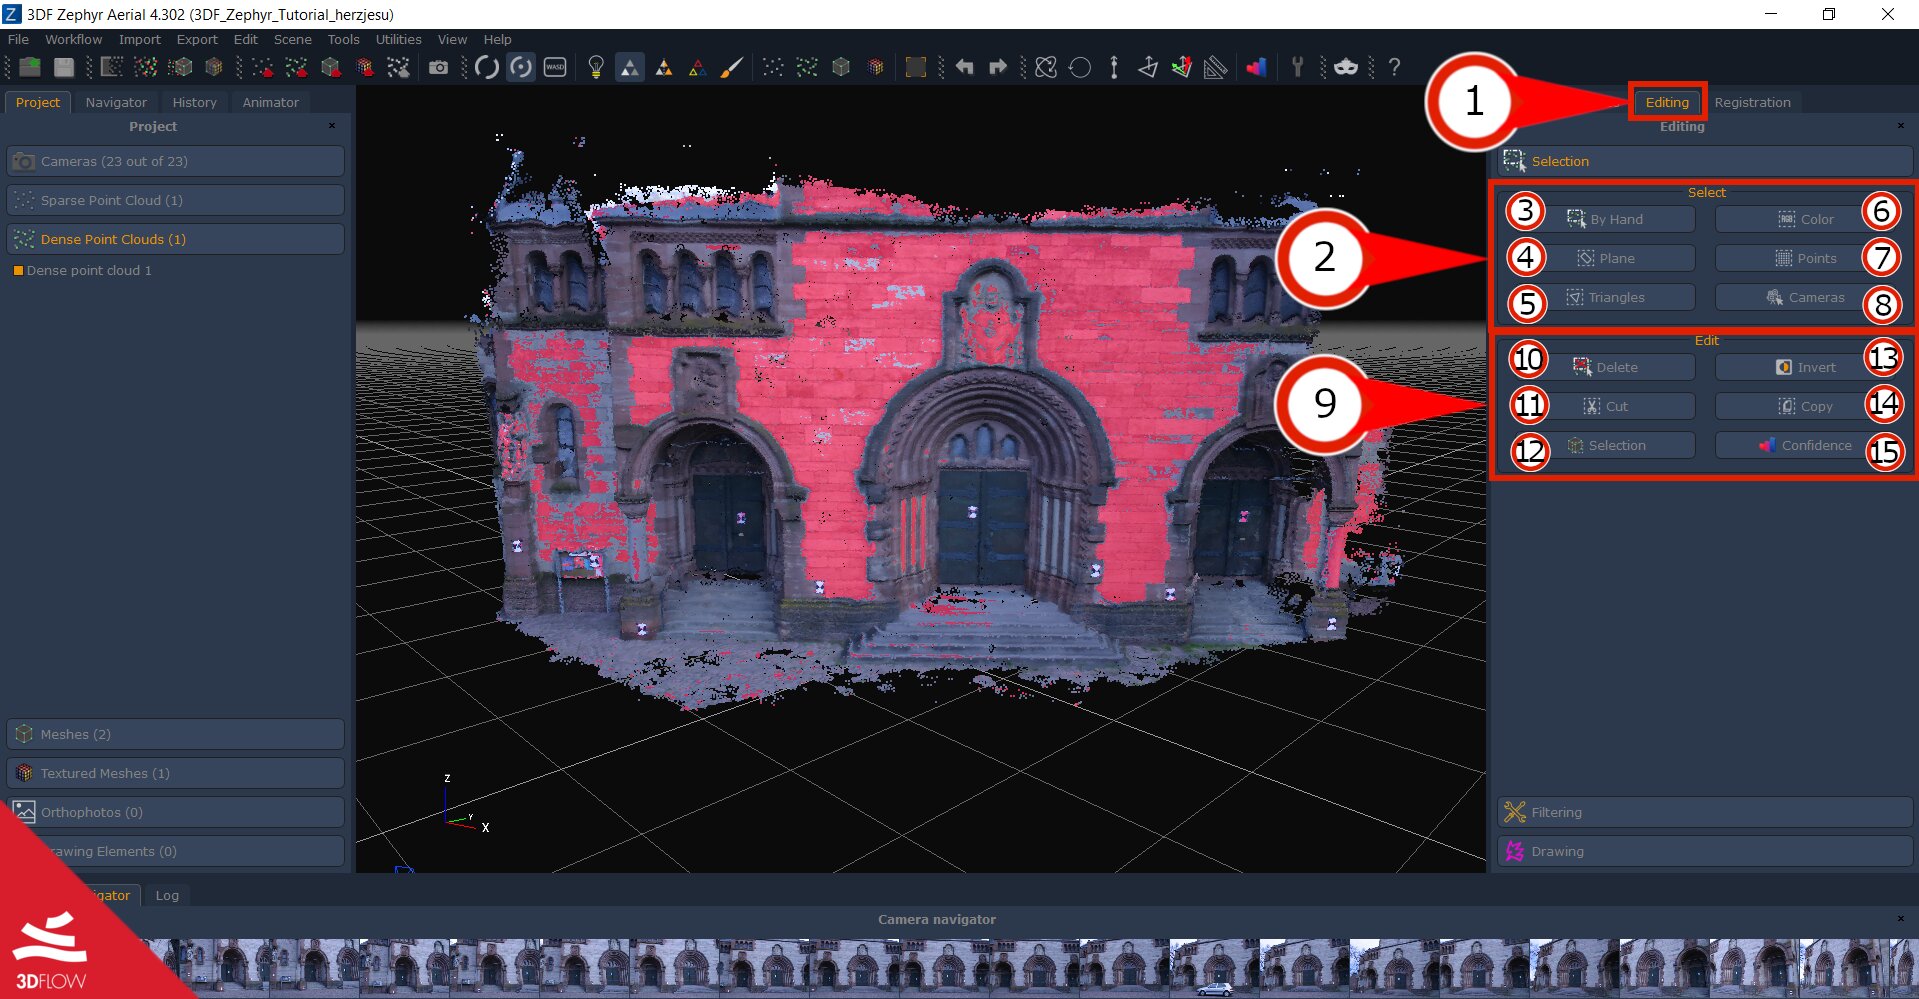
Select the “Editing” tab (1) to access editing tools. In there you can notice 2 different sections : “Select” (2) section and “Edit” (9) section.
The “Select” section offers you tools useful to select points in many ways, and then, when selected, edit them with a tool in the “Edit” section.
Step 3 – Manual Selection
You can use the “By hand” (3) selection mode icon to open the manual “Selection” window where you can find different manual selection tools :
“Rect” icon to drag a rectangle on the workspace and all the inside points will be selected (they will be highlighted in red).
“Poly” icon : simply click the points of a polygon (and close the polygon so that the last point is the same initial point), similarly, all the selected points will be highlighted in red.
“Elliptic” icon : draw a circle on the workspace.
“Lasso” icon : smart manual selection
“Box” icon : select points inside a box
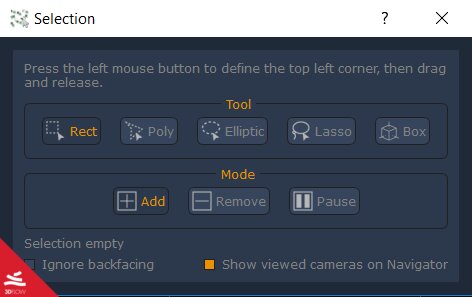
and different usage mode :
“Add” to add currently selected points to selection.
“Remove” to remove currently selected points to selection.
“Pause” to pause – resume selection mode and switch it with the overview mode
At this point, you can remove the selected points by clicking the “Delete” points icon (10). The points will be deleted.
Step 4 – Other selection tools
Other ways to select points are
By color: by clicking the select by “Color” button (6): a selection dialog will appear: simply pick the color of the points that you want to select (either with the color selector or by picking it on the scene) and all the colors that fall behind a certain (customizable) threshold will be selected (and highlighted in red). You can then remove these points using the “delete points button” as usual. Please note that this tool applies to dense point clouds only.
By “Plane” tool (4). Simply move the plane where needed and all the points above the plane surface will be selected (and highlighted in red).
“Triangles” (5). This tool works on the mesh (automatic selected) and allows you to select triangles using different filters.
“Points” (7). This tool works only on the cloud points (sparse or dense) and allows you to select points by using different filters.
“Cameras” (8). This tool allows you to select cameras
Pro and Aerial users may want to also use the “Confidence” tool (15) in order to remove the points in which Zephyr has less confidence, which in most cases also happen to be noise.
After the selection, you can also use “Cut” (11) and “Copy” (14) tools (do not work on sparse point cloud) to respectively split or make a copy of selected points. Or you can “Invert” (12) the selection. The same manual tools can be used to remove parts of meshes.
Step 5 – Filtering selection
Finally, there is a “Filter on selection” (12) tool that allows using special filter algorithms on the current selection.
It’s usually a good idea to make a copy of the original point cloud before making changes, although you can quickly undo/redo these actions with CTRL+Z and CTRL+Y (or the undo and redo buttons).
The next tutorial will show how to record a movie directly inside Zephyr. Proceed to the next tutorial