Cameras orientation
The first phase of 3D reconstruction is called Structure from Motion and computes the position and orientation of each photo loaded in Zephyr. This step results in a sparse point cloud.
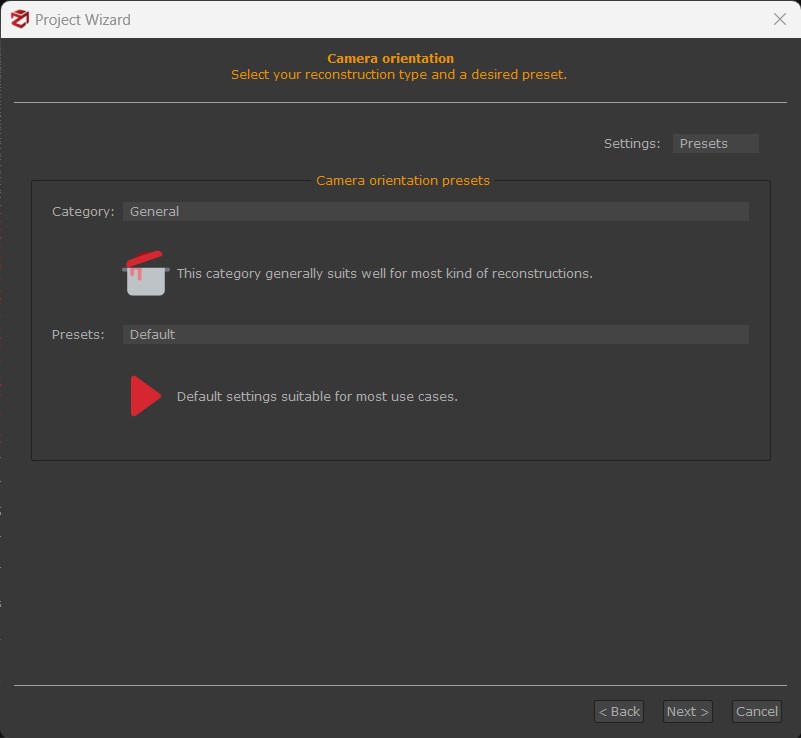
Users must define the Category depending on the scenario/subject they have captured, and select the Preset according to the accuracy and quality level they want to achieve on the 3D model(s).
You can switch to the Advanced settings by clicking the drop-down menu in the upper right corner of the window.
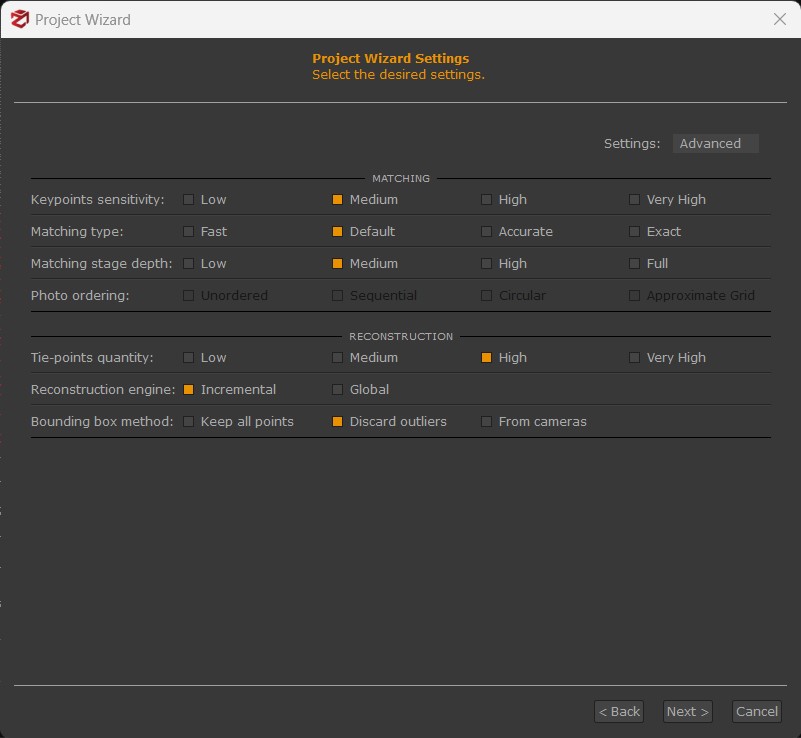
The advanced settings are explained in detail below:
Keypoints Sensitivity: "keypoints" refers to the matched pixels in the pictures. This parameter determines the maximum number of keypoints that are to be extracted for each image. Please note that a substantial number of keypoints does not lead to a better result since the more elements involved, the higher the ambiguity during the matching phase.
Low: extracts up to 5,000 keypoints per image
Medium: extracts up to 7,500 keypoints per image
High: extracts up to 10,000 keypoints per image
Very High: extracts up to 15,000 keypoints per image
It is recommended to decrease keypoints density when:
- the outcome is required quickly;
- the distance between the cameras and the subject/scene does not vary;
- pictures have enough (at least 60%) and high (70% - 80%) overlap;
It is recommended to increase keypoints density when:
- cameras are not oriented properly;
- pictures are too close to or too far from the subject/scene;
- pictures have low overlap;
- the subject/scene has a uniform or textureless surface (e.g., a white wall);
Matching Type: controls which optimizations (if any) should be used when computing matches between images. The "accurate" option will take longer to complete camera orientation;
Matching Stage Depth: controls how many keypoint matches are performed on the images. Usually, the more is the better, however, this comes at a computational cost.
It is recommended to decrease this parameter when:
- the outcome is required quickly;
- cameras are close to the subject/scene;
- pictures come with good texturing and high overlap (70% - 80%);
It is recommended to increase this parameter when:
- cameras are not oriented properly;
- pictures are too close to or too far from the subject/scene;
- pictures have low overlap;
- the subject/scene has uniform or texture-less surfaces (e.g., a white wall);
Photo Ordering: this parameter tells 3DF Zephyr which capture sequence has been leveraged onsite, thus speeding up the near-image detection. By using the "sequential" option, you are telling 3DF Zephyr the pictures have been taken sequentially (photo 1 - photo 2 - photo 2 - photo 3 - etc.), while the "circular" option hints at a closed loop sequence.
If you don’t know the photo order, pick the “unordered“ option. The last "approximate grid" option is designed for nadiral aerial datasets.
Tie-points quantity: this value affects the number of points to be considered during the Bundle Adjustment optimization. A higher value can lead to better results and a higher computational cost.
Reconstruction Engine: 3DF Samantha supports both incremental and global reconstruction pipelines. The global pipeline tries to solve the orientation problem globally, which means that it's usually faster than the incremental one and potentially less prone to drifting error. The incremental engine on the other hand, albeit slower, tends to include more cameras in the final solution. In a nutshell, you are supposed to use the global pipeline if you are processing a huge dataset (more than 1000 pictures).
Bounding box method: it defines the computation method of the bounding box. It's recommended to keep the default option "discard outliers", namely the far points that are not relevant to the 3D reconstruction.
A further description of those parameters is available here: http://www.3dflow.net/3df-zephyr-parameters-tuning-guide/
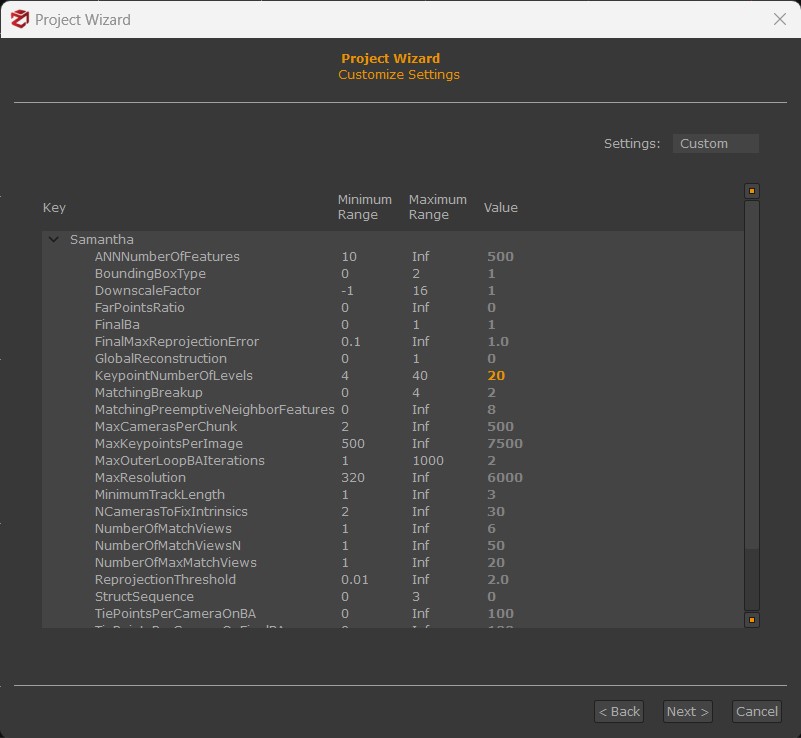
From the "Settings" drop-down menu, you may also select the "Custom" mode. This mode allows you to fine-tune in detail every single reconstruction parameter. Remember that you can load an XML file or reset the values to default settings by right-clicking and selecting the desired option. Please note that a hint related to the selected parameter is shown at the bottom of the window.
Once the camera orientation phase has been completed, the sparse point cloud will appear in the workspace as well as the oriented cameras identified by blue pyramids whose size and color are editable from the Options menu.
ACCURACY EVALUATION OF CAMERAS ORIENTATION PHASE
Once you are done with the first 3D reconstruction step, it is advisable to check its accuracy in order to figure out which pictures should be discarded to decrease the error even on further phases.
By clicking on Tools > Workspace > Camera Stats the following chart will appear:
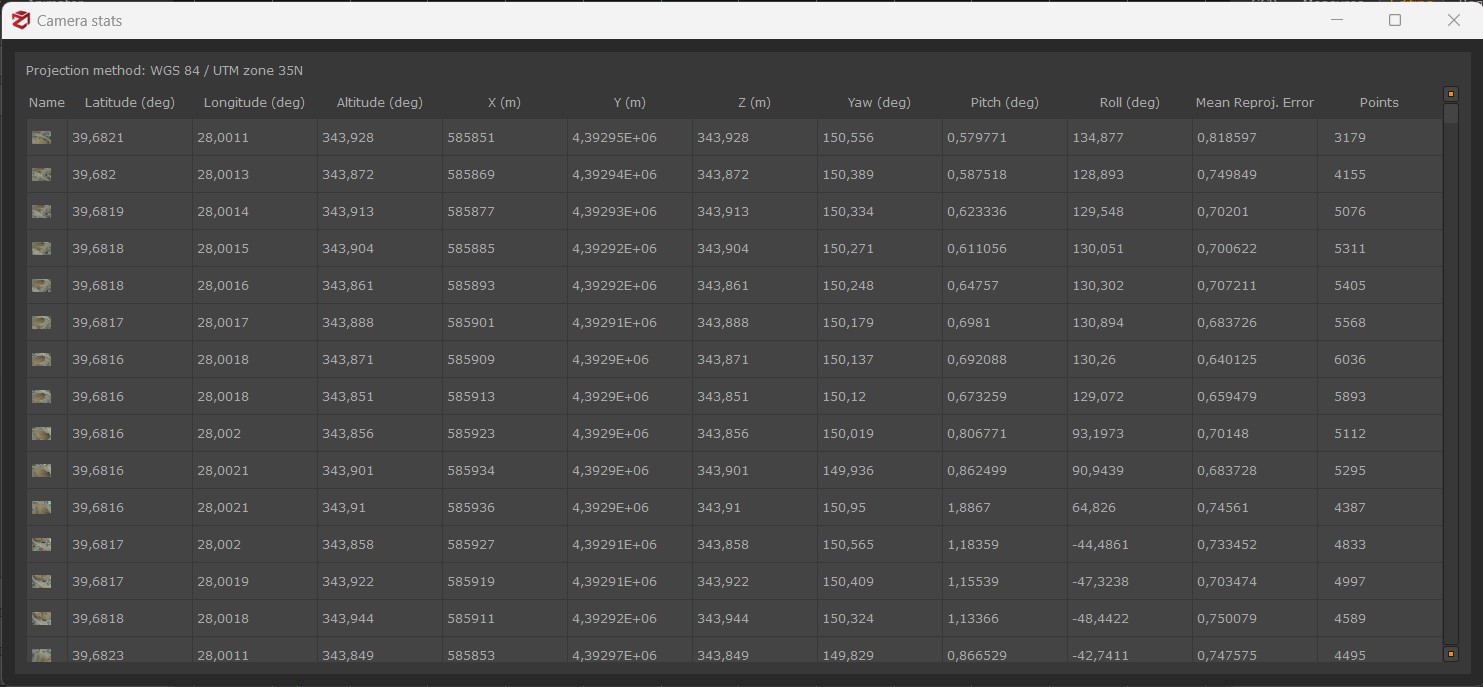
The two columns on the right show the Mean reprojection error for each picture and the Points, namely the number of keypoints (the points for which the software retrieved the position) detected in each photo. By clicking on the entries "Mean Reproj. Error" and "Points", users can sort the values in decreasing or ascending order.
Overall, a well-oriented picture with a good accuracy degree results in a low reprojection error and a number of keypoints. Keypoints represent the equations amount exploited during the reconstruction phase, so their high value is related to the higher reliability of the final result. It's worth noting that the reprojection error gives a rough idea of the orientation accuracy since it should always be related to the sensor size of the camera.