The bounding box
When the sparse point cloud has been created, the bounding box will be computed as well. The bounding box corresponds to the volume in which all points that do not fall into said volume will be discarded in the next 3D reconstruction steps.
You can then change how Zephyr behaves by editing the bounding box settings (not just for "what" is being reconstructed, but also the discretization level changes when the volume changes too).
You can enable the bounding box visualization - and edit it - either from the Scene menu or by clicking the related icon in the top toolbar.

Once enabled, the bounding box will be visible in the 3D viewport and the bounding box edit widget will appear on the screen. You can toggle the bounding box controls using this widget.
We suggest to enable - and adapt if need be - the bounding box as soon as you complete the sparse point cloud generation. This way you are aware of what will be affected in the next 3D reconstruction steps.
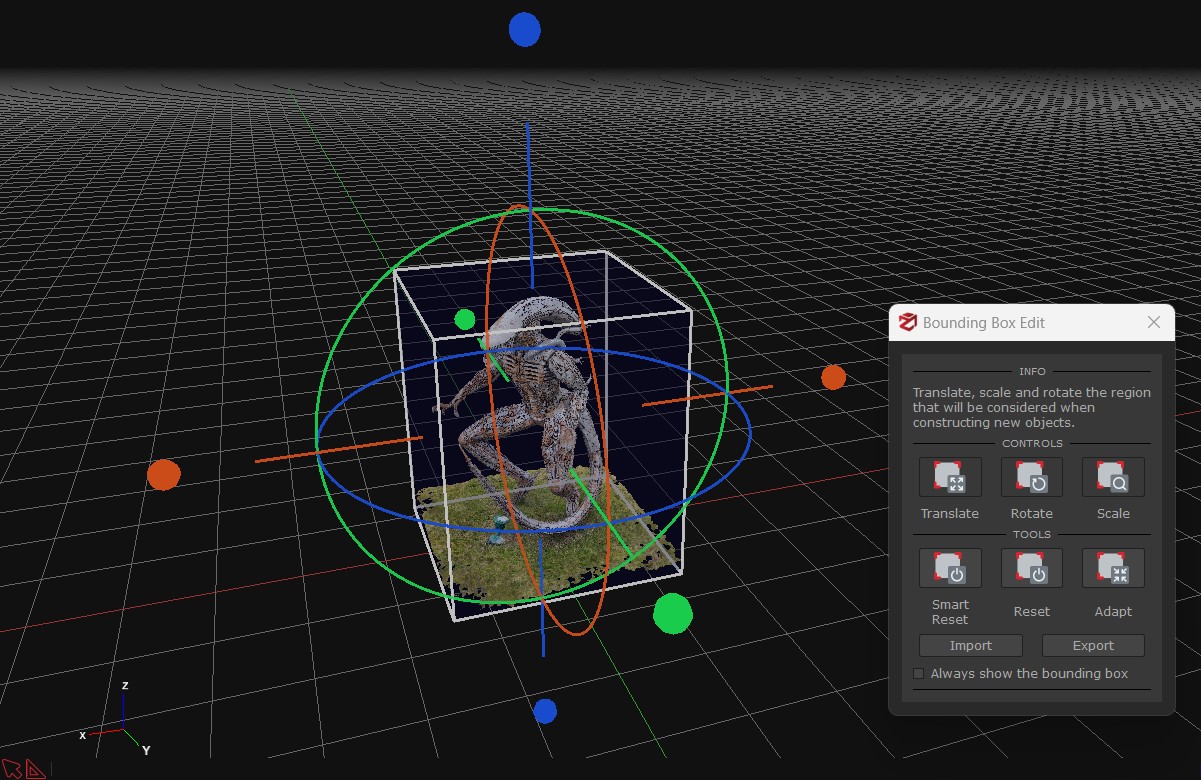
Translate: click and drag the desired gizmo to move the bounding box over the selected axis.
Rotate: click and drag the desired gizmo to rotate the bounding box over the selected rotation axis.
Scale: click and the desired face of the bounding box to scale the bounding box.
Reset/smart reset: resets the bounding box (the smart reset will try to automatically fit the bounding box to the computed point cloud).
Adapt: it allows to adapt the bounding box to one of the objects in the workspace (sparse point cloud, dense point cloud, mesh, etc.).
Always show the bounding box: keeps the bounding box rendered in the scene even when the bounding box widget is closed.