Generating orthophoto via new project wizard
It's possible to generate directly an orthophoto from the Z-axis (map) in the project wizard.
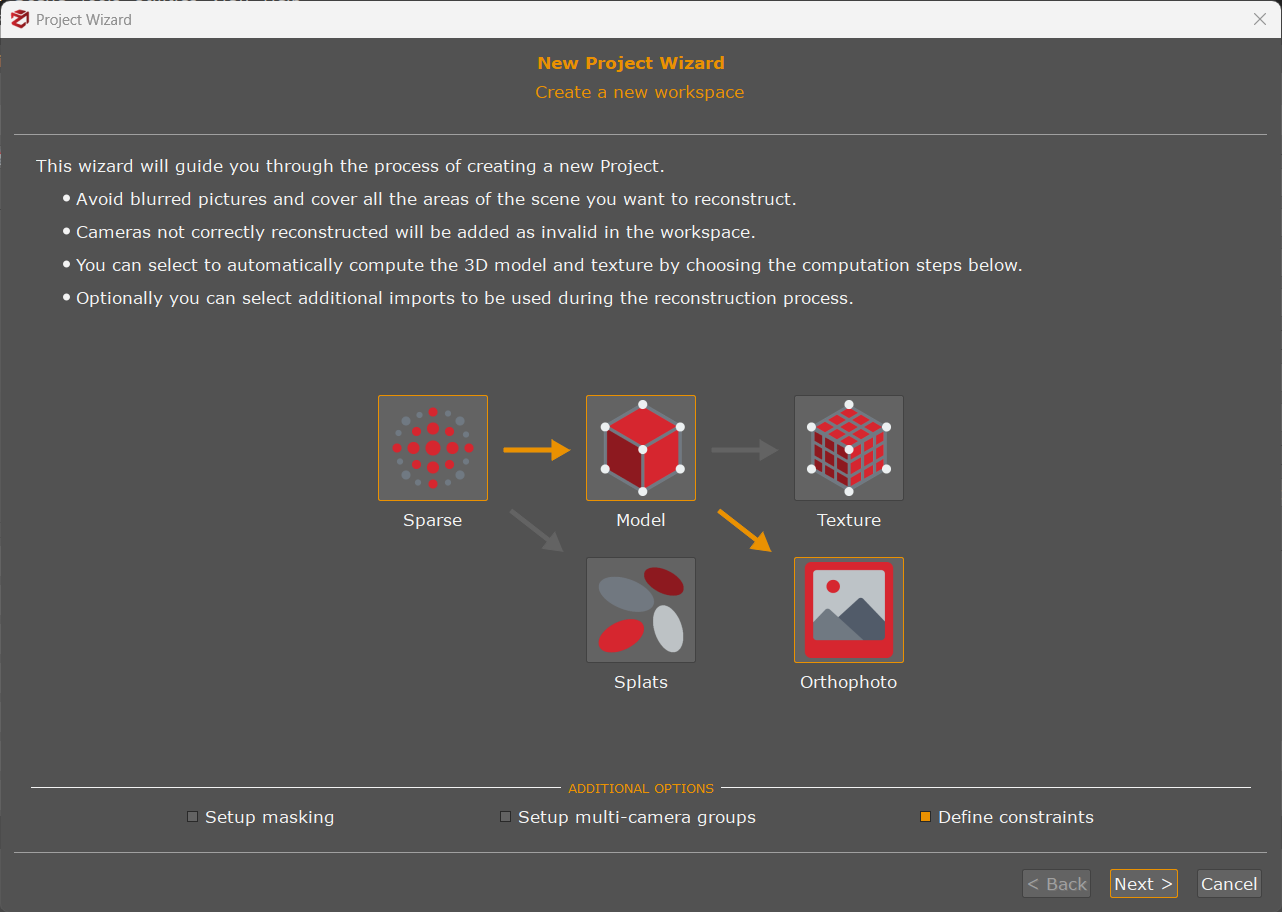
On the initial page of the project wizard, select the" Orthophoto" phase from the available options in the scheme.
By clicking the "Next" button, you can navigate through the wizard's pages until you reach the orthophoto settings page.
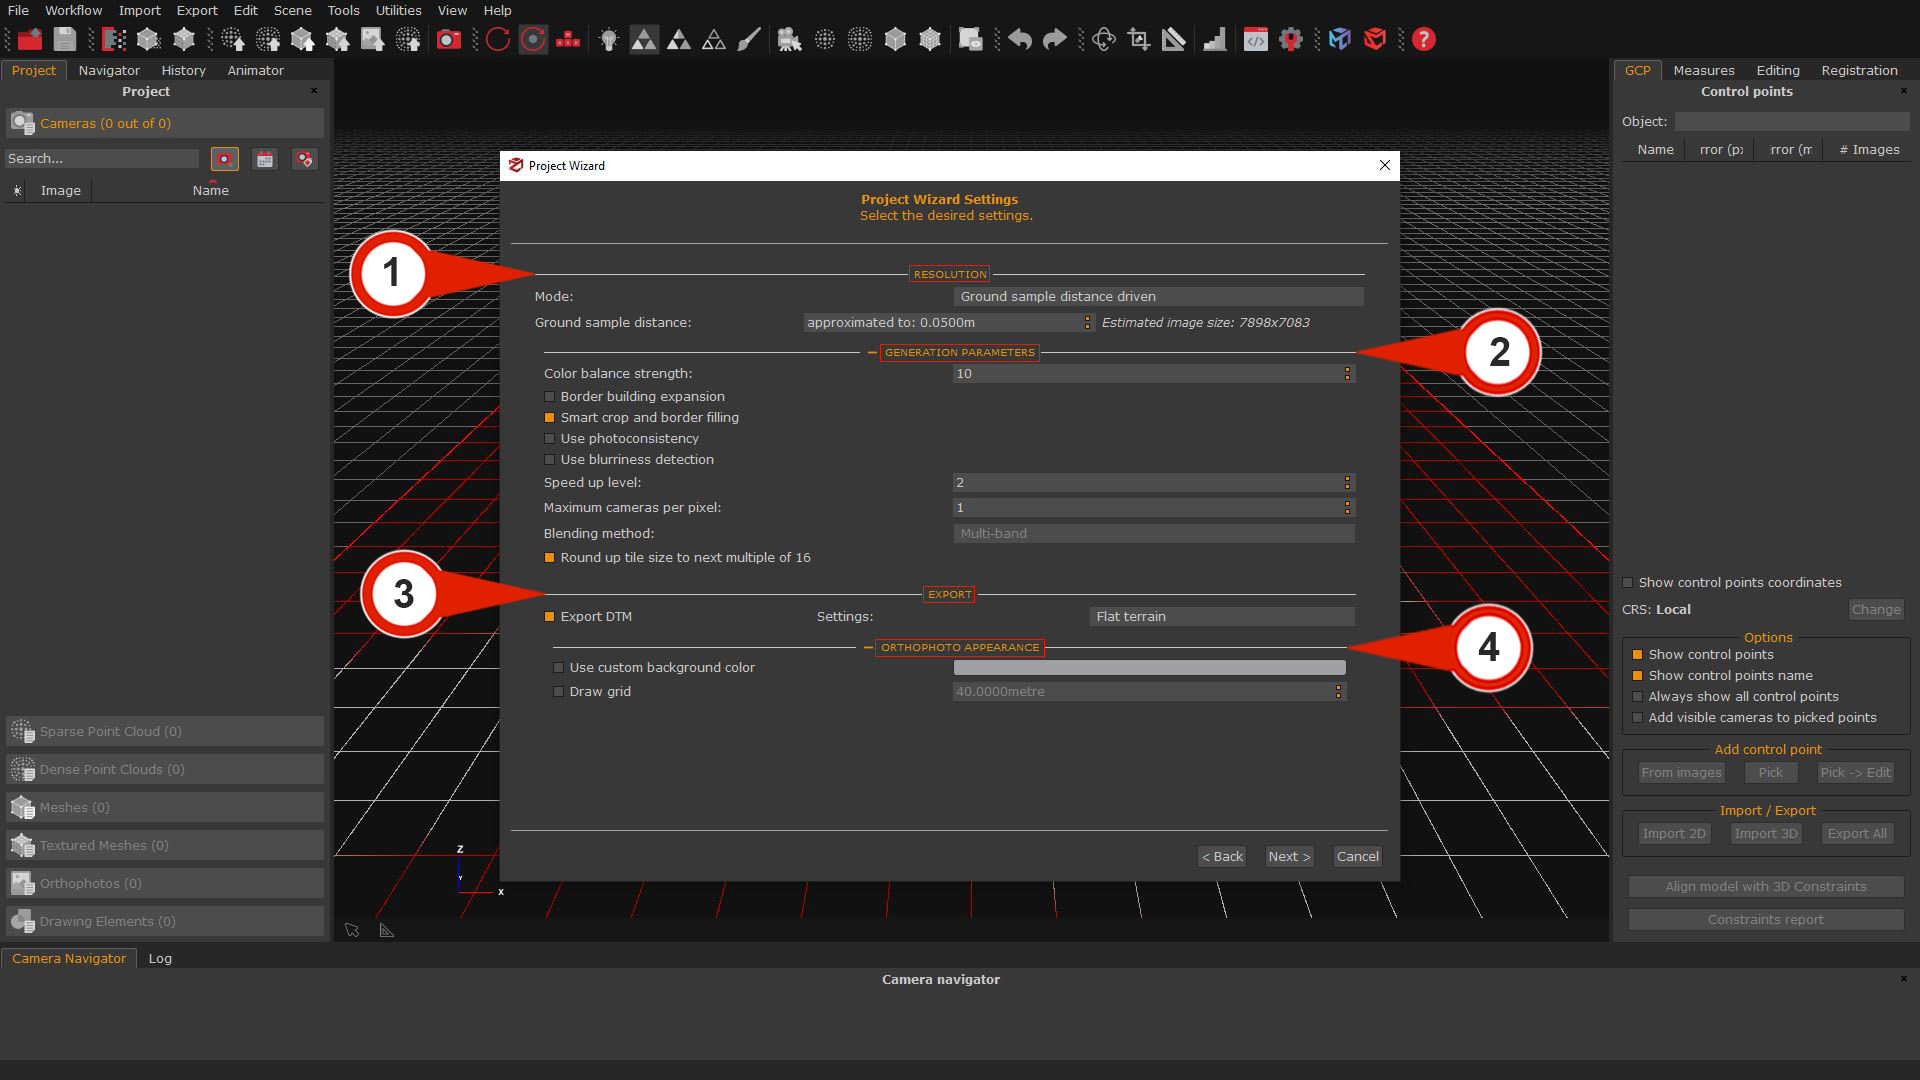
RESOLUTION SECTION (1)
Switching the Mode drop-down menu between "Ground Simple Distance Driven" or "Image Size Driven" will enable you to define either the Ground Sample Distance or the Image Size (largest dimension).
GENERATION PARAMETERS SECTION (2)
It allows controlling every pixel's color generation mode and other tweaks. This system is very similar to the texture generation system. We advise leaving the color balance with 1 camera per pixel; however, if you wish, you may use more cameras for a different color weight. If this happens, you may choose between an algorithm blending method:
- Multiband: will use the mean to compute low frequencies and the best images to compute the high frequencies. This is usually a better choice than Mean because although it is less prone to lighting changes (usually just a little worse than mean), the resulting image will be more in focus and sharp by preserving high frequencies.
- Mean: will weight the color source depending on the view angle and the distance. Although it's robust to lighting changes, the mean won't keep high frequencies, so will be less in focus and sharp.
EXPORT SECTION (3)
Export DTM: selecting this flag will automatically generate a DTM (Digital Terrain Model) file according to the scene type. It's possible to choose three different scenarios (Mountain area, Complex scene, and Flat terrain).
ORTHOPHOTO APPEARANCE (4)
this section enables/disables the drawing for customizing the control points and grid on the orthophoto if desired.
Following the reconstruction process, the orthophoto will be displayed in the Orthophoto section of the Project tab.