Animator panel
The Animation panel is located in the left sidebar of the main Zephyr interface. This function allows to easily create video animations of your 3D models in Zephyr and export them in different file formats (avi, wmv, mp4) or upload them to YouTube directly.
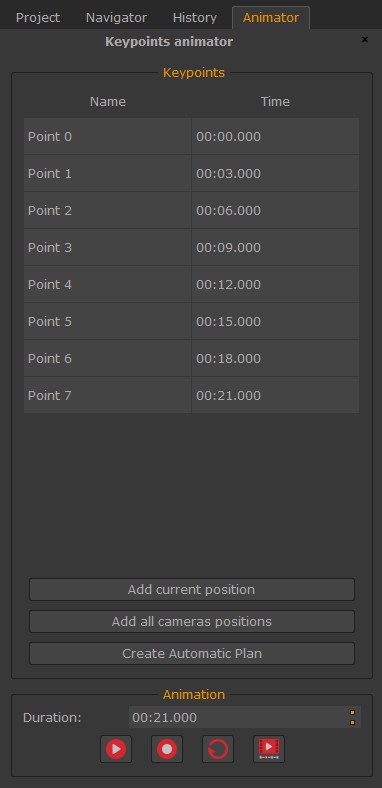
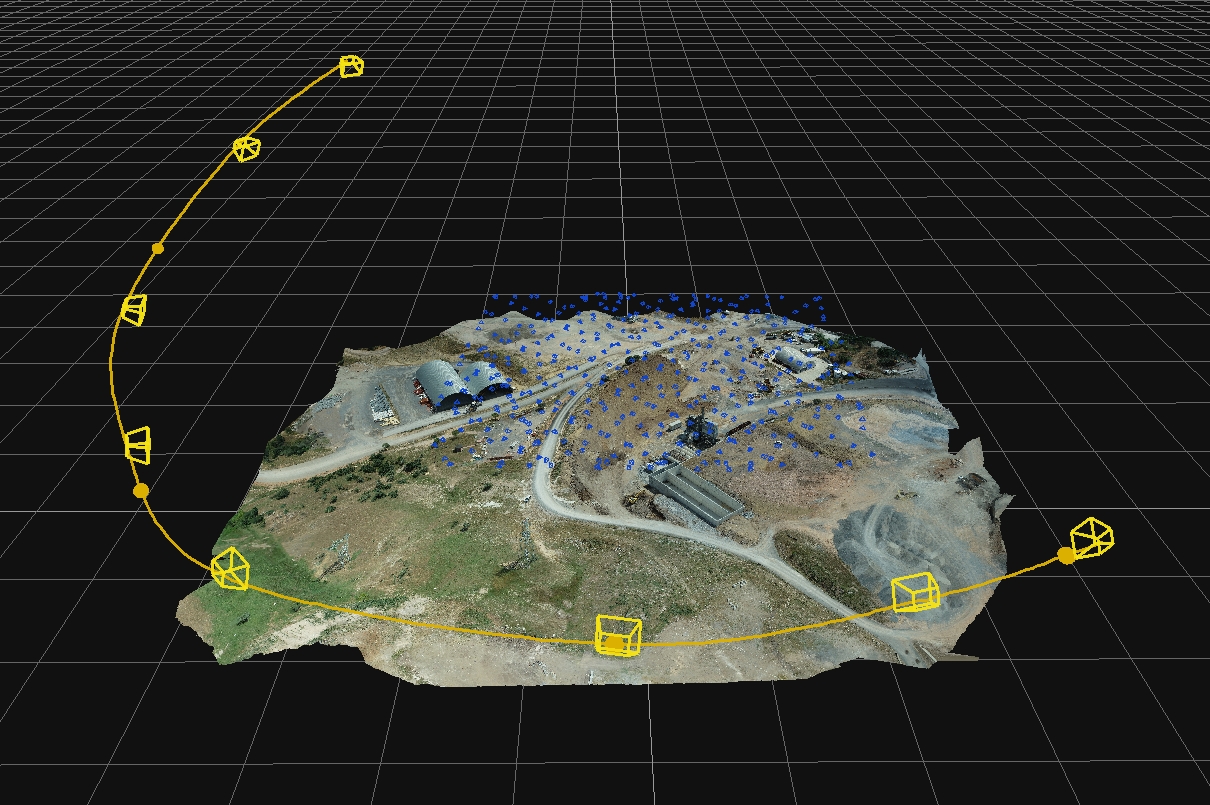
To manually create an animation, simply click the "Add current position" button in the Animator panel and move the workspace camera to the desired position(s). By enabling the "Show keypoints" option, every (manual) keypoint position will be identified in the workspace by a yellow frustum.
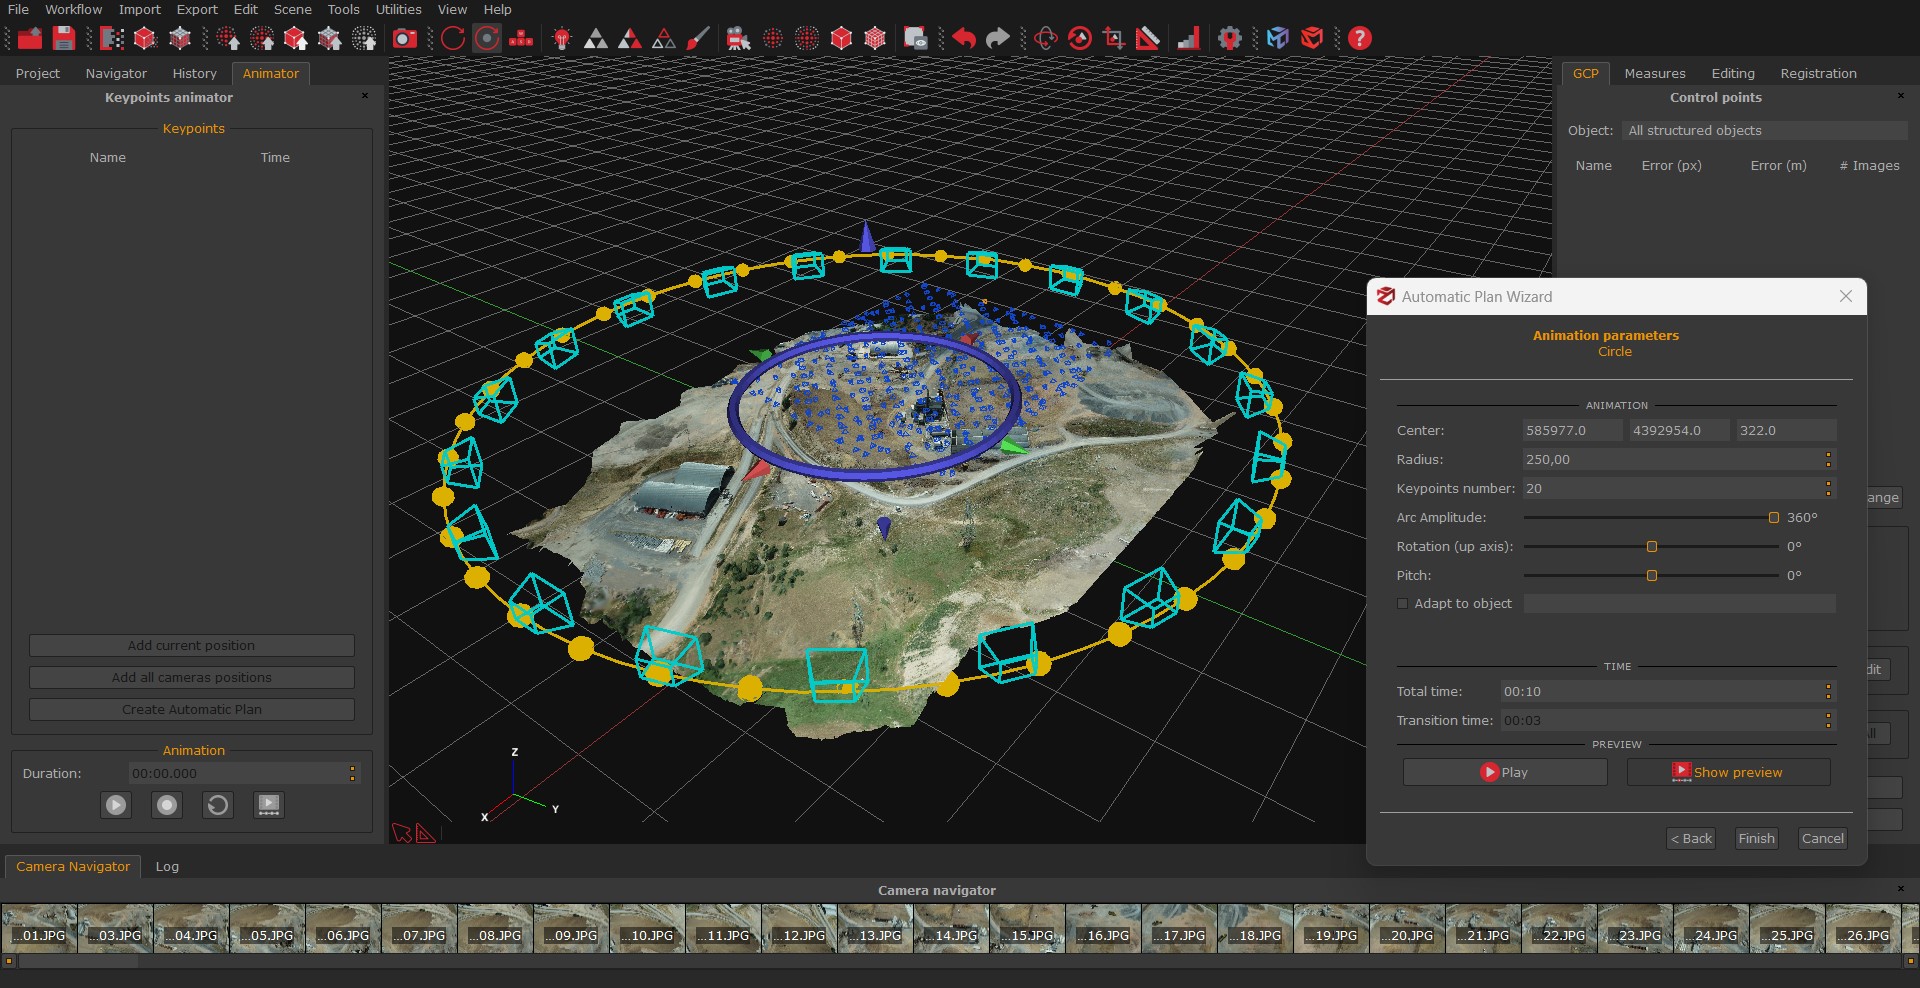
To automatically create an animation, click the "Create automatic plan" button in the Animator panel and choose among four different animation paths (circular, spiral, panning, fly over). Each automatic plan comes with its own settings page and the related keypoint track will be identified by a light blue frustum sequence.
Automatic animation paths:
- Circular: circular trajectory around the target element. Radius, height, and axis of rotation can be defined;
- Spiral: multiple orbits going up around the mesh. Basically extends the previous type, stacking multiple circles with decreasing radius;
- Panning: movement parallel to the current view plane: the camera moves perpendicular to the pointed direction;
- Fly Over: Smooth cascade motion on top of the mesh coming with adaptable parameters of slope and trajectory length (useful for Aerial datasets involving nadiral pictures);
Once the keypoints have been placed, you can either click the Play button to get a preview of the animation or edit the single keypoint by right-clicking its name in the animator panel and selecting the Edit option. You can also set the whole animation length using the Duration field.
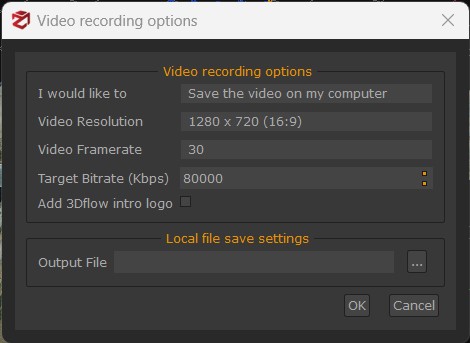
A new window will appear by clicking the Record button, allowing you to define those settings such as the video resolution (up to 4K), the framerate, the target bitrate and the saving options. You can also add the 3Dflow animated logo to your animation's intro enabling the dedicated option.
Notes:
- Animations are scalable in time: you can choose the total length and the transition time used to blend the new trajectory with the existing keypoints;
- In order to easily edit the automatic sequences, the workspace 3D gizmo allows to move the keypoints at once by setting the parameters of the wizard;
- You can delete or edit the keypoints and part of the animation sequence. In case the result is not as desired, you can undo any operation of the editing process;
- You can join multiple animation sequences into a single one;
In case the trajectory comes with sharp edges along way, you may try to increase the Total time parameter to allow a smoother interpolation.