Measures panel
Quick measurements
You can quickly pick and measure directly in 3D space using the "quick measurement tool".
This tool allows for measuring both the horizontal and slope distance, elevation and inclination of a segment.
The following functions are not available in 3DF Zephyr Lite and 3DF Zephyr Free.
Control Points & Distances
Control distances can be defined as the distance between two control points, the distance between a control point and a camera, or the distance between two cameras. With 3DF Zephyr you can easily define control distances and even scale the world with control distances.
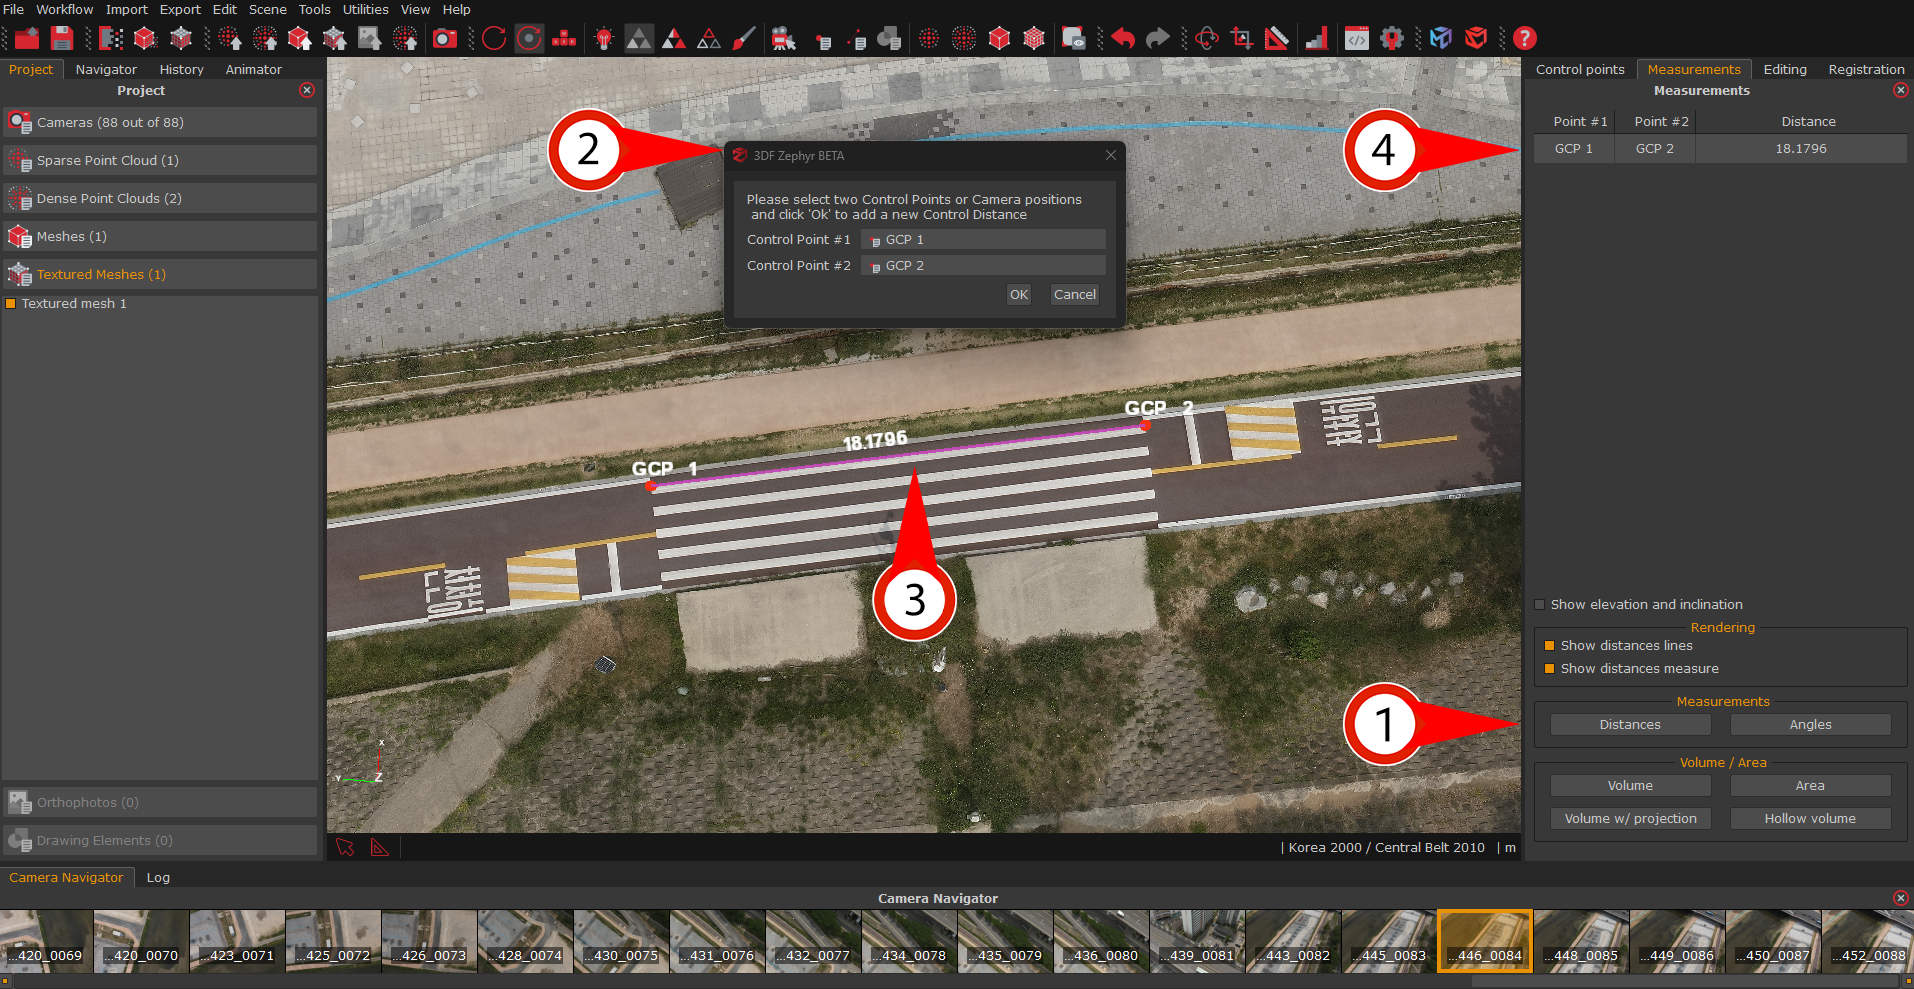
The "Add control distance" function
To add a new control distance, click on the “Distance” Button (1). The “control point selection window” (2) will pop up. From this window, pick the two control points needed from the Control Point #1 selection menu and the Control Point #2 selection menu. Once you click “OK”, the distance will be drawn as a green line (3) and rendered onto the screen (in this case, 18.1796).
The control distance (and the relative used control points) will also appear as a list on the right side of the panel (4).
Scale world with control distances function
It is possible to scale the model using control distances:to do so, simply click on the "Scale model with control distances" button: in the window that will pop up, simply set the wanted distances as constraints. When completed, the residue error will be shown.
Import control distances from txt file
It is possible to import control distances directly from text file: every line of the text file must be formatted as
"Control Point #2" "Control Point" 2.18197
Measure mesh volume
It is possible to compute the mesh volume using the dedicated button. If the mesh is not completely closed, all holes will be automatically filled and later shown with a red color - it is possible to save that mesh as a separate workspace object.
You may also compute the volume of a dense point cloud rather than a mesh: by selecting the desired dense point cloud as target for the computation, please note that a mesh will be internally computed anyways.
Once you have selected the reference mesh from the menu, simply click the "Compute" button.
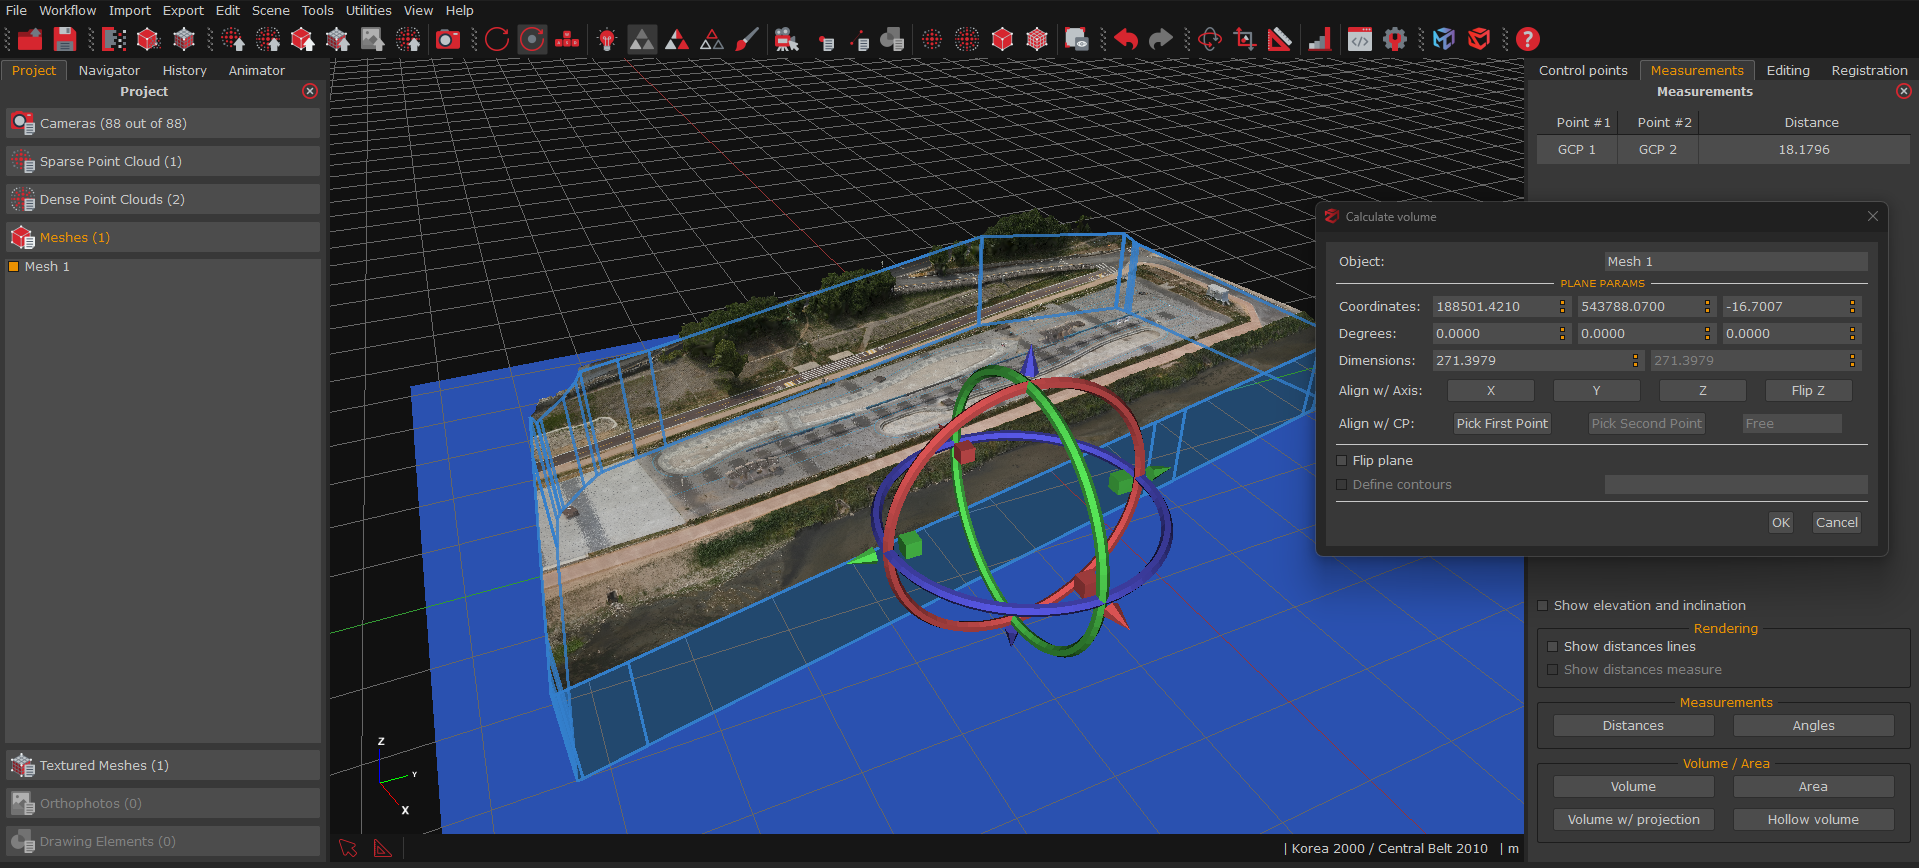
Measure volume after projection
This tool allows calculation of the volume of a mesh or a point cloud by considering the points distance and the position of a plane chosen by the user. Points under the plane are not considered, while those above are projected on the plane's surface.
This tool streamlines volume calculation of elements such as embankments and excavations and it is handy for applications like 3D printing for instance.
The calculated mesh can be exported as a standard surface in the main formats provided in 3DF Zephyr.
Volume after projection on a urban area: here the direction of the plane's normal is up
Hollow objects volume
This tool allows calculation of the volume of a cloud/mesh when the photographic survey has been carried out from the inside of the acquired object itself, as in the case of a room or a tank. Unlike the standard volume computation, this algorithm entails that the normals of the objects point towards the inside. This also means that any other objects cluttering the inner space will not be considered during this specific computation.
Volume between two sections
You can compute the volume between two sections: simply select the two reference contour lines from the drawing elements panel, right click, and select "compute selection volume"
Measure mesh area
Similar to the "measure mesh" function, clicking this button will compute the area of a given mesh. Just select the mesh and click the "Compute" button.
Measure Angles
When at least three control points have been selected, you can compute the angle between control points. The interface of the window that will appear will allow you to set control points as A,B and C and then compute the angles between the vectors BA and BC. A checkbox will allow you to change the output to radians or degrees.