How to export depthmaps directly to Facebook 3D photos
Since version 4.505 it is possible to directly export depth maps in a variety of file formats (JPG, PNG, TIFF, EXR, BMP) – depth maps can be used in many applications (VFX, science, engineering, etc.) and of course, to share a 3D photo on Facebook. Facebook 3D photos are not 3D models, but rather a function to give a 3D look to a single image by using its relative depth map.
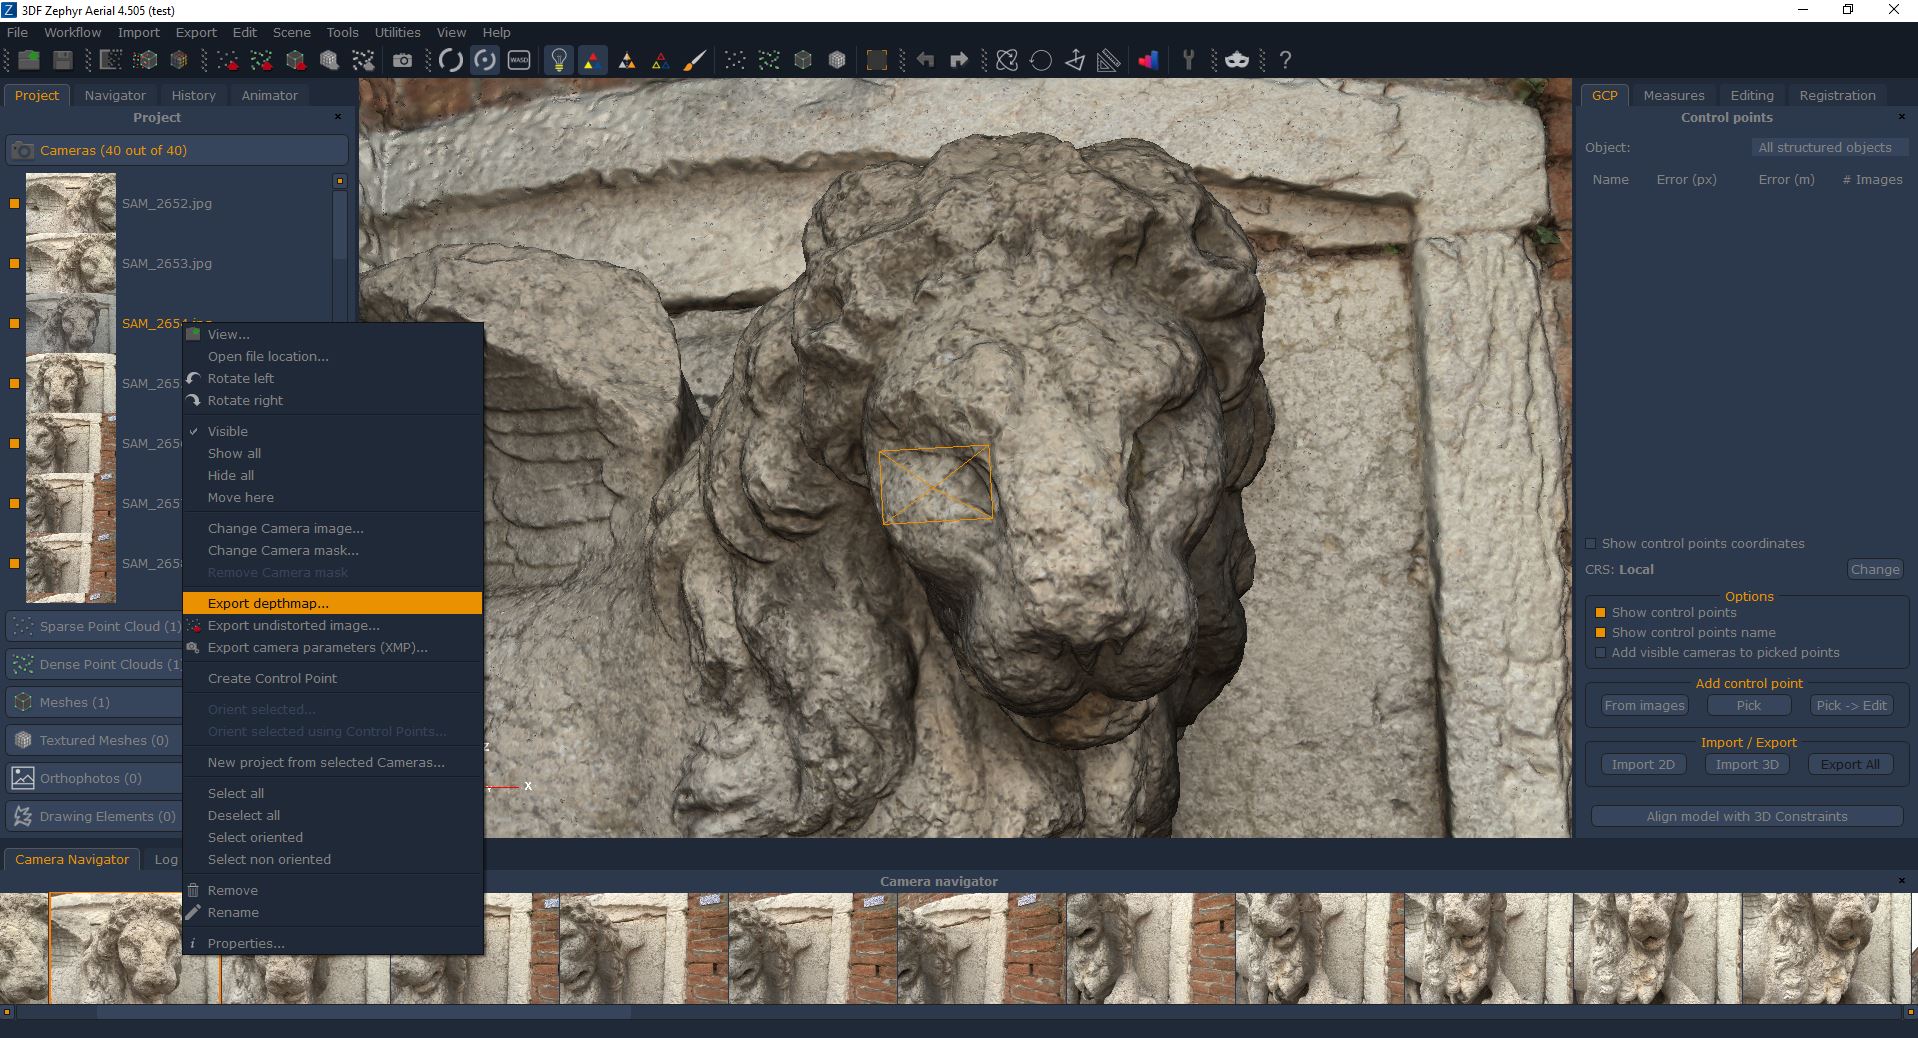 | Select the camera you would like the 3D photo to be generated from. Simply browse your cameras in 3DF Zephyr’s interface (remember you can quickly move through the reconstructed cameras using the camera navigator bar on the bottom of the screen). Once you have chosen your desired camera, right click it and select “Export Depthmap” In this case, we are exporting “SAM_2654.jpg” (the original photo). The output will be two new files, SAM_2654.jpg.FILEFORMAT and SAM_2654.jpg_depth.FILEFORMAT, where FILEFORMAT is the chosen export format. |
 | Since in this tutorial we are exporting depth maps for Facebook, it is advised to export in JPG format as you will have to deal with Facebook upload filesize limits. 3DF Zephyr can export depth maps and has full access to the export feature options. Make sure to select the correct target object – in this case, since there are multiple meshes in the scene, the selected mesh (Mesh 5) has to be selected from the dropdown menu “Target Object”. For Facebook 3D photo export, you must:
Browse to your desired directory (in this case, Desktop) and select the export format (JPG). Click save and zephyr will generate two new files in the selected export directory, in this case, SAM_2654.jpg.jpg and SAM_2654.jpg_depth.jpg. On the left, is the original image, and on the right is its relative depth map. |
 SAM_2654.jpg.jpg |  SAM_2654.jpg_depth.jpg |
Either drag and drop both the files in the “Create post” Facebook function, or click “Photos/Videos” and select both files. You should see the “Creating 3D photo” message from Facebook while the upload completes. Click “Post” when ready!

