With the beta finally out, it’s time for a second development status update for Clementine!
Did you miss the first status update? Click here to read the first part!
Normal Map and Displacement Map generation
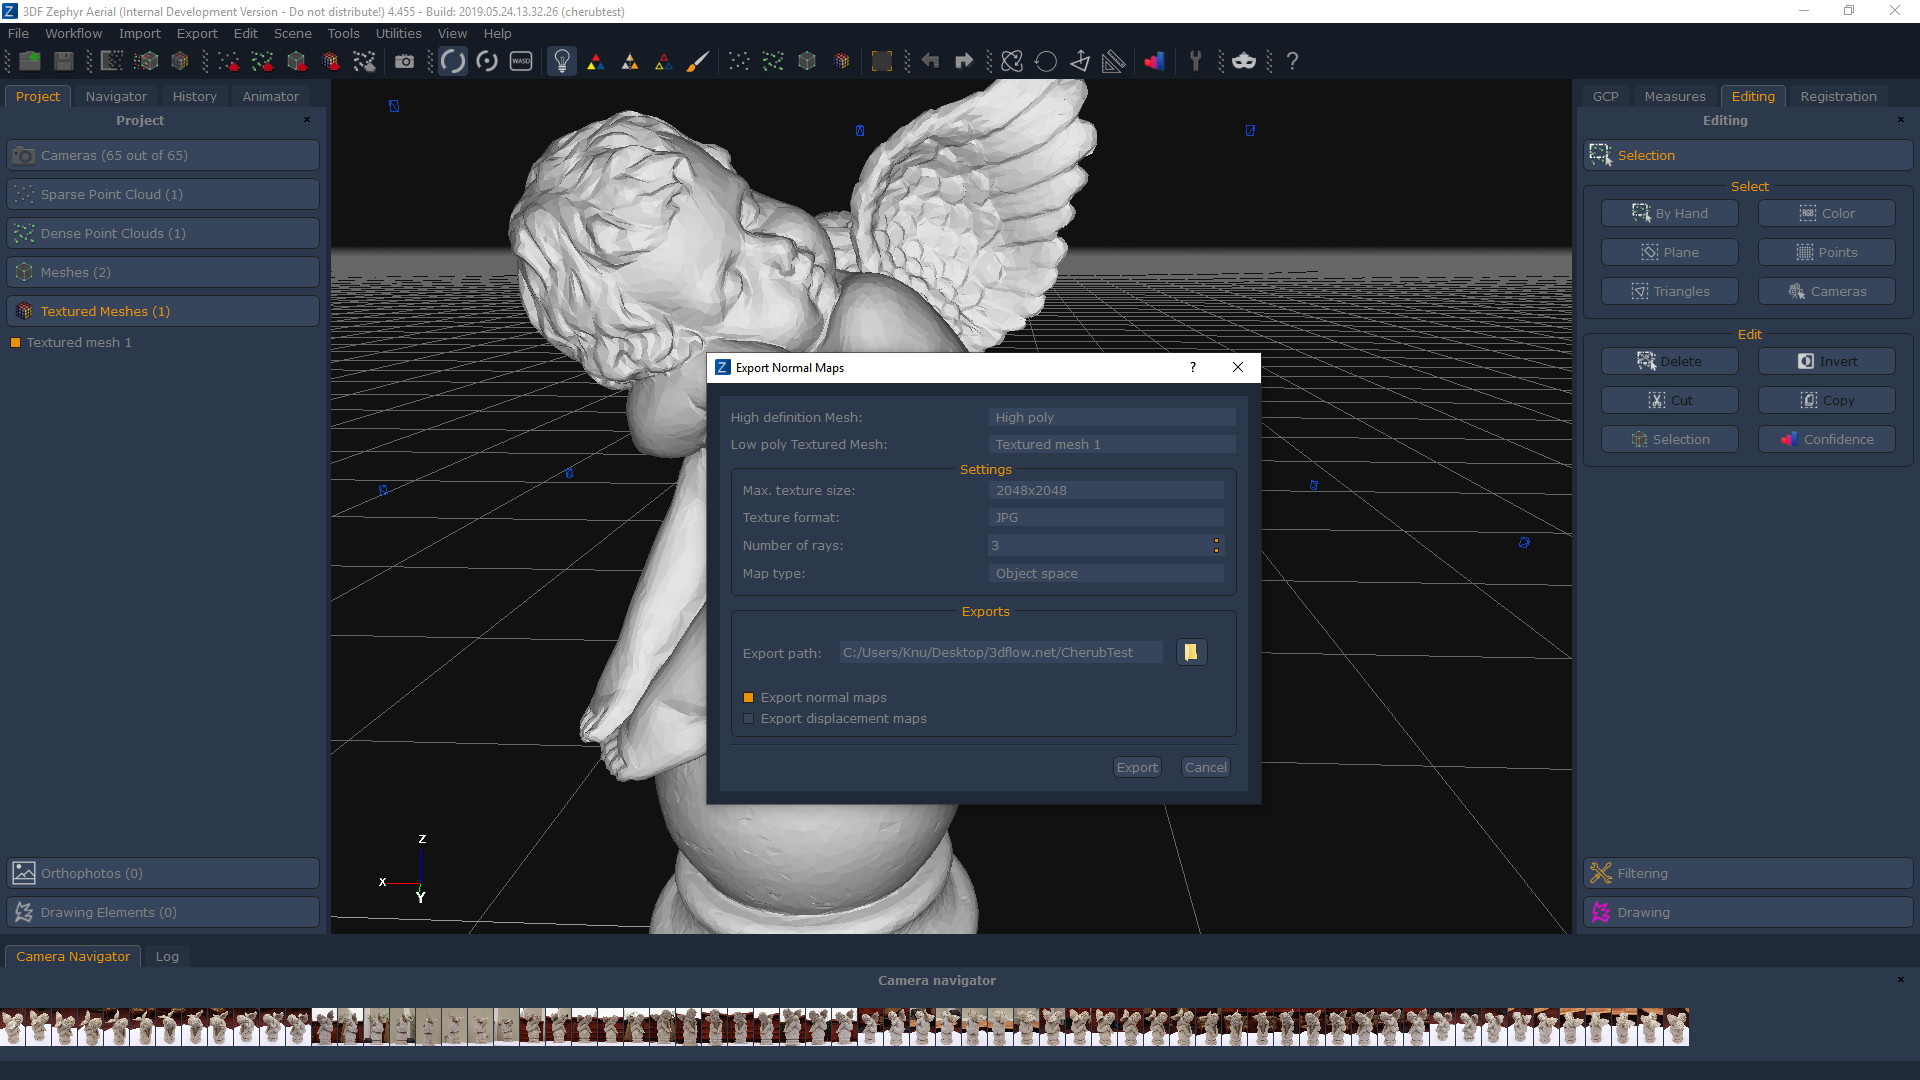 | We focused a lot of our efforts in improving 3DF Zephyr for vfx and game development workflows. One of the most requested features we’ve received recently is the normal map/displacement map generation. While it is already possible to do so using external software paired with the Import function of 3DF Zephyr (shown for example in this videotutorial using xNormal) a lot of you have asked to streamline this process directly in 3DF Zephyr. With Clementine, this is now possible in all 3DF Zephyr versions except for the Free edition. All you need to do is run the normal map/displacement map generation tool from the Workflow -> Advanced menu, select your reference High poly mesh and your target low poly mesh (which can eventually have custom UVs defined in your 3D editor of choice, as usual) and then start the processing for the normal map, the displacement map, or both. |
The following GIF shows a 3DF Zephyr generated (and decimated) low poly (40k vertices) mesh with a 2048×2048 normal map baked by 3DF Zephyr from a high poly (2.5M vertices) 3DF Zephyr generated mesh rendered in Unity3D. As you can see from the screenshot above, the generation options allow you to customize the normal map generation for your needs.
Even more user friendly than before
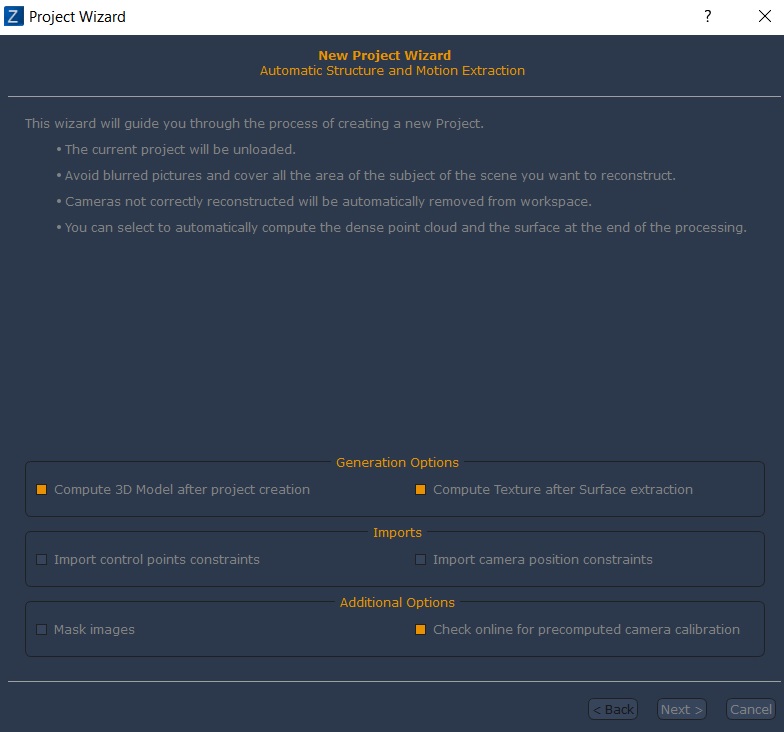 | We’ve always worked to make 3DF Zephyr as easy to use as possible for everyone. Clementine brings many improvements in that sense, while keeping a coherent interface for all existing users. The first thing you’ll notice is that the classic four steps in 3DF Zephyr (sparse cloud, dense cloud, mesh, textured mesh) are now replaced by a more streamlined workflow (sparse cloud, “generate 3D model”, textured mesh generation). While obviously the dense point cloud is still been generated (and existing users can still do all the four steps separately from the advanced menu) this integration allows us to be slightly faster (as we can optimize this step a bit) but most importantly, easier for new users to follow. You will also notice later in the pipeline a new general preset, that should be used – you guessed it – for all cases that do not fall into the other presets category (duh!) and presets also for the texturing steps. You’re are still (and will always be) in control of the 3D reconstruction process with 3DF Zephyr and new users will find the process easier. |
New orthophoto internal algorithm
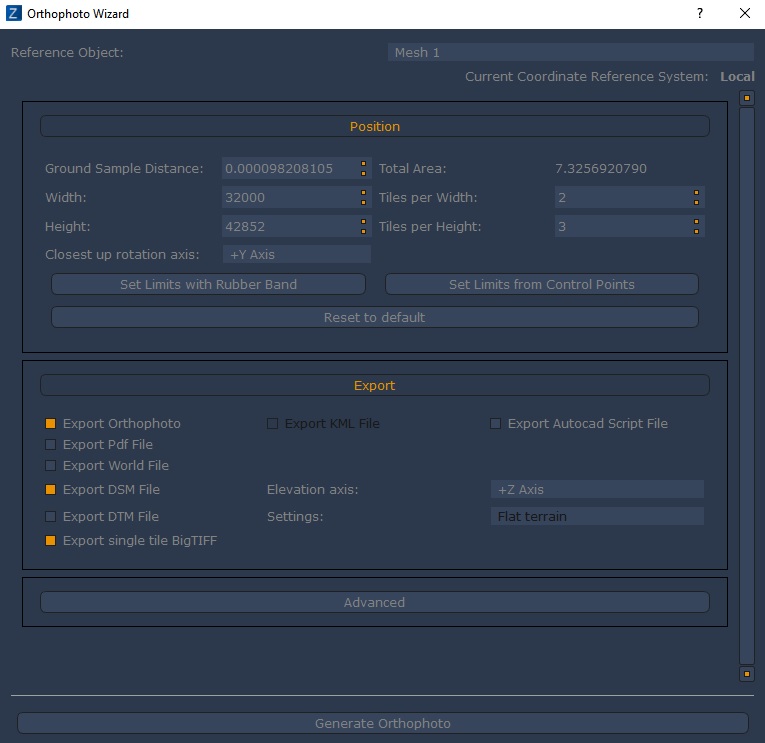 | 3DF Zephyr Aerial users will also like Clementine a lot! Many professionals have to deal with huge orthophotos, something that until now 3DF Zephyr was able to generate only as a tiled output. With clementine, there is no longer any limitation in the maximum orthophoto resolution output that can now be exported as a unique BigTiff file. The processing speed has also improved a lot – even if you don’t need BigTiff files, you’ll appreciate the significant speed improvement that Clementine offers. Other minor improvements to the orthophoto generation include the smart autocrop orthophoto borders feature and the new option to export both with alpha channel or nodata value for transparency, effectively improving interoperability with many viewers. |
Support for custom geoid
 | Another 3DF Zephyr Aerial exclusive feature, is the support for custom geoids for georeferencing. By supporting directly the PGM format 3DF Zephyr Aerial is now supporting even more coordinate reference system than before. In the future, we will also add downloadable geoids from 3dflow.net. |
Join the Clementine open beta!
 | Ready to join the beta? It’s easy – all you need is a 3Dflow account: you can register over https://www.3dflow.net/account/ (If you are registered to our forum, you already have a 3Dflow account). Once logged in, simply click “Beta access” and fill in the form: you will instantly get the beta key and the download link. If you don’t want to register it’s still possible to request beta access via email over support@3dflow.net You can check the real time development status by clicking here! Join our community and make sure to let us know your feedback! |