The Role of Photogrammetry for Forensic Analysis
Photogrammetry, Forensics, Documentation
All the following case study data have been collected by 3Dflow in collaboration with professionals from Canon Italy and forensic experts from Padua, Italy.
![]()
This article will explain how photogrammetry can be a helpful tool for the forensic field by showcasing four 3D projects that aim to replicate real case studies and workflows.
Please note that these projects are not based on real scenarios but tests of some typical situations that forensic professionals may have to deal with, such as the collection of photographic data of fingerprints, shoe prints, traces of blood, objects found at the crime scene, rooms and interiors, and so on. We tried to reproduce this phase by setting up a room in our office where we placed dedicated objects and used equipment tailored to the scenario brought by the forensic experts. The photo acquisition was carried out using a Canon’s EOS R6 Full Spectrum camera, kindly provided by Canon Italy, while all the data was later processed in 3DF Zephyr.
Photogrammetry and Forensics
Over the last few years, photogrammetry has proven to be a very effective tool to quickly retrieve onsite data for evidence collection during forensic investigations, going way beyond the “simple” photo acquisition. Extracting detailed 3D models from pictures allows you to have solid and complete documentation and to carry out in-depth analyses at any moment while leveraging a non-invasive approach, which is crucial in forensics. Thanks to this approach, you can get the state of the art of a crime scene, and by using known distances or targets, you can take measurements directly on the 3D model processed from the pictures.
There are several scenarios: aside from the ones already mentioned, there’s the possibility of analyzing projectile deformation and detecting their line of fire or reconstructing in 3D car accidents, where you can better understand the impact dynamics of the vehicles involved.
Equipment used
For the testing day, we used the following equipment:
- Canon EOS R6 Full Spectrum camera for data collection
- Lens mount adapter with “drop-in” filters
- Tripod
- UV/IR & regular lighting torches
- Items with blood stains & fingerprints
- 3DF Zephyr coded markers
- 3DF Zephyr for data processing
The Canon EOS R6 Full Spectrum is a product specifically designed for this field. This camera was modified from its standard counterpart to meet the needs of forensic and security investigations. Thanks to a lens mount adapter that allows for inserting and using specific “drop-in” filters, along with the Full Spectrum technology, it retrieves biological traces and all the evidence otherwise invisible or barely visible to the naked eye.
Projects in 3DF Zephyr
Project #1 – Room
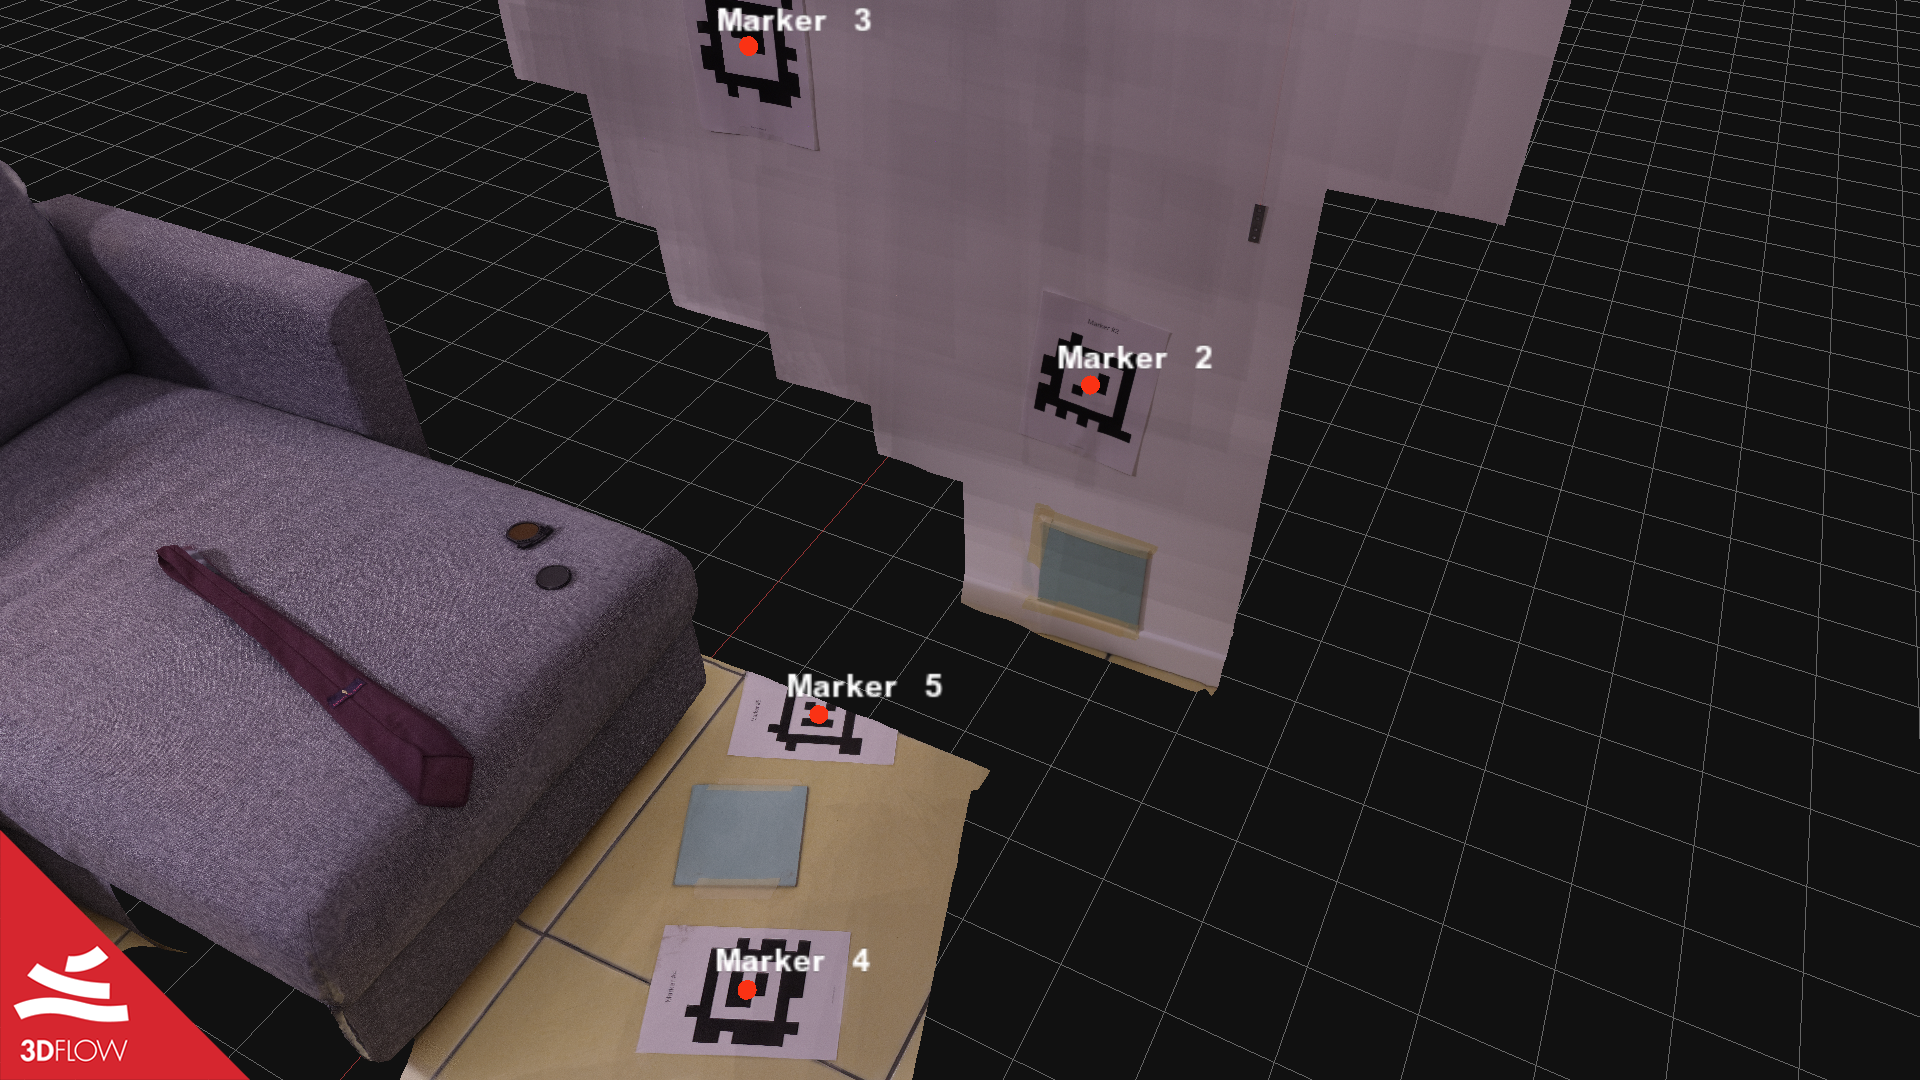
The first project shows a typical indoor survey, the room where we placed our “props” and made our tests. The dataset features 172 JPG images (RGB data) taken by using a tripod, which is quite helpful when facing indoor scenarios where it often occurs there are no good light conditions (Fig. 1). The room was partially reconstructed as our main focus was the items (the couch, the tie, and the tile) and the white wall.


Fig. 1. 3D mesh of the office room – geometry (left) and texture (right). ©3Dflow
Speaking of the white wall, to correctly reconstruct a uniform surface with almost no texture using the photogrammetric method, adding more patterns and spots on the wall is usually recommended to help the software recognize and reconstruct them. To do so, we relied on our coded targets that are printable in 3DF Zephyr directly, and that can be a real time-saving solution as the software detects them automatically and adds a control point for each coded target once the camera orientation phase has been completed (Fig. 2). The final mesh has a total of 63,249,850 triangles.
Project #2 – Tie
Here, we have the first close-up project of the items of the previous room 3D model. In this case, the dark red tie has been placed on the couch and stained with blood. The blood stains were much more visible thanks to the filter 950 nanometers inserted in the Canon camera and the UV and IR lighting. Eventually, the forensic experts chose to take more pictures with the IR torch, as you can see from the textured mesh. They also placed a ruler onsite to get a metric reference (Fig. 3).


Fig. 3. 3D mesh of the tie – geometry (left) and texture (right). ©3Dflow
The dataset features only 13 JPG pictures, however, this small amount of data was done on purpose. We wanted to stress 3DF Zephyr and show what level of detail, in terms of 3D geometry and texture quality, can be achieved with such a scarce number of images. The photoconsistency filter has further improved the initial rough mesh to retrieve as many scene details as possible, thus overcoming the low number of input data, and increasing its triangles number to more than 6 million.
Texture-wise, only the IR pictures were used to run the texture generation – by making a manual pre-selection of them – as they highlight blood traces better. That function is handy as users are totally free to take pictures using different kinds of lighting and frequencies and decide which data to process according to their goals and needs.
Project #3 – Tile
Here, we brought our software stress test to the extreme: we took just five pictures of a tile taped on a wall and partially covered it with some subtle blood stains to replicate crime scene evidence. Once a metric reference was placed next to the tile, the pictures were taken using a UV light with no need to mount any filter on the camera lens (Fig. 4).


Fig. 4. 3D mesh of the tile – geometry (left) and texture (right). ©3Dflow
Very few, but we still had our 3D reconstruction done with the final mesh having more than 15 million triangles. However, as a rule of thumb, taking more pictures, when possible, is always recommended, especially when dealing with more complex or bigger subjects.
Project #4 – Fingerprint
The last project shows a fingerprint that was made onto a TV monitor (i.e., a black background). For this dataset, the forensics experts took the pictures using regular and UV torches, plus the so-called “Clear” invisible filter from Canon. The 3D reconstruction process was run with 18 pictures, and below, you can see the detailed geometry (Fig. 5) and the two textured meshes. The first was generated from the UV lighting dataset, whereas the images taken with the Clear filter and the regular lighting were leveraged to create the second one (Fig. 6).
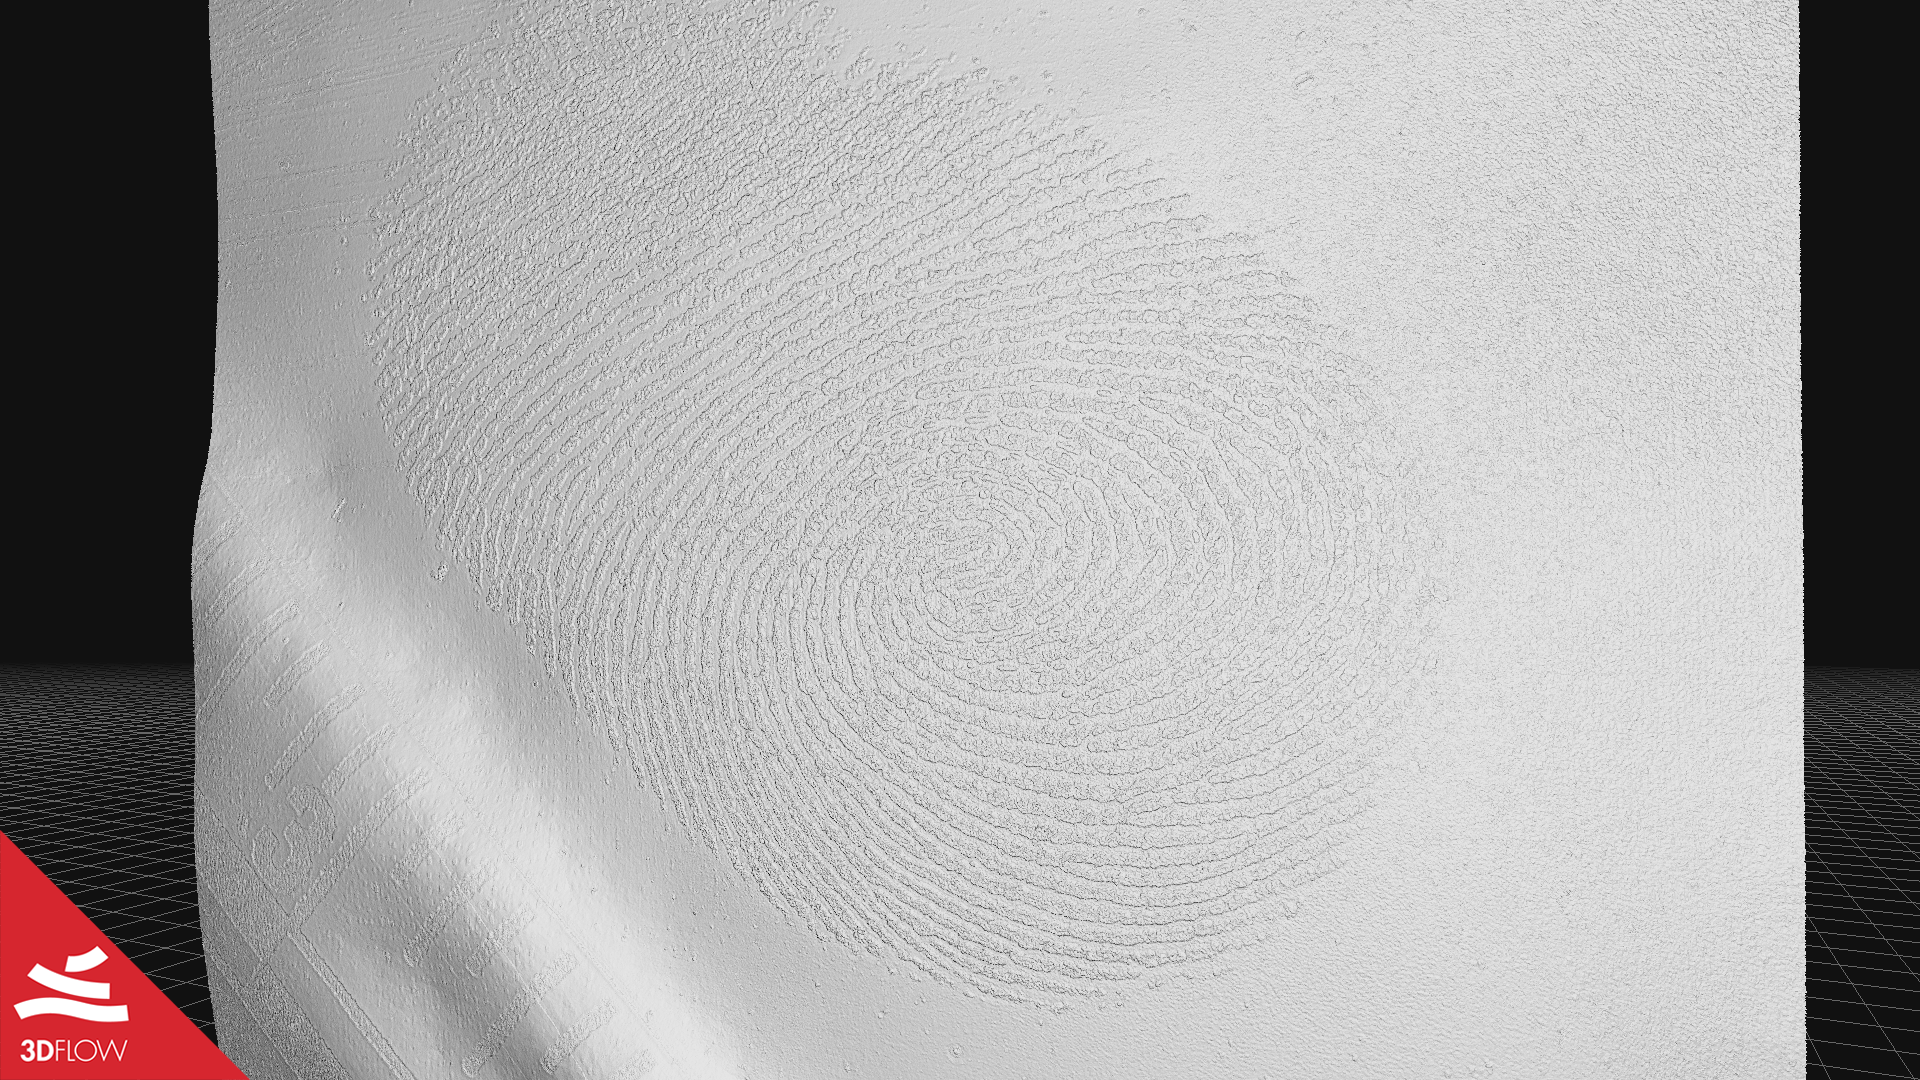


Fig. 6. Textured mesh of the fingerprint – UV lighting (left), Canon clear filter + regular lighting (right). ©3Dflow
As for the mesh geometry, we tinkered with the photoconsistency filter to make the microdetails stand out even more (please refer to this tutorial to learn more about the photoconsistency filter settings) and got a final result of 8,897,912 triangles.
Conclusion
Photogrammetry and LiDAR surveying boost digital evidence in forensic scenarios, providing experts with an easy-to-use documentation tool to analyze crime scenes. Any 3D reconstructed evidence can be scaled accurately according to the measurement pipeline selected by forensics professionals. This way, solid documentation for legal investigation can be provided with no limits in data accessibility and query.