Tutorial #08 – Unwrapping a Zephyr generated texture
Unwrapping a texture generated by 3DF Zephyr
Welcome to the 3DF Zephyr tutorial series.
In this recipe you’ll learn the workflow needed to unwrap a 3DF Zephyr generated texture in order to have an easier way to manipulate the texture.
You can complete this tutorial with any generated 3D model and your 3D editor of choice – in this example, we’re going to use blender. Please refer to the documentation of your 3D editor of choice.
This feature is not available for 3DF Zephyr Free, but only for Lite (after v2.600), Pro and Aerial.
Step 1 – Understanding the problem and getting ready
When exporting the final mesh generated in 3DF Zephyr, you’ll get a texture that make sense for a computer, but probably less for a human, which will probably want to directly edit just the texture in its favourite software (like photoshop or gimp) in order to achieve its goal, for example, being able to change colors or add decals to the texture. In order to obtain an editable texture, being familiar with texture unwrapping is required.

Going from the wrapped, computer generated texture (left) to an easier to edit – not to mention hilarious – unwrapped texture (right). Depending on the projected geometry, you can get different types of distorsion.
In this tutorial you’ll understand the workflow required to unwrap a texture with blender in order to obtain an unwrapped texture for easier post processing. Obviously, a similar approach can be done with your 3D modelling software of choice.
Open up your sample dataset in 3DF Zephyr and compute a stereo mesh if you haven’t already. When you are ready, export the mesh from the “Export Menu” in OBJ format. When you have done so, you can proceed to step 2.
Step 2 – UV mapping with blender

Import the 3D model in the blender workspace from the “File -> Import” (A) menus. You should see your 3D model in the workspace and in the lower toolbar, the “object mode” should be selected. Click on the mode selection menu and pick “Edit Mode” (B). On the left side toolbar go to the “Shading/UV’s tab” (C) and select “unwrap -> unwrap” from the “UV Mapping” selection box (D) . you might wish to use other kinds of unwrapping methods depending on your model and needs (for example, sphere unwrapping). Once blender has finished the unwrapping, save the unwrapped mesh on your computer (eg. temporary.obj) by exporting it into OBJ from the “File -> Export -> Wavefront (obj)” menu. When ready, proceed to step 3.
Step 3 – UV remapping in Zephyr
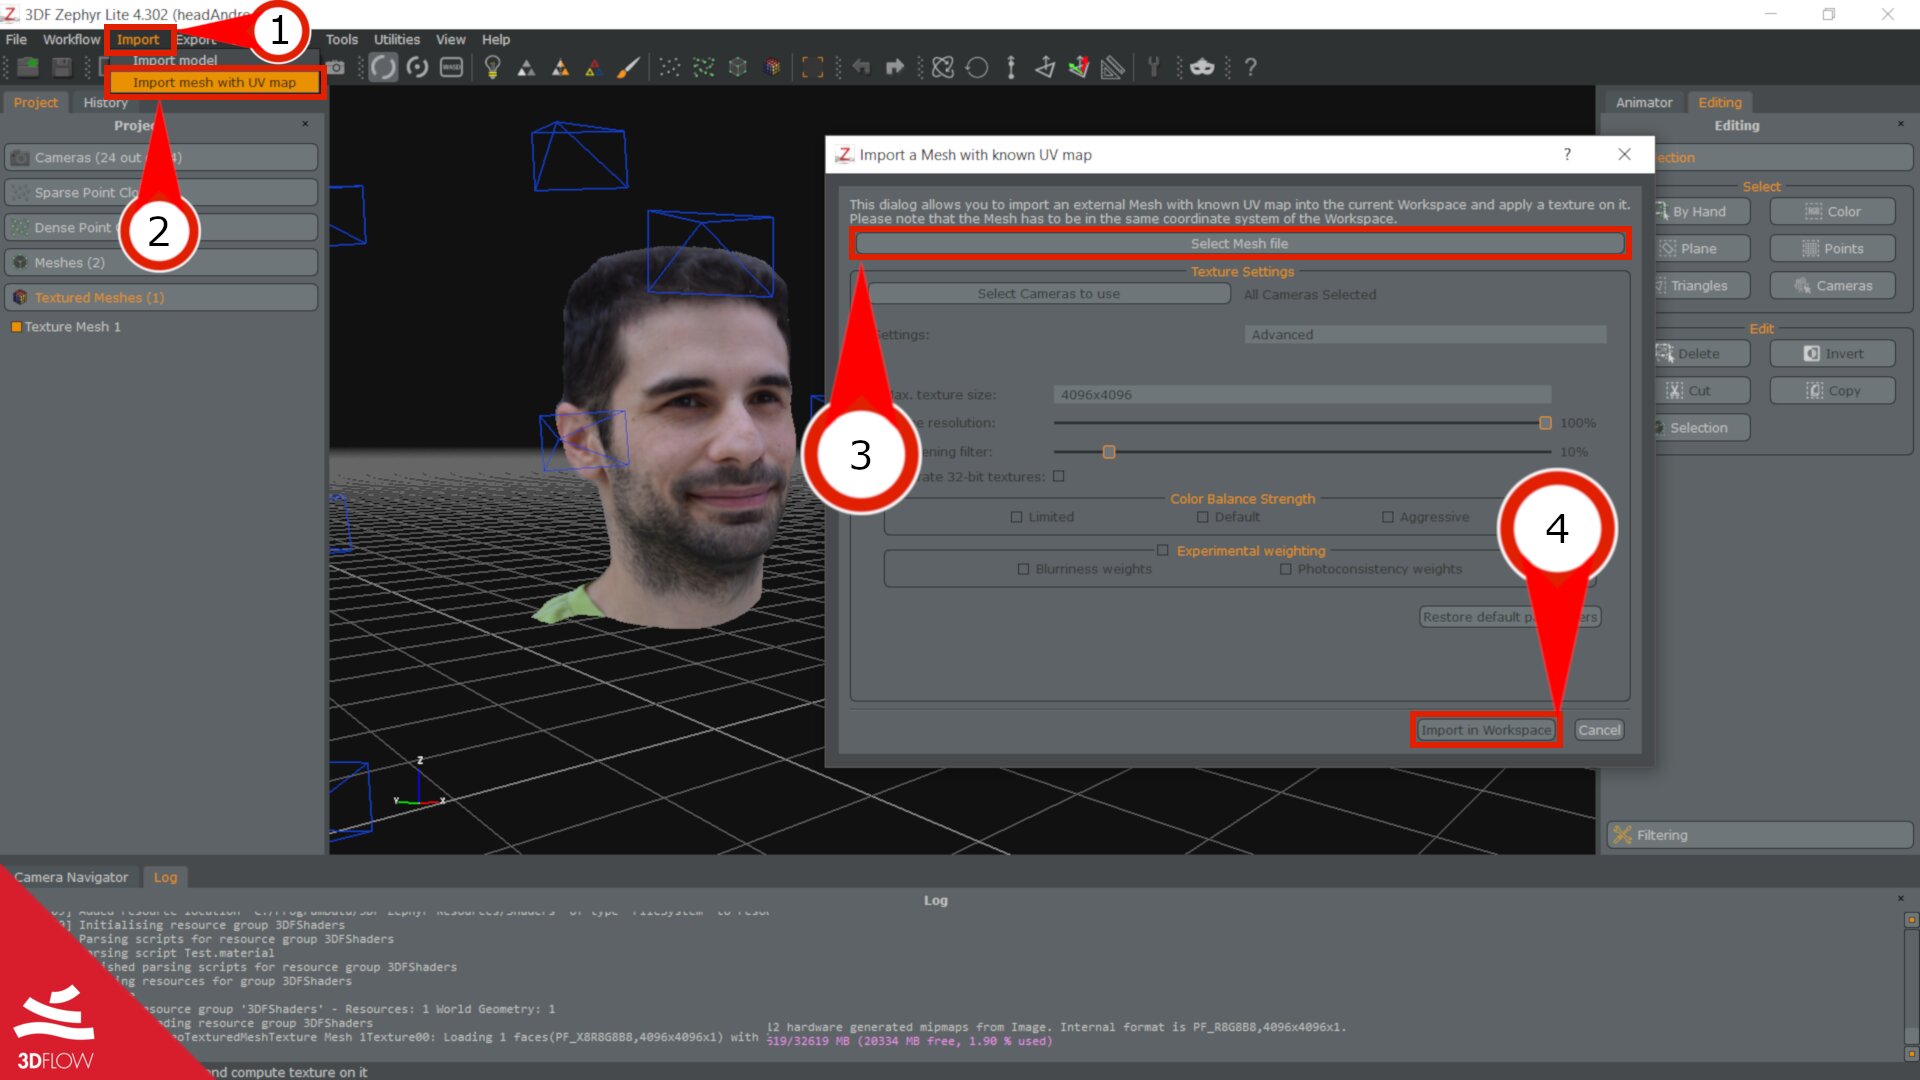
Simply to click on the “Import” Menu (1) and click “Import mesh with UV map” (2).
The “Import a Mesh with known UV maps” will appear: simply click “Select mesh file” (3) and select your previously created obj with your custom UV map (temporary.obj in this example). Once Zephyr has loaded the mesh, the Texture options will activate and you’ll be able to select the parameters that the new texture will use. When ready, click “Import in workspace” (4): Zephyr will regenerate the texture accordingly to the specified UV mapping, and a new mesh with said texture will appear in the workspace like any other textured mesh.
At this point, you can safely export it again or use it as a normal textured mesh in the Zephyr workspace.
Final notes
An unwrapped texture is extremely useful especially for an artist – depending on the projected geometry, you can flatten the texture to a point where you can paint directly on the texture.