Tutorial #A03 : Workspace merge
Workspace merging
Welcome to the 3DF Zephyr tutorial series.
This tutorial will show you how to merge different workspaces with 3DF Zephyr.
This tutorial cannot be completed with 3DF Zephyr Free or Lite versions.
Introduction
Due to the poor specs of the computer dedicated to processing, large datasets often require to be sorted into multiple subsets and processed in different 3DF Zephyr projects separately. This can be addressed by the 3DF Zephyr Import and Merge Another Workspace tool to merge more zep projects into a single one.
The Merge tool allows for:
- Using the same reference system (direct merge)
- Using the control points (projects must have a common area)
- Using nearby cameras
Below you can download a sample dataset that has already been sorted into Project 1 and Project 2 to let you follow the workflow in 3DF Zephyr with ease.
 | Download 3DF Zephyr Tutorial – Dataset – Workspace Merge (199MB) |
Step 1 – Import your project and merge it directly
Click the “Import (1)” menu in the Project 1 session and select the “Import and merge another workspace” option to open the Import window (3). You can “Browse” (4) the Project 2 you want to merge and click the “Import” (5) button. Once you have imported Project 2, you are requested to choose the Merging Method (6) you want to use, then click the “Next” (7) button.
Note: it is possible to drag and drop Project 2 in Project 1 (the Import Workspace tool window will automatically pop up afterward).
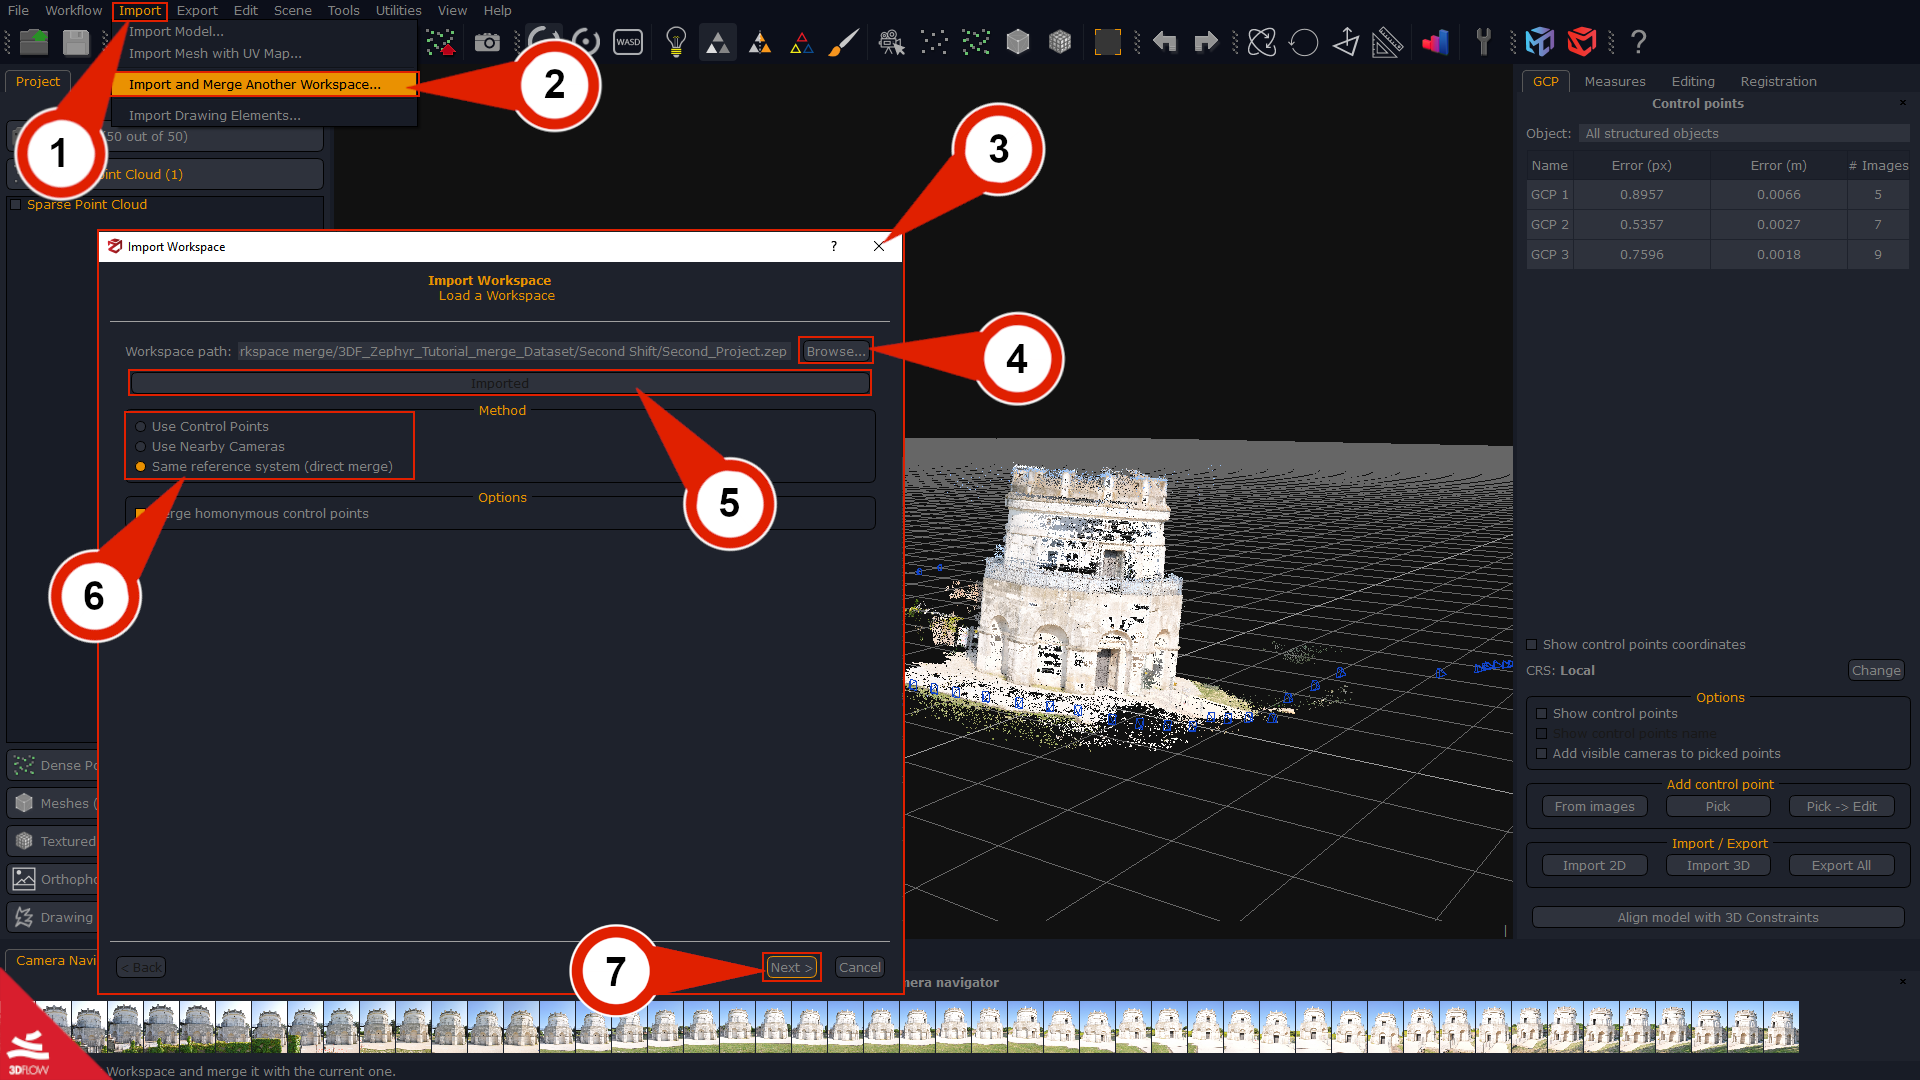
Zephyr will automatically select the Same Reference System (direct merge) method if no control points are placed in the project(s). This method relies on the same projection system shared by both projects, so please check them out before picking this procedure.
Going through the Import workspace wizard, you can choose which 3D element to import (the images and the sparse point cloud will be selected by default). You can eventually decide whether or not to import the Dense cloud or other elements of the project (8). Once done, you can click “Next” (9) and then the “Align” (10) button.

Note: in order to speed up the merge process, it is highly recommended to use the following method when the projects involved include the Sparse point clouds only.
Step 2 – Merging using control points
First, you are asked to place at least three control points in both the projects. Control points must have the same position (that is why there is the need to have an area in common between the datasets) and the same name in both projects to let Zephyr match them and go ahead with the merge process. Enabling the Compute Bundle Adjustment option is advisable to reduce the reprojection error of the control points (the merge process may take longer). Once you have placed the control points, you can import the other project(s) into the current one described above. Then, simply enable the “Use Control Points” mode in the Import workspace wizard and click the “Next” button.
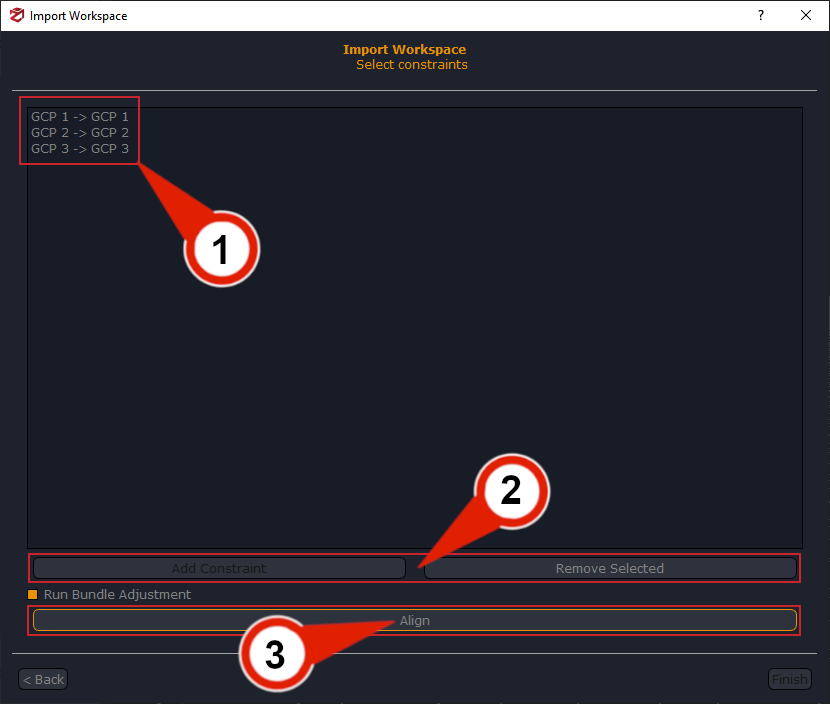
3DF Zephyr will automatically match each couple of control points in both projects, reporting them in a list (1), and you can remove or add them using the “Add constraints” or “Remove selected” (2) buttons. Remember that at least three pairs of control points are needed for the merging process.
You should enable the “Run bundle adjustment” option to get a more accurate alignment result. Indeed 3DF Zephyr performs a raw merge without it, albeit more quickly.
Click the “Align” (3) button to start the computation.
Step 3 – Manual dense point cloud merge (optional)
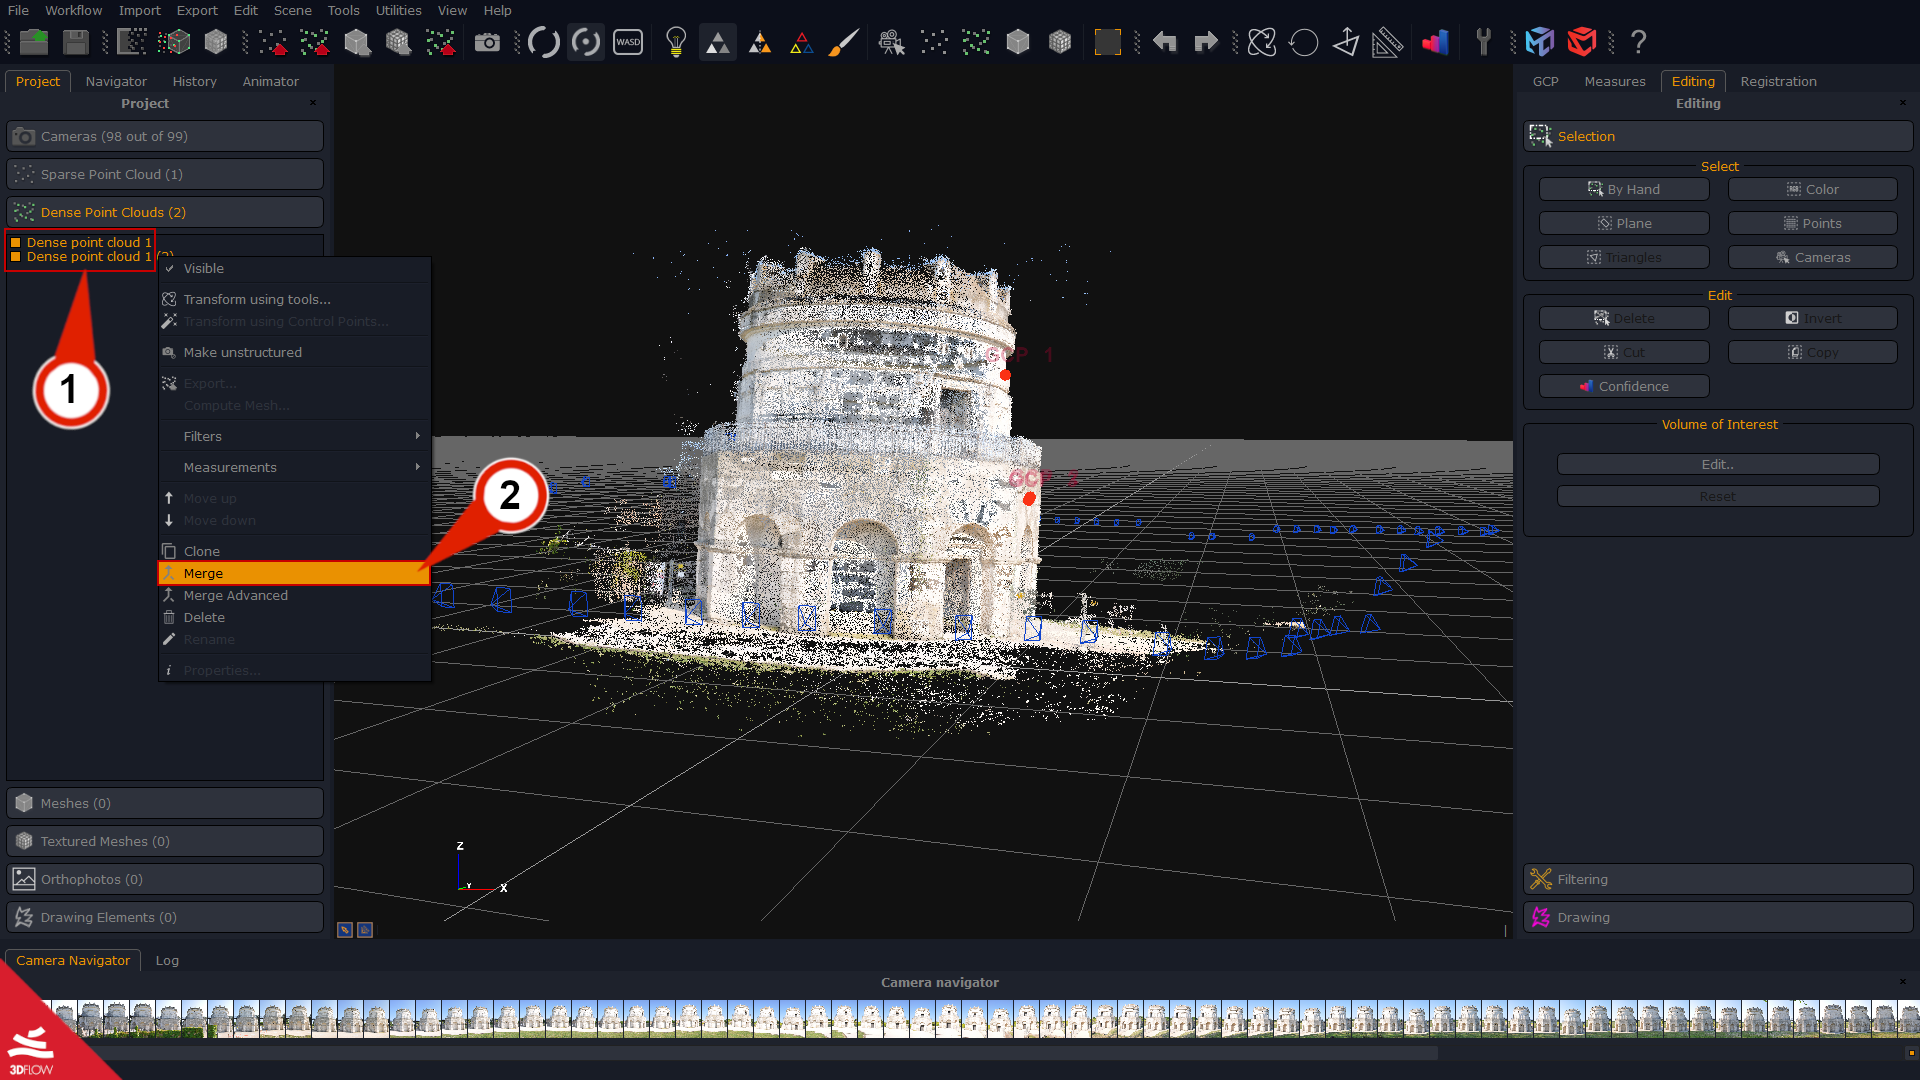
Once the projects have been merged, you will get one sparse point cloud and eventually multiple dense point clouds and/or meshes.
You can manually merge the two dense point clouds, if you wish, by selecting both of them (ctrl-left click) (1) and then right-clicking the selection. Then select the “Merge” (2) option.