Tutorial #04 : Multiple workspace objects management
Workspace objects management
Welcome to the 3DF Zephyr tutorial series. In this recipe, you will learn how to manage multiple objects within the 3DF Zephyr workspace.
Step 1 – Introduction
Having multiple copies of the same object (or parts of them) within the same workspace is very useful: you might want to do different reconstructions with different settings for different areas of the point cloud/meshes.
3DF Zephyr has very easy-to-use tools for this purpose, namely the “New Object by Cut” and “New Object by Copy” tools.
This tutorial will use the dataset below, however, feel free to use any dataset you like.
 | Download Dataset – Multiple Objects Tutorial (452 MB) |
Step 2 – Making a copy of an existing object
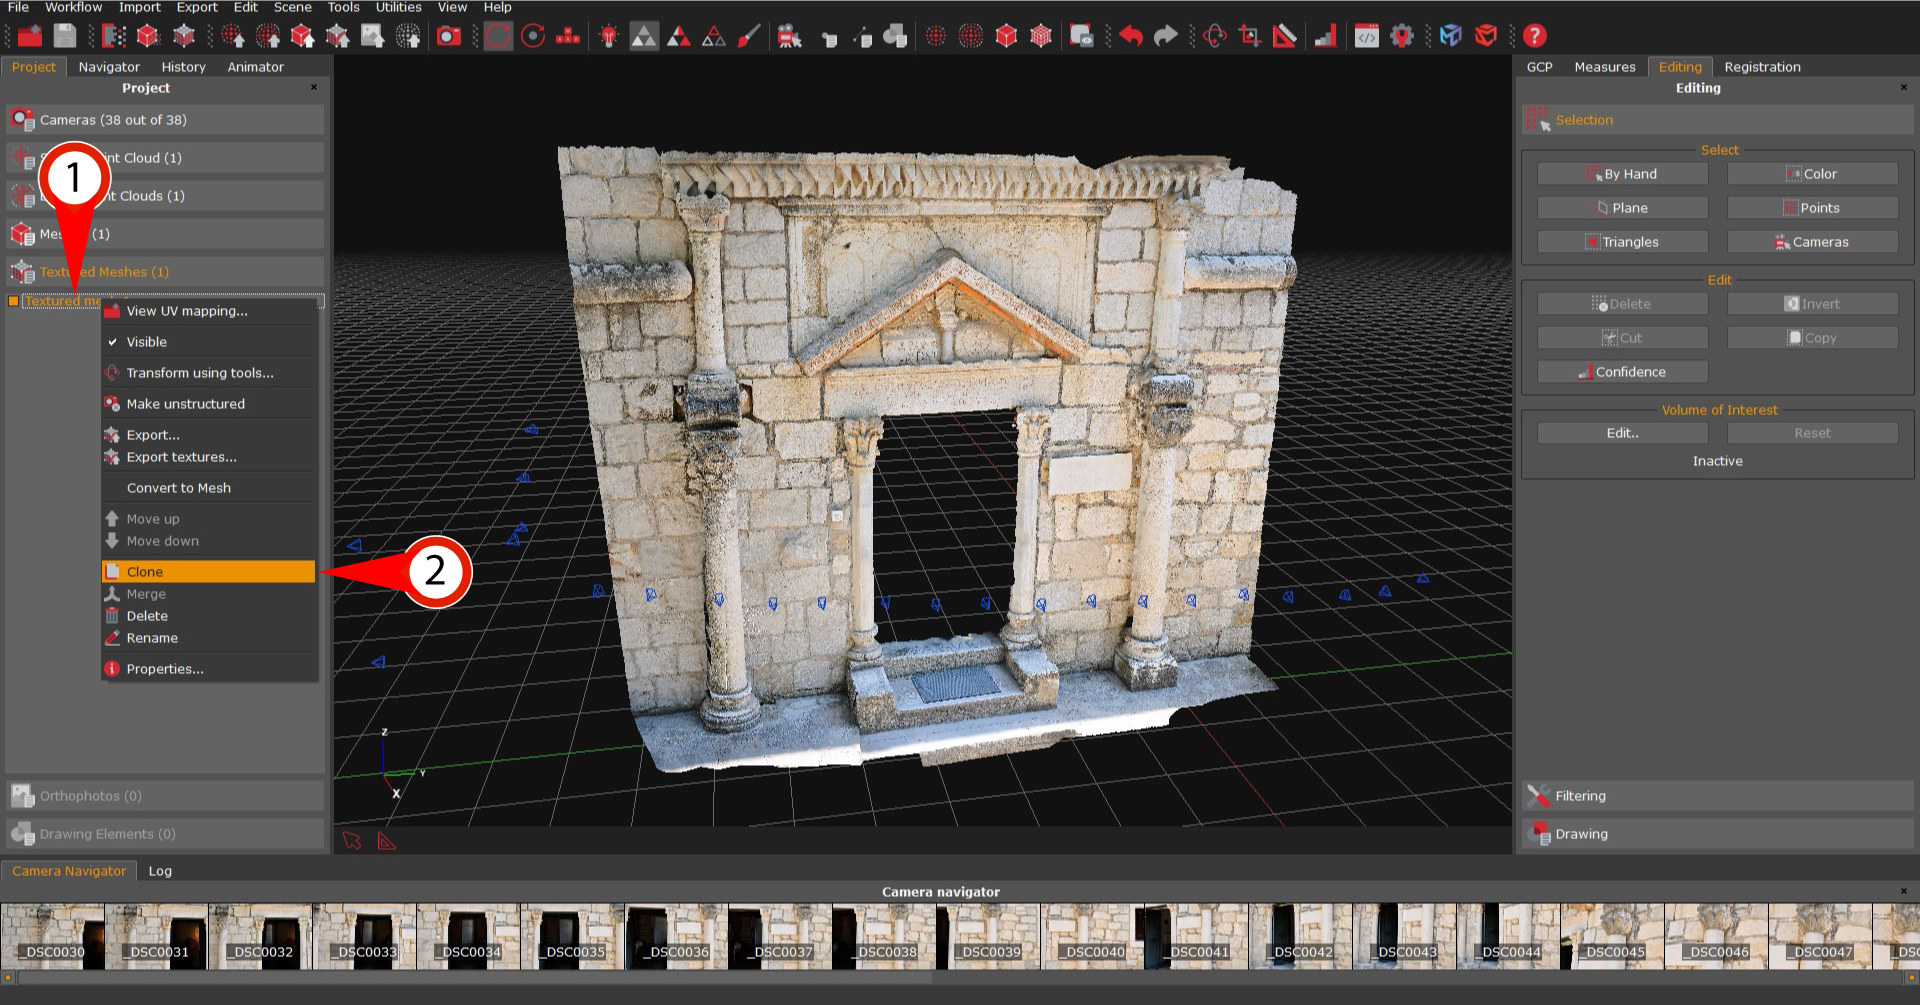
From the “Project” tab, simply right-click the object you wish to duplicate (1) (point cloud or mesh) and left-click “Clone” (2). A new object with the same name (with “Copy 1” appended to its name) will appear in the workspace.
You can now independently use this newly created object: for example, you can clean this point cloud and then feed Zephyr the new copy as input point cloud when generating a mesh, so you can always go back in case you realize you removed too many points.
Remember that these copies will increase the .zep file size considerably.
Step 3 – Making a copy from cut / paste
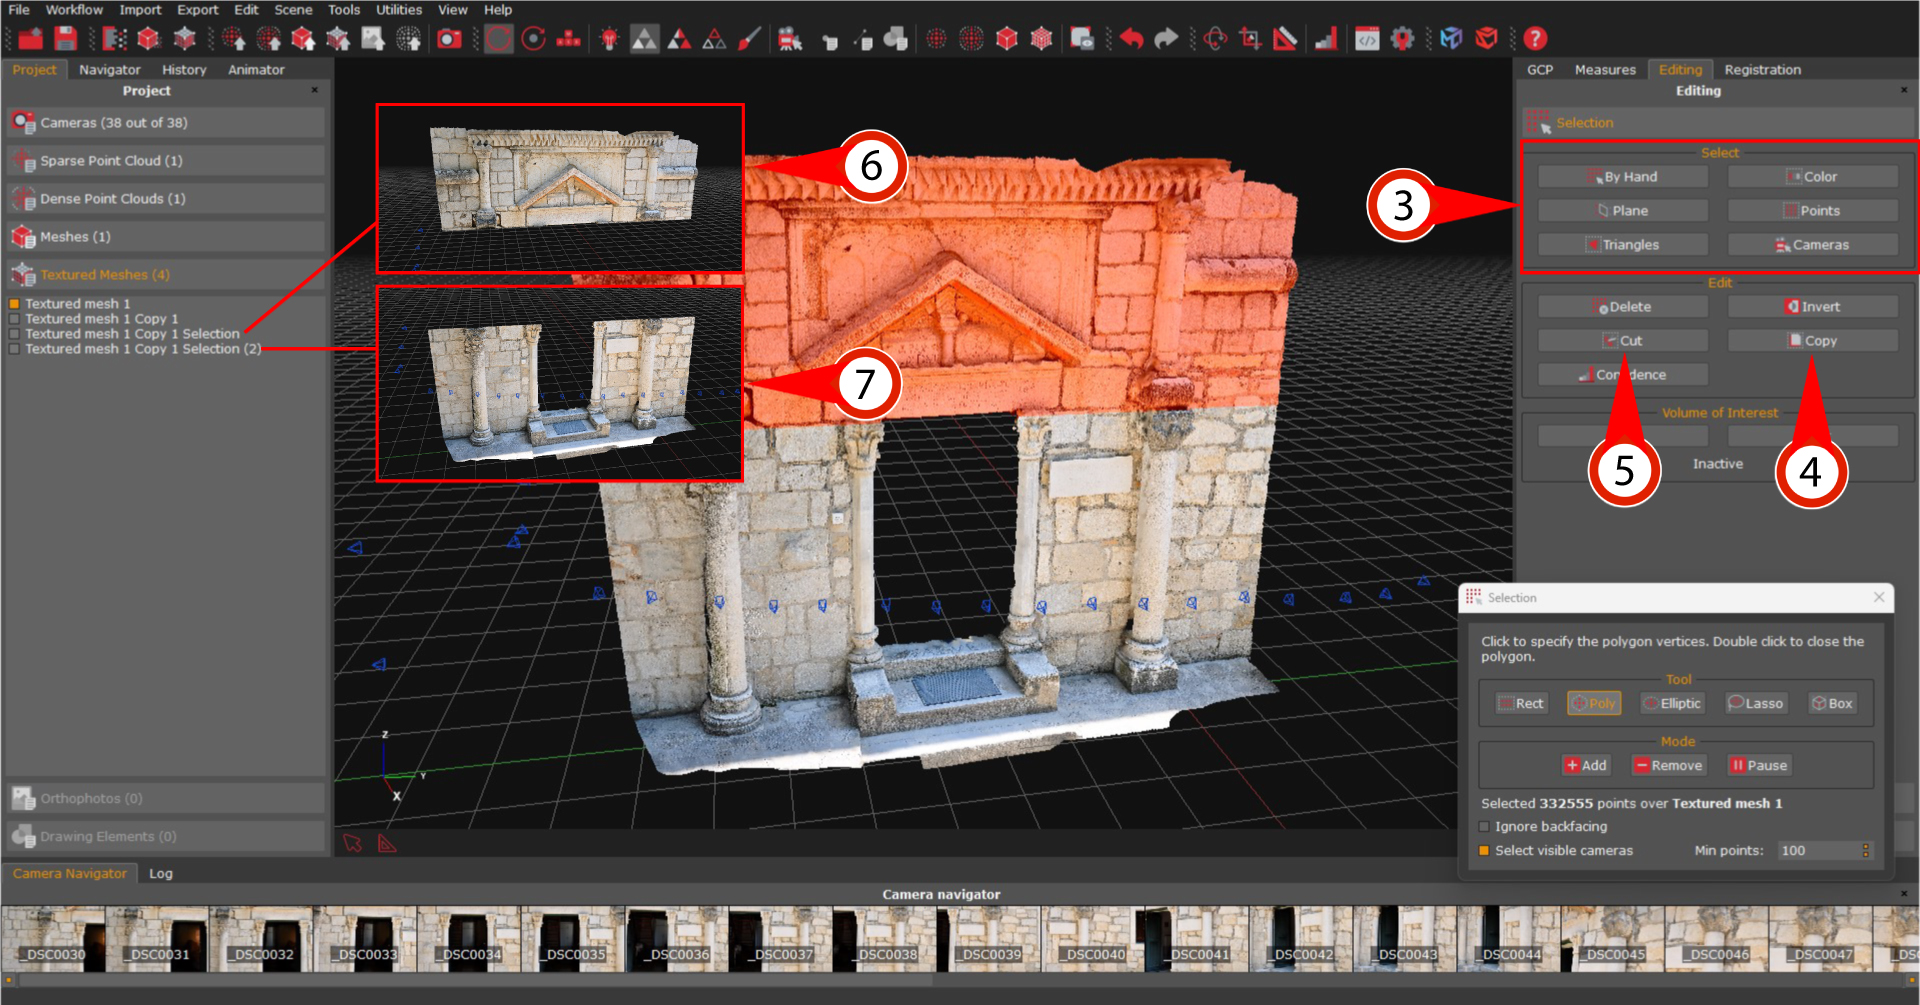
Select a subsection of your subject by using Selection tools (3) as explained in the Point cloud cleaning Tutorial. When finished, the select area will be highlighted in red (remember you can use the “Invert Selection” tool if you wish to do an inverse selection).
At this point, all you have to do to cut or paste your workspace object is to click the “Copy” button (4) or the “Cut” Button (5).
New Object by Copy: will create a new object in the workspace by copying the selected area into the new object (6).
New Object by Cut: will split the currently selected object. The selection will become the new object, and everything that hasn’t been selected will remain in the subject of origin (7).
Centering an object / Moving the grid
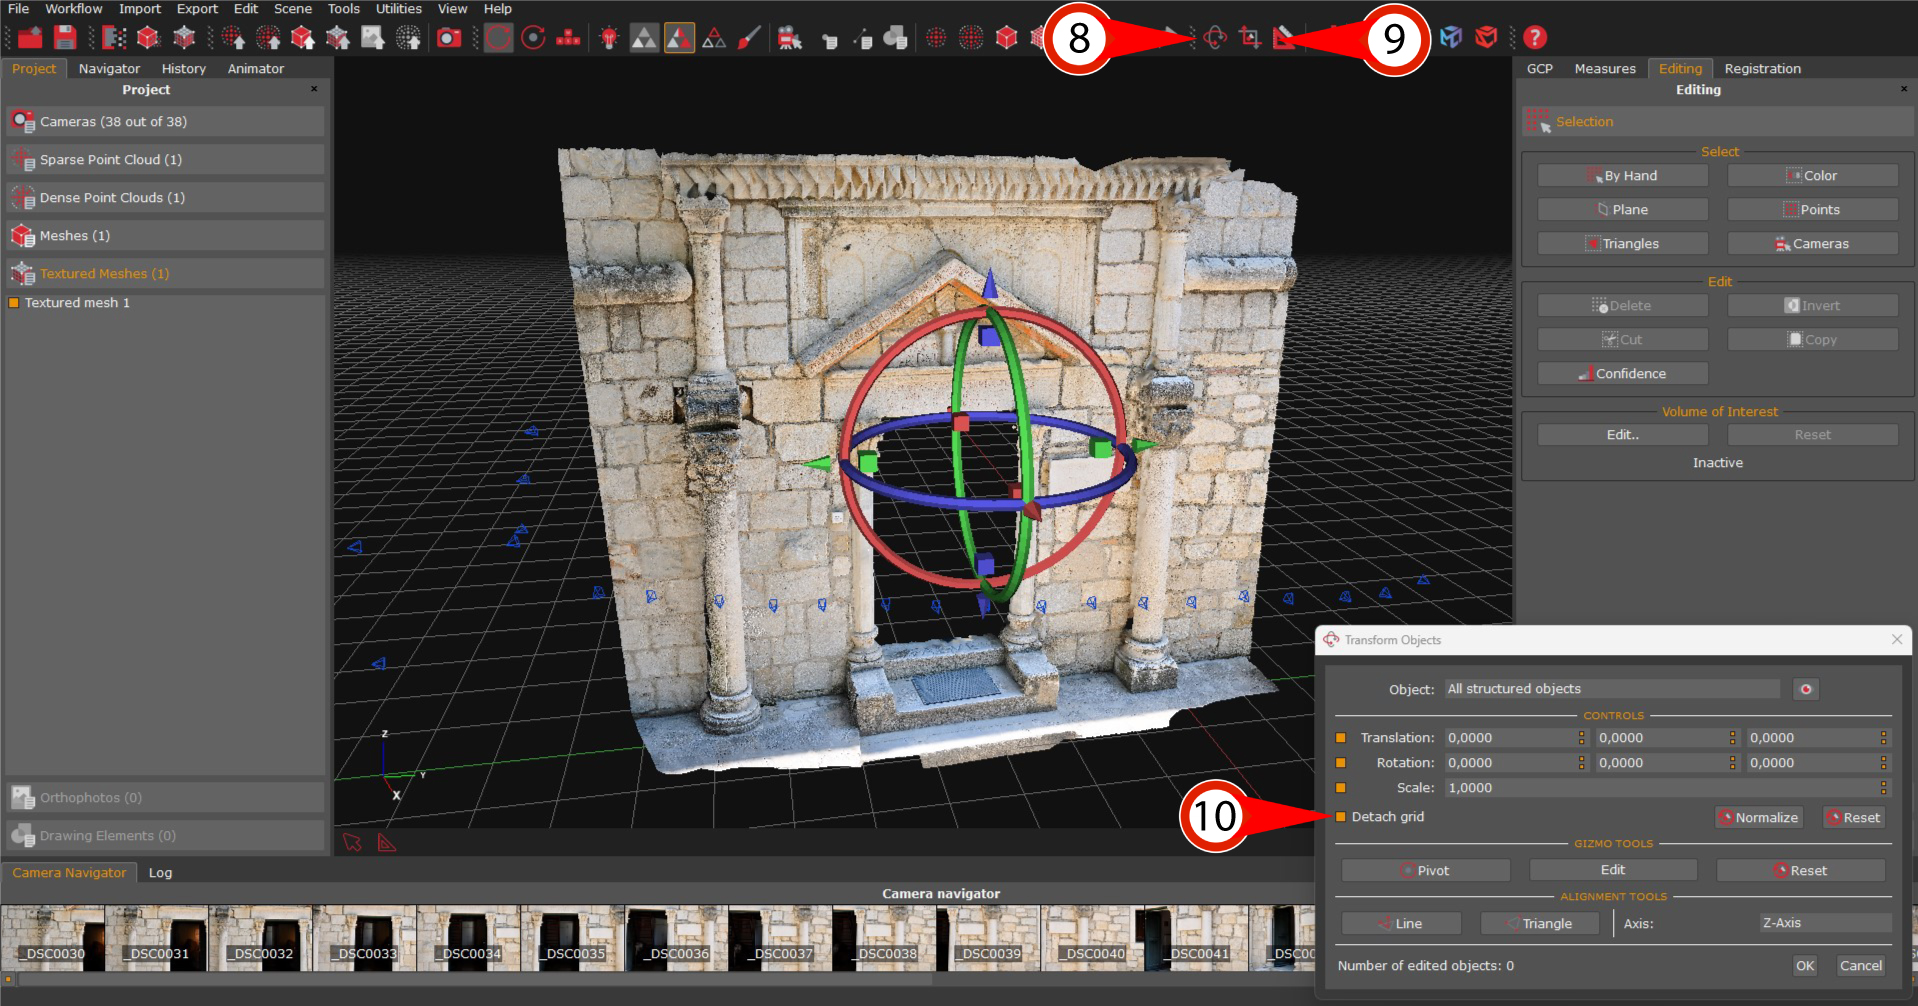
To move the 3D model, you can use the Gizmo (8). As of 3DF Zephyr 7.0, we added support to multiple reference systems in the same workspace. This means that there can be many “grids” within the same project. Professionals dealing with georeferenced projects will find this feature helpful because rather than moving the object toward the grid, in some cases, you may want to move the grid toward the 3D model by using the Transform Grid tool (9).
If you do not need multiple grids in your project and are just looking to move the 3D model in the workspace, make sure the “Detach grid” (10) option is selected. You can also use the “Normalize” button in the same dialog.
However, if you are using control points in your project, we strongly recommend using the “Move to origin” option in the Transform Grid tool and the control points to drive your workflow. Your workflow may vary depending on your needs and goals.
Final notes
Experiment a bit with these tools since they can significantly aid your workflow.
The next tutorial will explain how to clean point clouds when needed. Click here to proceed to the next tutorial.