Tutorial #A04 : using the Confidence tool
Using the Confidence tool
Welcome to the 3DF Zephyr tutorial series. In this recipe, you will learn how to manage multiple objects within the 3DF Zephyr workspace.
This tutorial requires 3DF Zephyr Pro.
This tutorial will use the dataset used for workspace merge, however, feel free to use any dataset you like.
Step 1 – Introduction
The Confidence tool is a way to visually understand the quality of the reconstructed point cloud, representing the confidence that Zephyr has for each reconstructed point, ranging from blue (less confident) to red (most confident).
Step 2 – Computing the confidence
Confidence computation is a process that might take a while, depending on the dataset size. For this reason, it’s not automatically computed when generating a point cloud: in order to compute the confidence, simply click the “Enable Confidence” Button (1) and confirm.
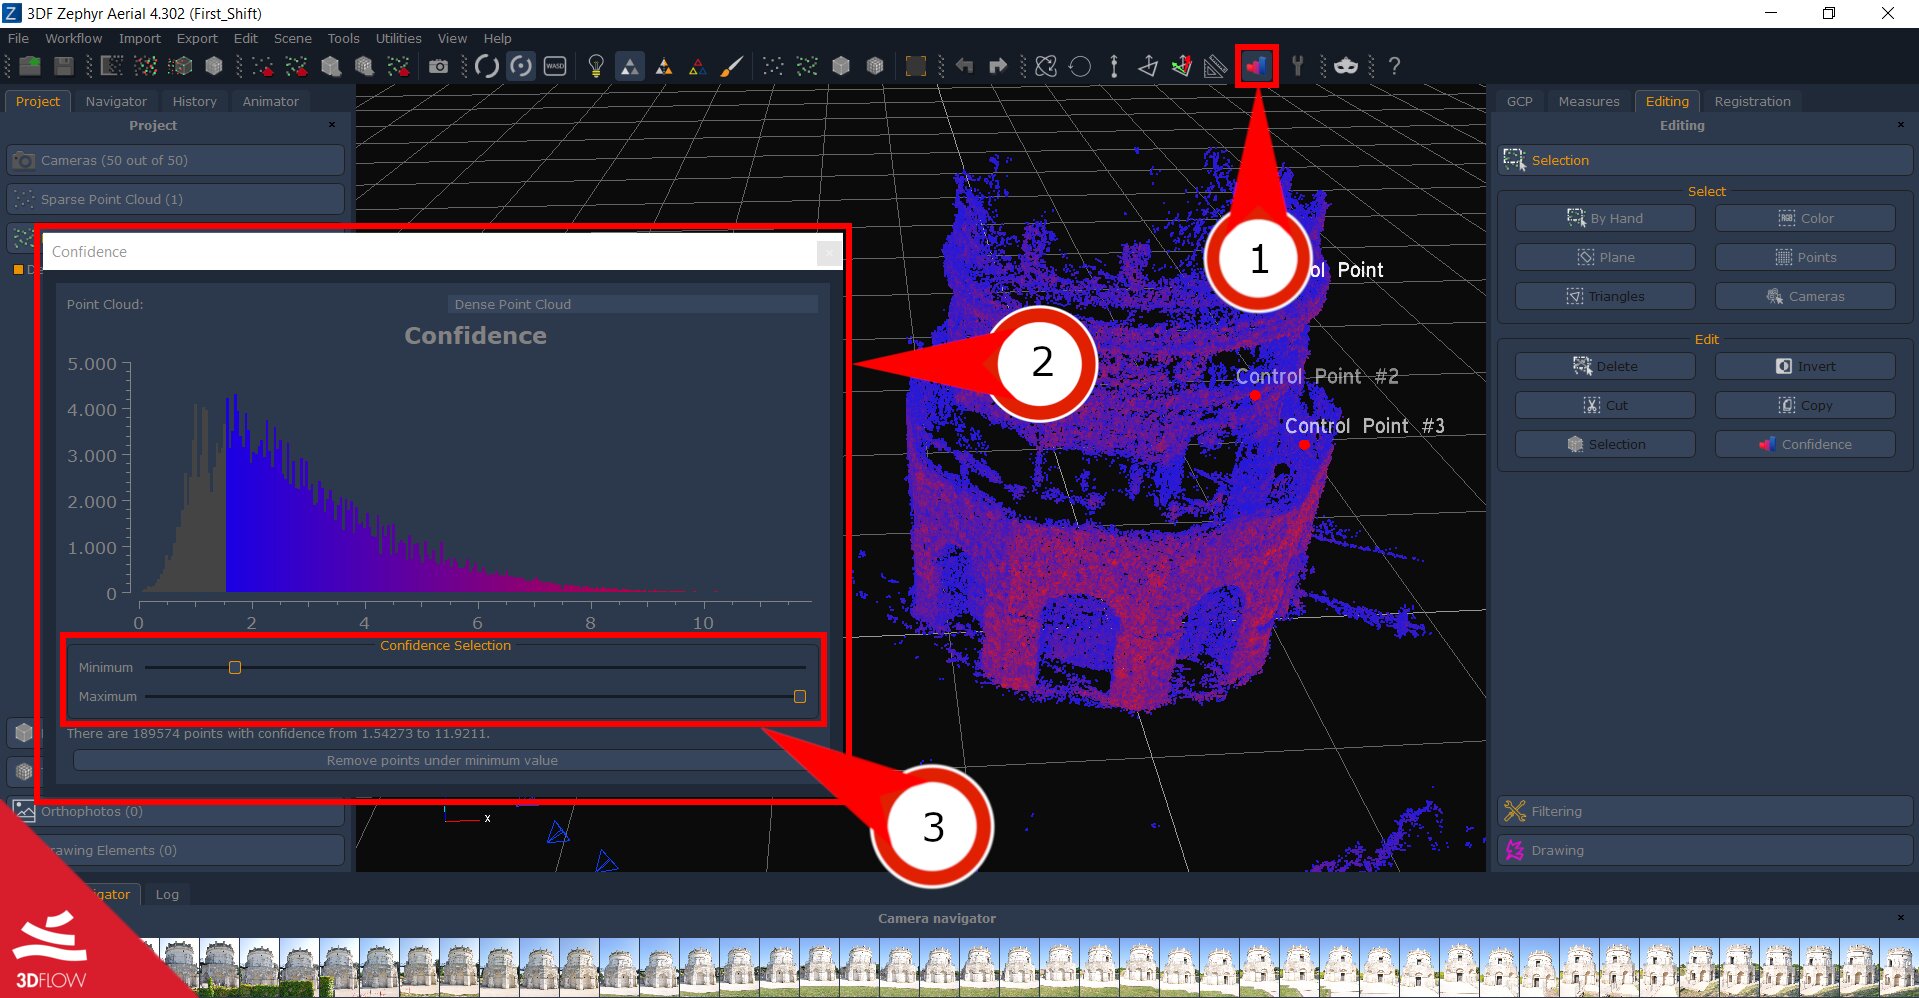
The “Confidence Window” (2) will appear reporting in detail the confidence histogram, reporting the number of points on the Y axis and the confidence on the X axys. Confidence for each point is computed by giving a score to all the cameras that see that specific point.
You can still move around in the workspace and you can live preview what the point cloud will look like when removing all points that don’t’ fall between the minimum and maximum range (which can be adjusted with the “confidence selection sliders” (3) ). You can also remove points below the minimum threshold by using the appropriate button.
It’s usually a good idea to make a copy of the original point cloud before applying the “remove points under the minimum value” confidence filter, just in case you want to go back without losing any information.
The next tutorial will explain the DEM generation and elevation profile tool. Click here to proceed to the next tutorial.