Tutorial #02 : managing the bounding box
Bounding box management
Welcome to the 3DF Zephyr tutorial series. This guide will explain how to use the Bounding box tools in 3DF Zephyr. The Bounding box can be utilized with all the versions of 3DF Zephyr; please download a Zephyr evaluation version to understand how to use this feature.
Summary
Introduction
When the sparse point cloud has been created, the Bounding box will be computed as well. The bounding box corresponds to the volume in which all reconstructed points are defined. Therefore the ones that do not fall into this volume will be discarded in the next 3D reconstruction steps.
NOTE: For large datasets, resizing the bounding box before the Dense point cloud and Mesh generation can save processing time because areas outside of the box’s space will not be considered.
The images below show the different results according to the chosen size of the bounding box.
In this image, Zephyr has calculated the bounding box by default. As a result, the mesh also includes jagged edges and non-essential parts of the project.


In this image of the sparse point cloud, the bounding box has been resized manually. The resulting mesh is much smaller than the default one and includes only the area of interest.


As an example for this tutorial, it can use the public dataset linked below:
 | Dataset Download – Tutorial 02 boundingbox UAV mining site |
The bounding box editing tools
The Bounding box edit window can be accessed by selecting the “Scene” menu > “Bounding box” > Edit bounding box, or by clicking the “Bounding box” (1) button in the toolbar. The bounding box (2) will be rendered on the scene, along with the “Bounding box edit” (3) panel. Remember that everything inside the blue box will be reconstructed!
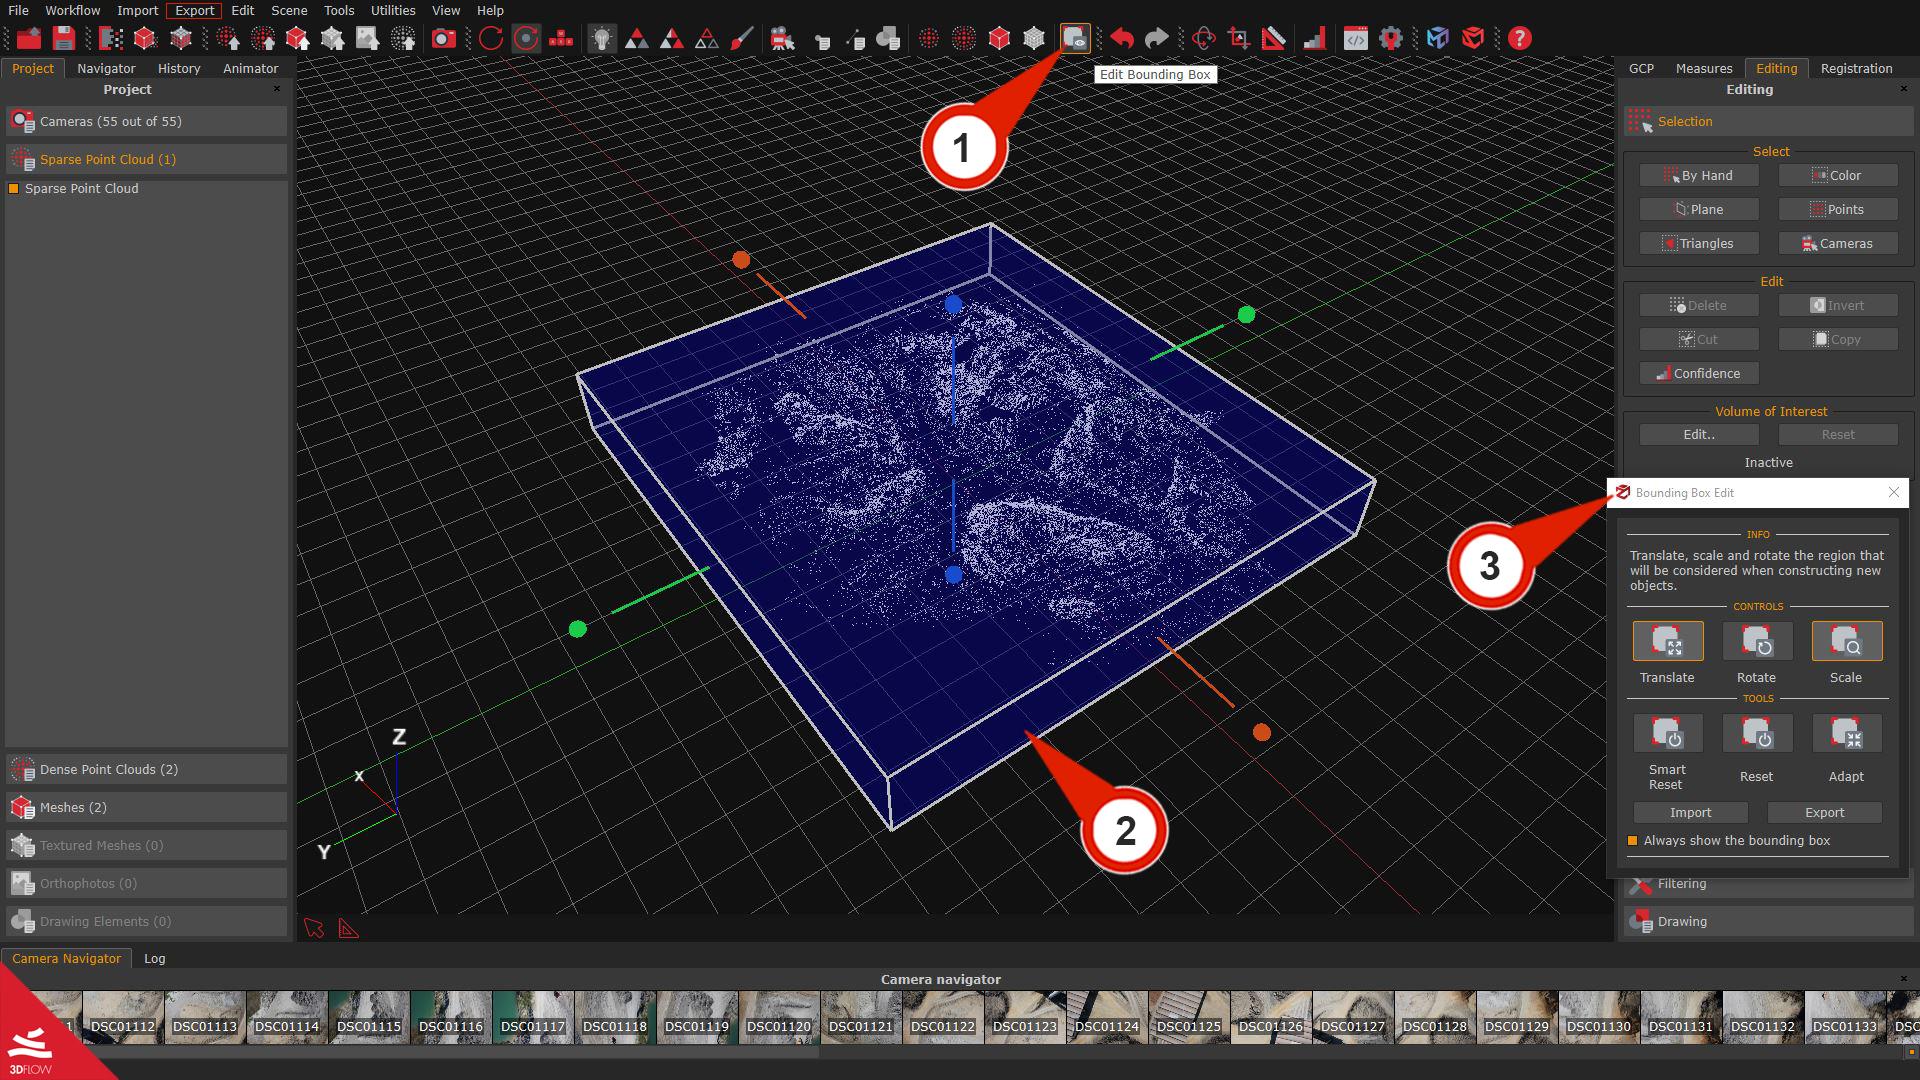
The following tools will help to resize and place the bounding box to ensure the area of interest is fully contained.
| CONTROLS | |
Translate:the command allows clicking and dragging the gizmo to move the bounding box over the selected axis. | |
 | Rotate:This command allows you to click and drag the desired gizmo to change the bounding box position over the selected rotation axis. |
 | Scale: the command allows clicking and dragging the desired box’s face to scale the bounding box. |
| TOOLS | |
 | Smart Reset : Automatically set the bounding box to a reasonable position / rotation / scale over the sparse point cloud. |
| Reset : Reset the bounding box to its original condition. |
 | Adapt: allows the bounding box to be adapted to one of the objects in the workspace (sparse point cloud, dense point cloud, mesh, etc.). |
Other tools
– Import/Export: it allows Exporting and importing a bounding box in .xml file format.
– Always show the bounding box: this checkbox keeps the box rendered in the scene even when the bounding box widget is closed.
Adjusting the bounding box
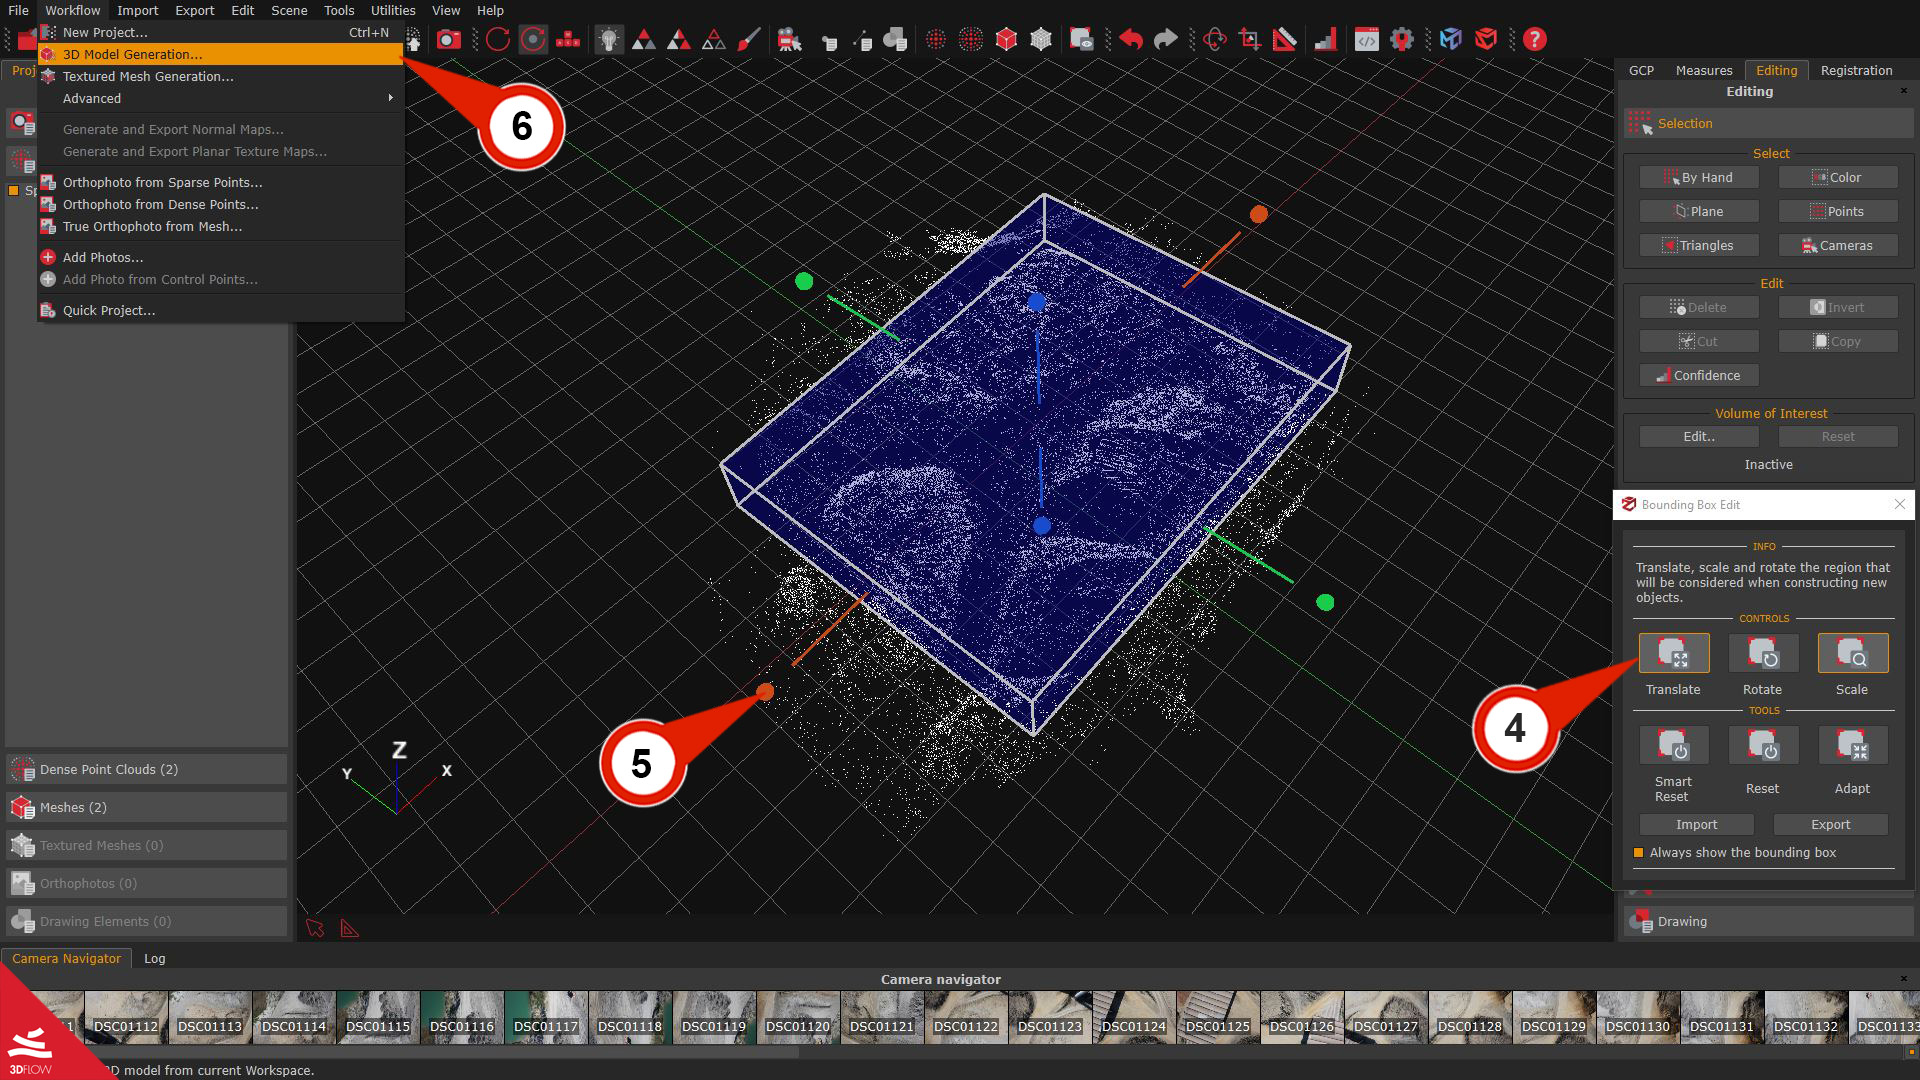
Using the “Translate” and “Scale” tools from the Bounding Box Edit (4) panel, adjust the size of the bounding box (5) on the sparse point cloud as needed.
From the Workflow menu, select 3D Model Generation (6). 3DF Zephyr will then generate a dense point cloud and mesh within the new bounding box volume. However, any points outside the original bounding box will be excluded.
If the dataset provided in this tutorial is used, the result will be a reconstructed mesh with the newly selected bounding box, as depicted in the image below.
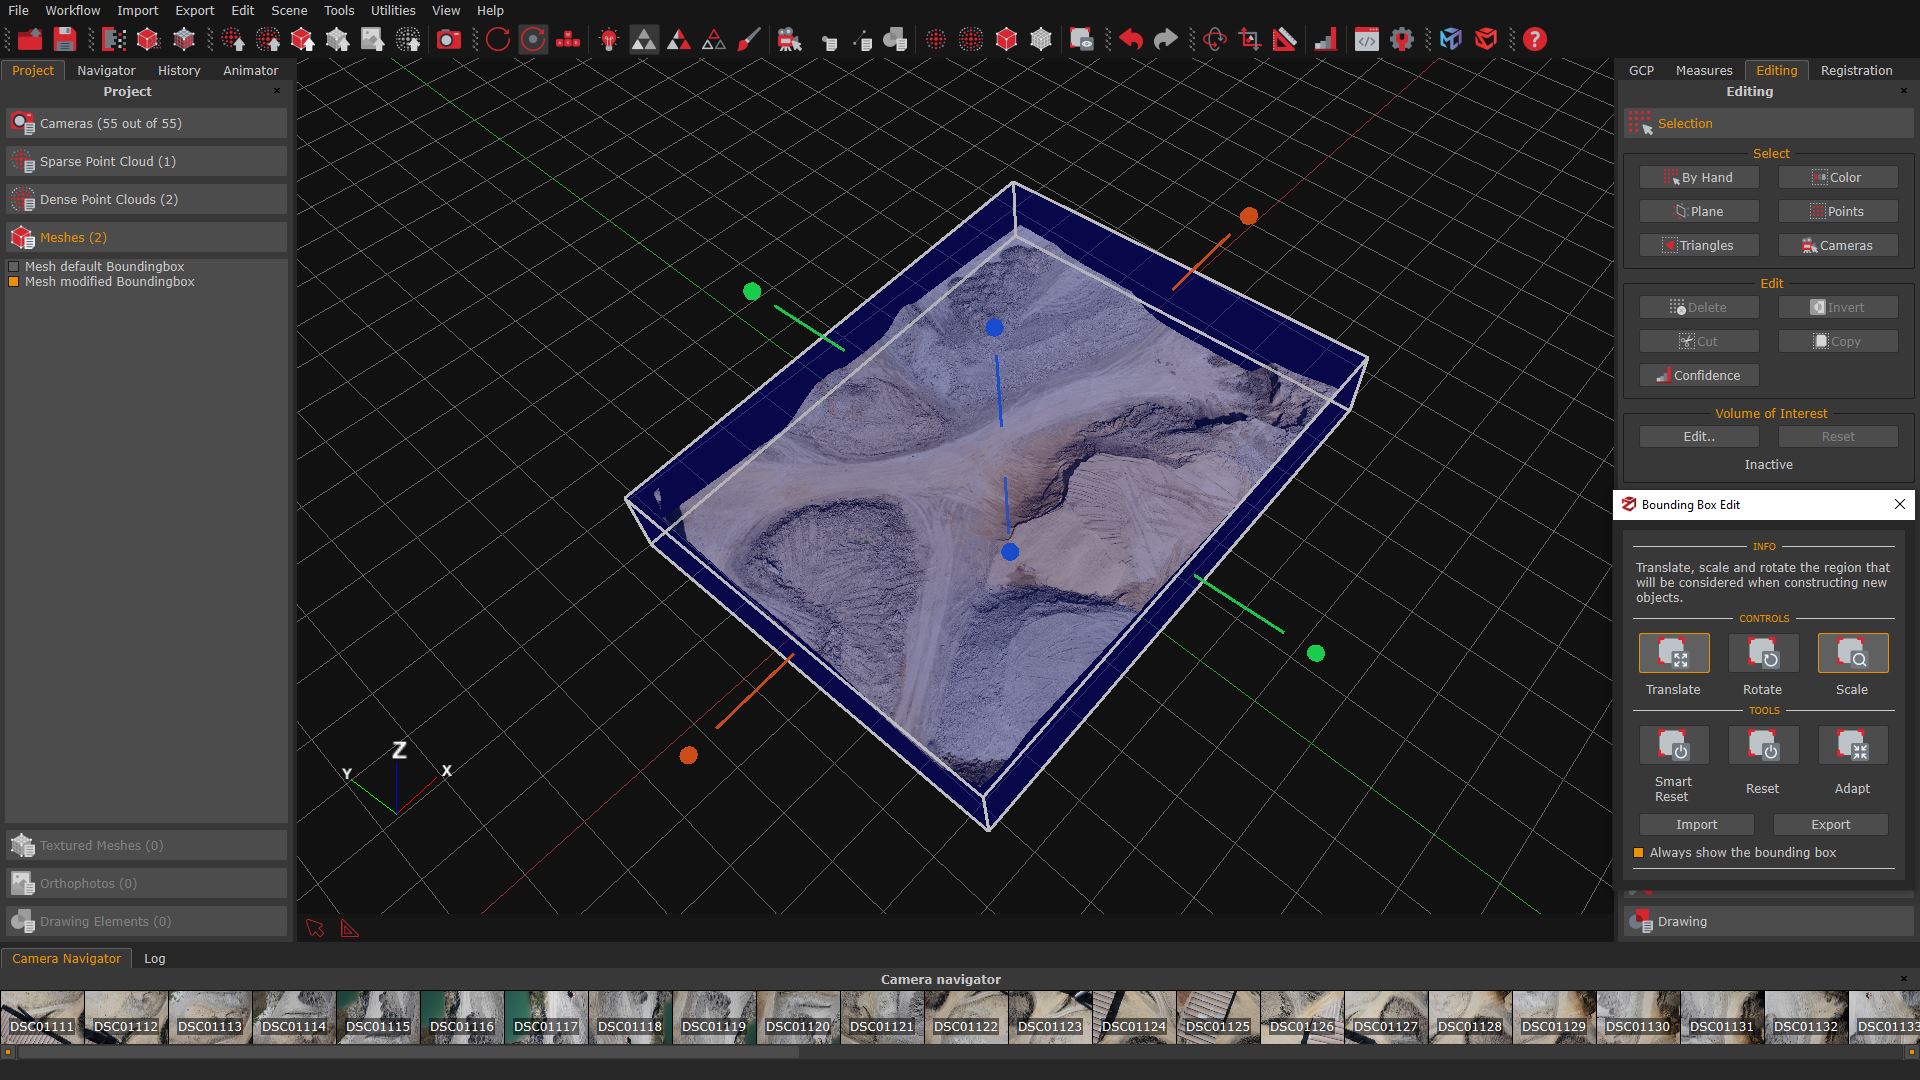
select “Sparse point cloud”, and then “OK”. Remember to Save the project to keep the changes.
[/spoiler]
Final Notes
Changing the bounding box is easy and speeds up the post processing phases in Zephyr. Remember to always check it before starting a reconstruction!
The next tutorial will show how to mask images in order to remove unwanted areas to minimize error, improve computation speed, or cheat Zephyr in order to be able to move an object. Click here to proceed to the next tutorial.