Tutorial #A13 : The Orthophoto Editor Tool
How to use the Orthophoto Editor in 3DF Zephyr
Welcome to the 3DF Zephyr tutorial series.
In this guide, you will learn how to improve and fix an orthophoto generated with 3DF Zephyr.
This tutorial cannot be completed with 3DF Zephyr Free or Lite versions!
Introduction
In the Orthophoto Generation tutorial, we learn how to create Orthophotos in 3DF Zephyr. In certain scenarios, it is necessary to tweak and improve some areas of the orthoimage while maintaining the right scale and proportion.
The Orthophoto editor tool allows tweaking and improving portions of the orthophoto right after its generation without reprocessing it from scratch.
Starting the Orthophoto Editor Tool
After you create a new orthophoto, it’s possible to launch the Orthophoto Editor by either methods:
- Right-clicking the Orthophoto name listed in the dedicated Project panel (1) tab and selecting the “Edit” (2) option.
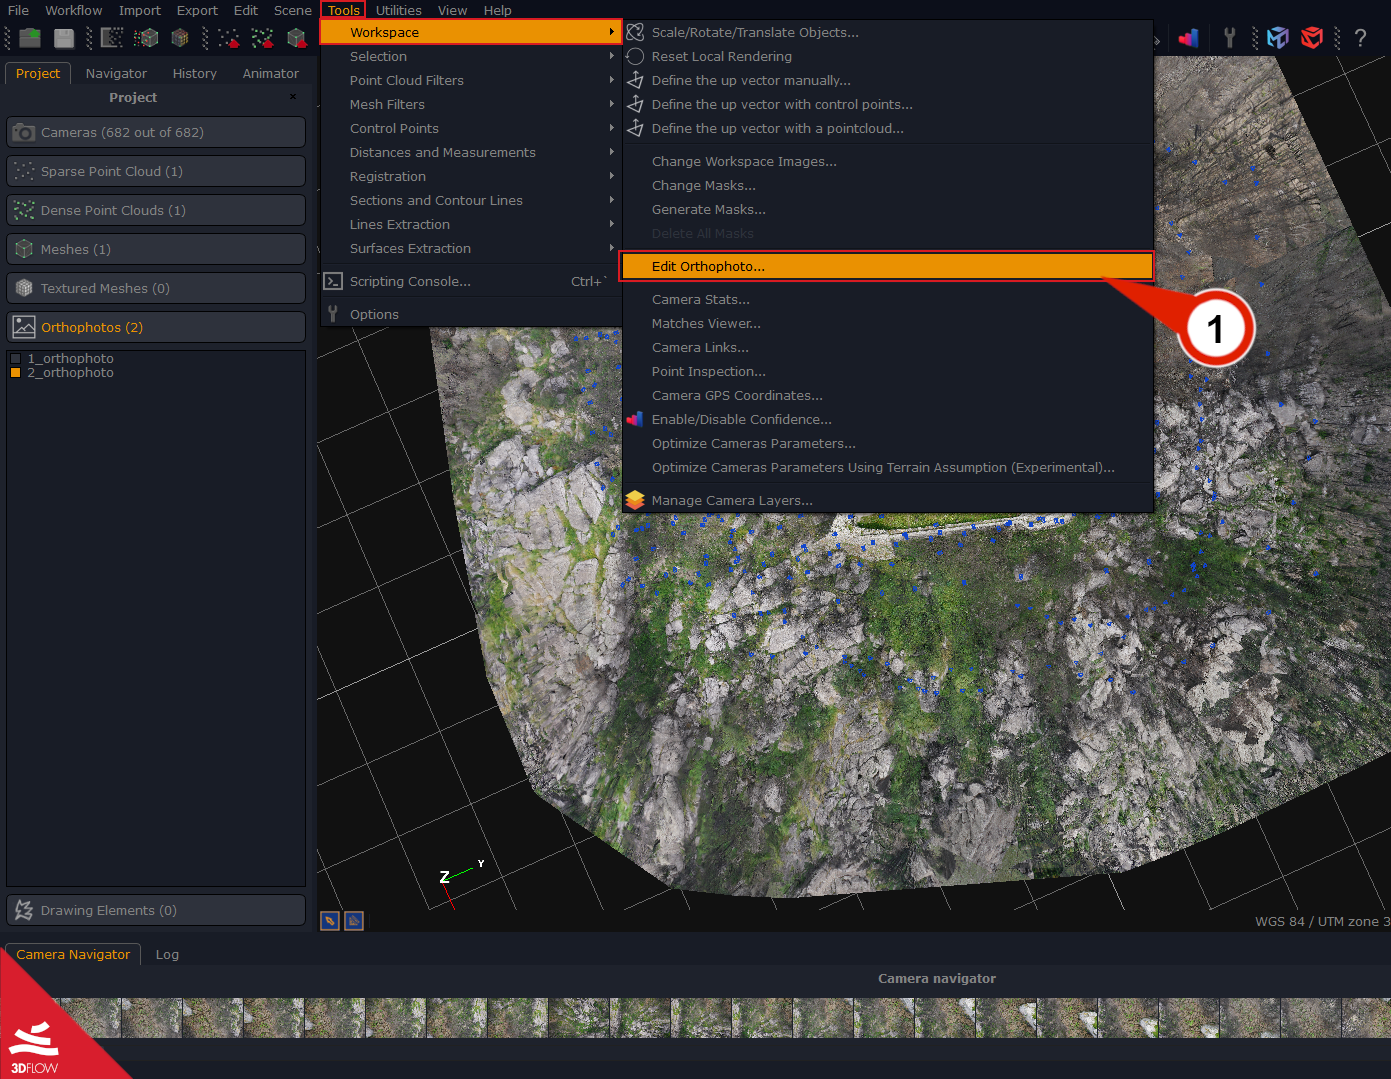
- Select the following path: “Tools” menu > “Workspace” > “Edit Orthophoto” (1).
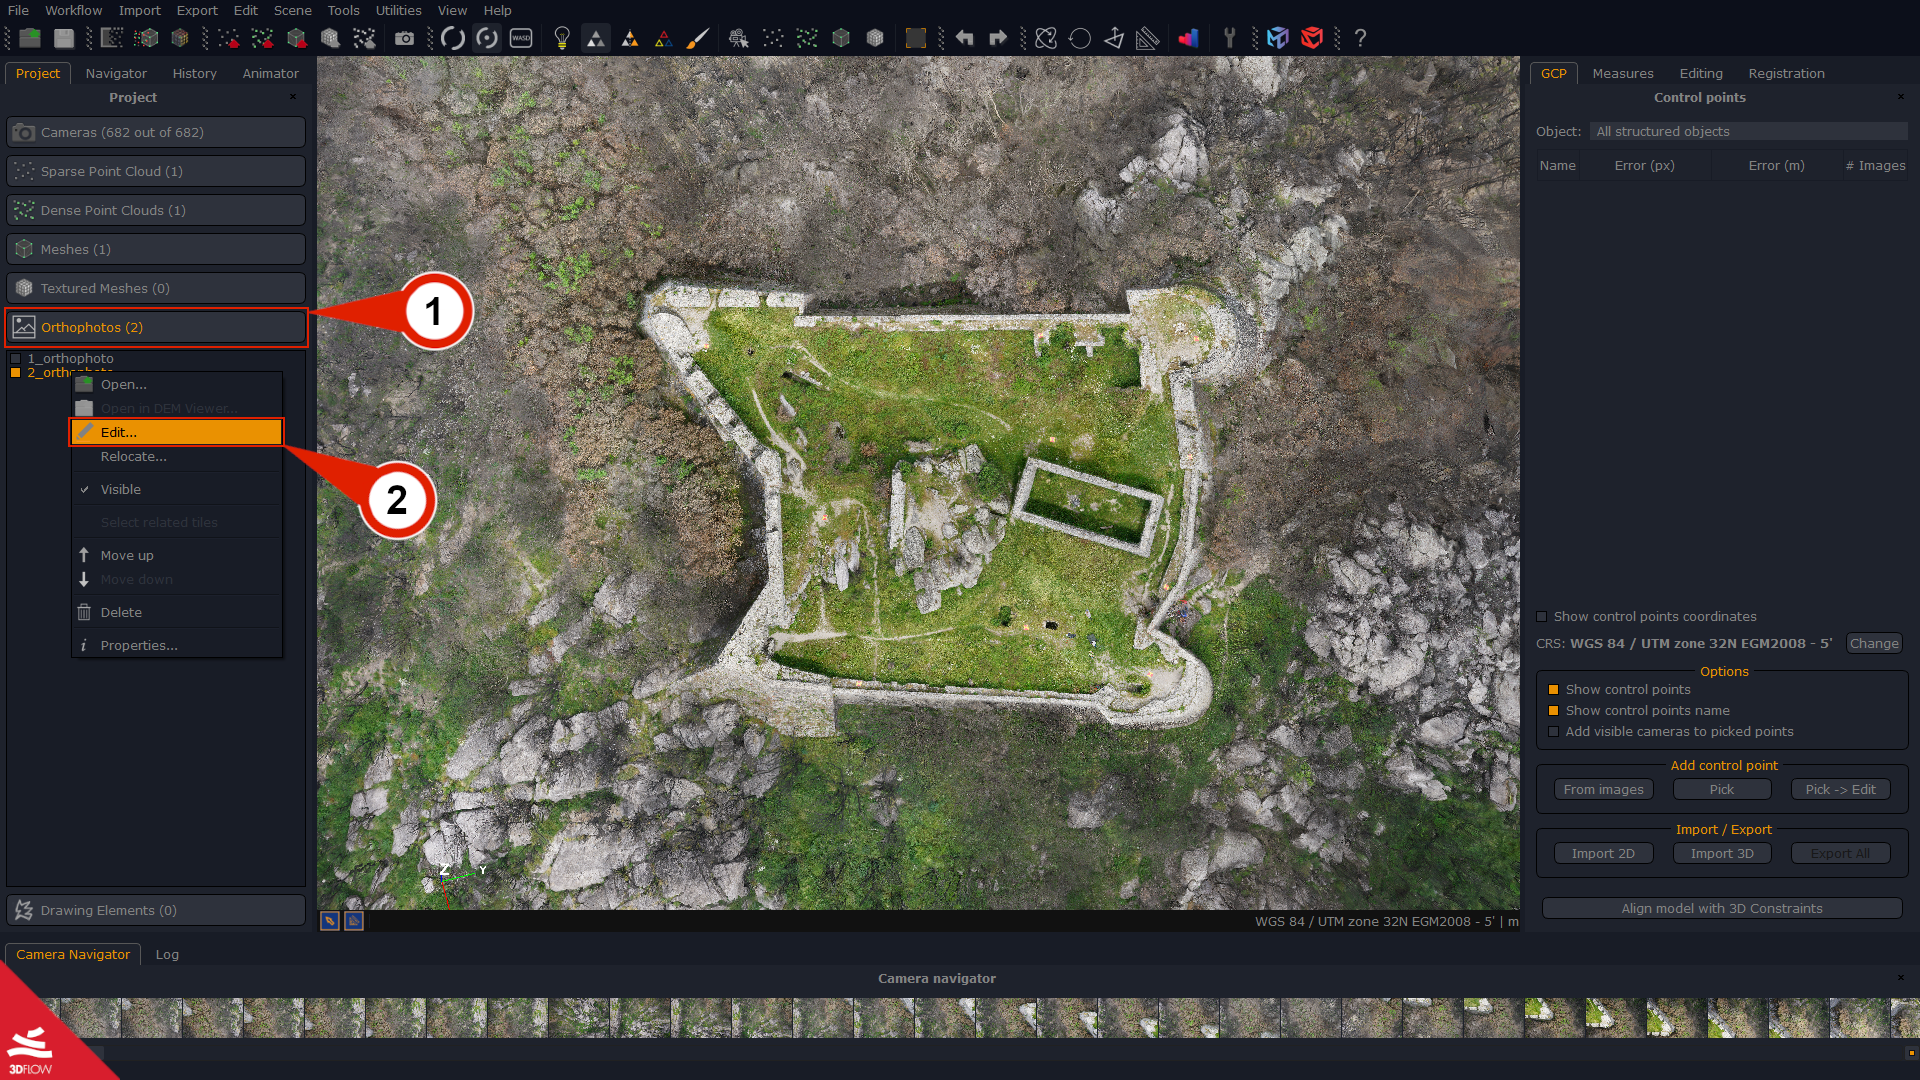
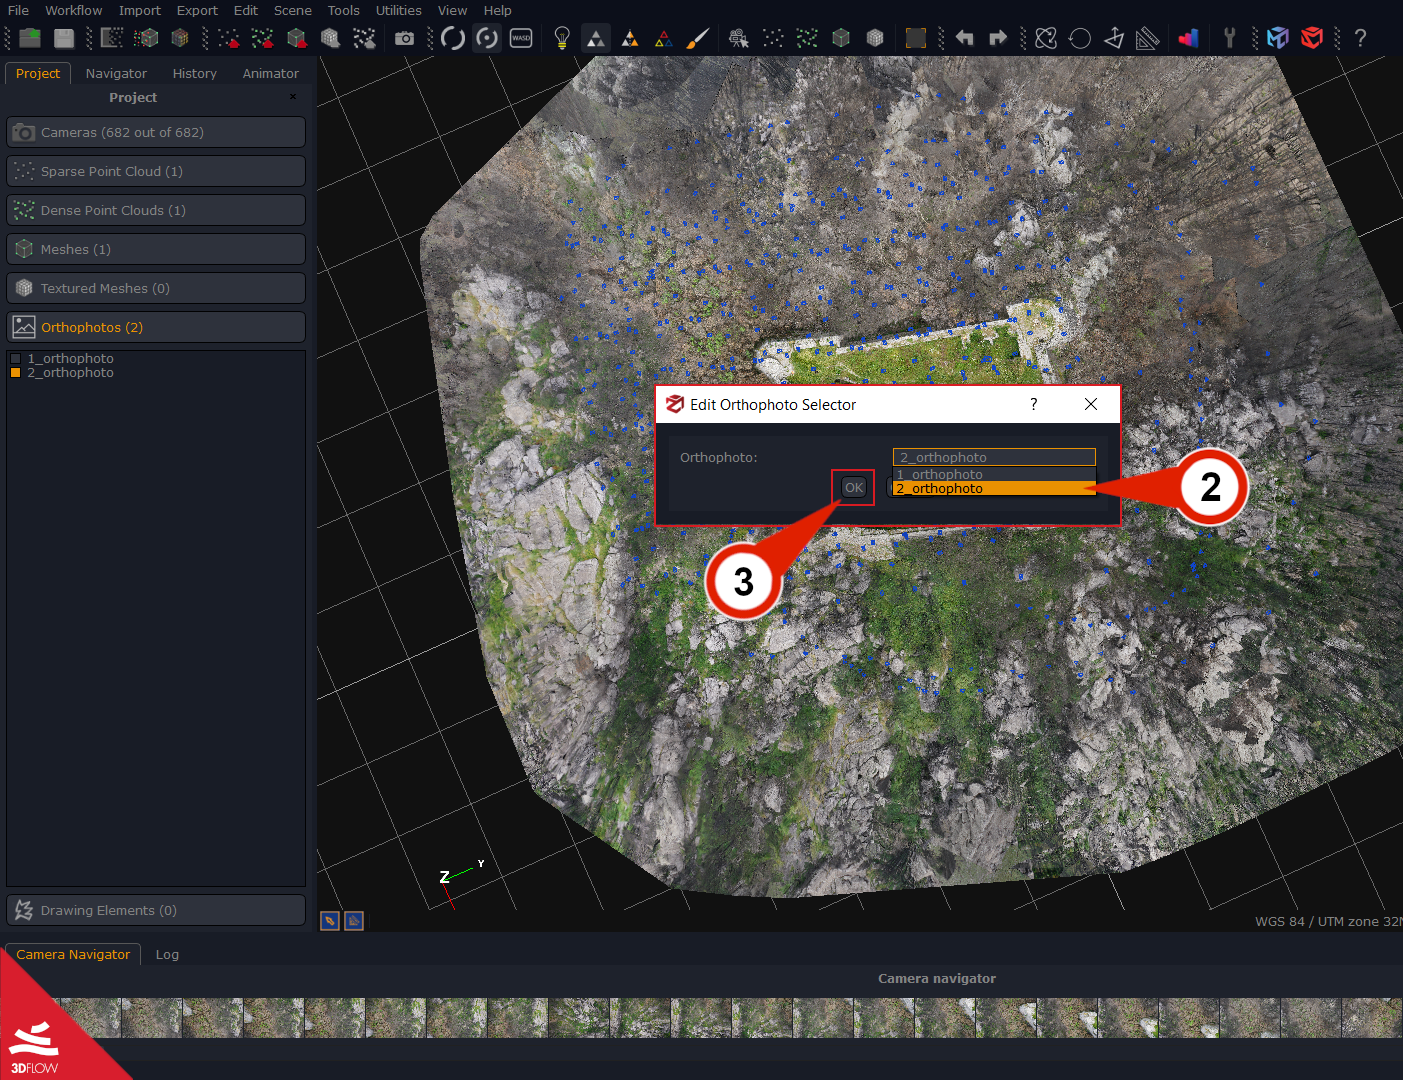
A new window will appear, allowing to choose the orthophoto that needs to be edited in the Orthophoto selector dialog (2), click “OK” (3), and the Orthophoto Editor will appear.
The Orthophoto Editor overview
The editor dialog provides a set of drawing tools that can be used to select specific regions of the orthophoto that need to be recomputed.
Let’s take a look at the interface:
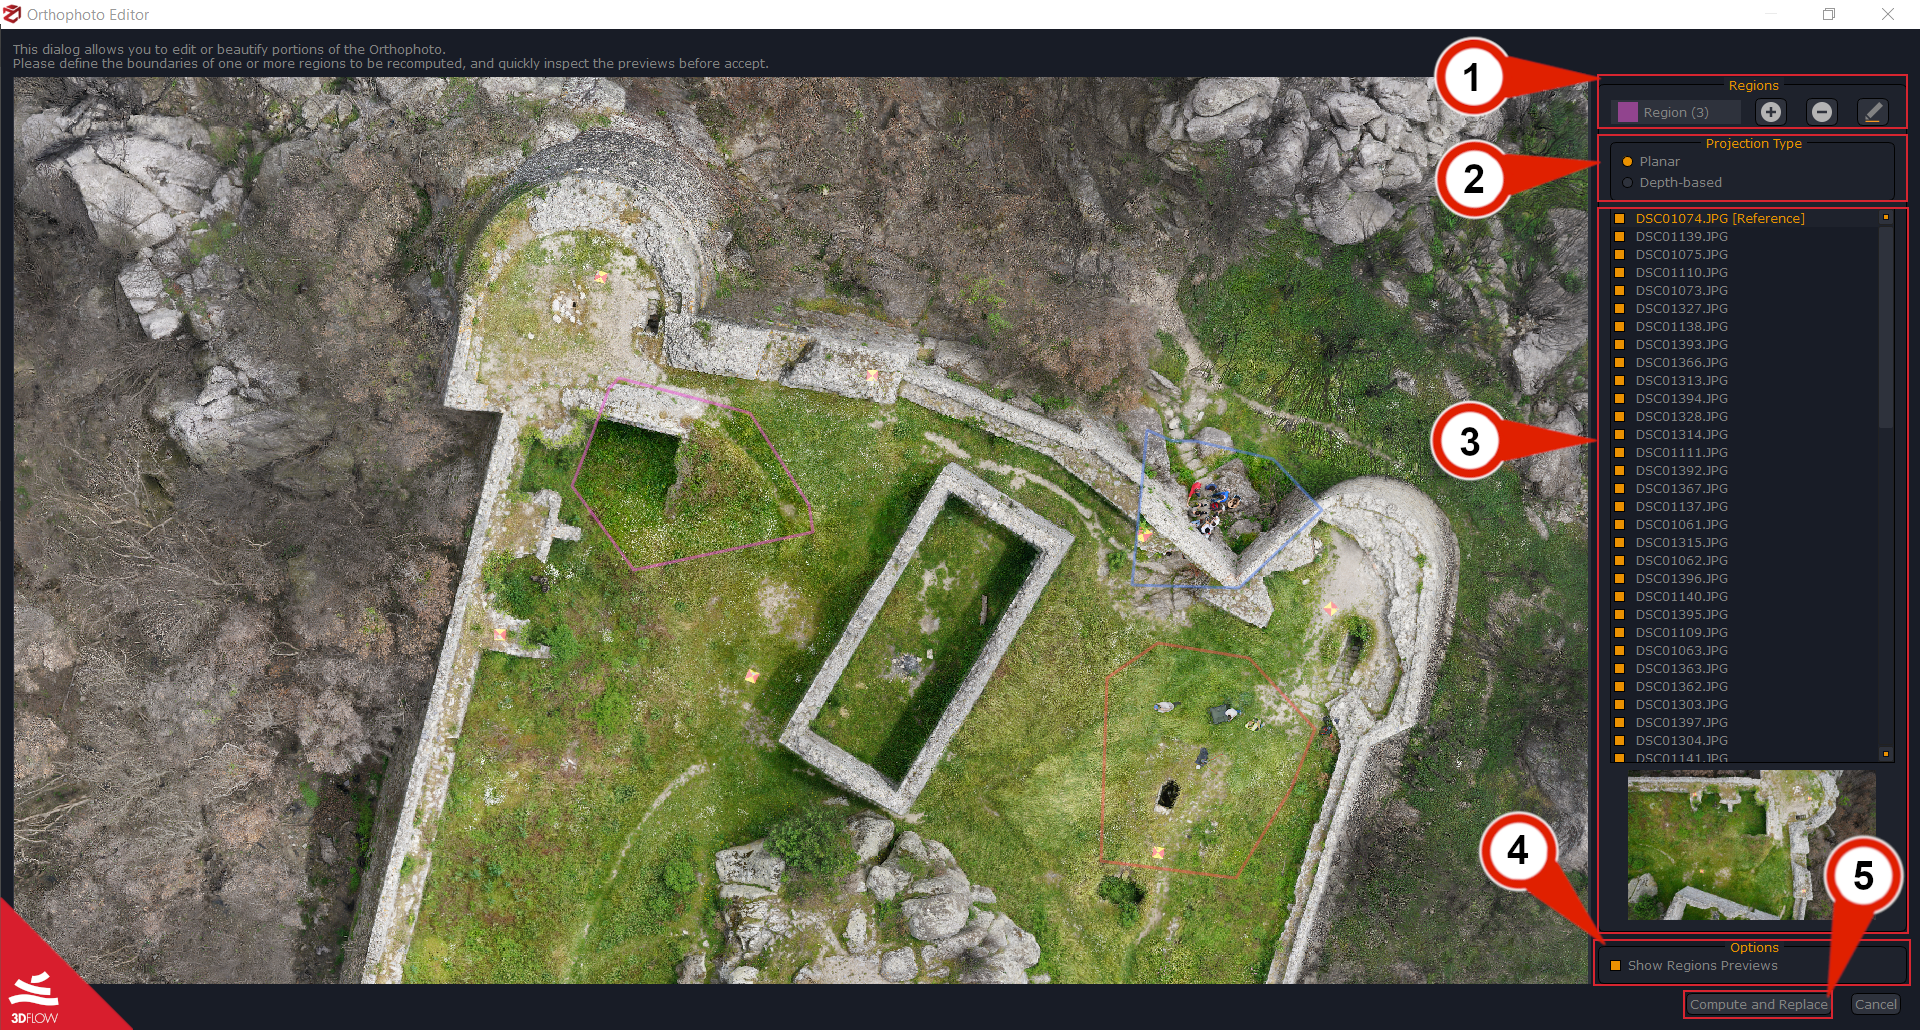
On the right side of the dialog, the following are shown top to bottom:
– Regions (1) section: A scroll-down list of the created regions, with the 3 main edit commands:
- Add a region button
- Delete region button
- Edit Region button
– Projection Type (2) section: here, it’s possible to associate a projection type with the drawn regions, which will be used to recalculate the color balance within the delimited area. The two available projection methods are:
Planar: this method generates an adapted planar projection of selected reference cameras. It is advisable to use it only when dealing with flat or regular surfaces (e.g., terrains, roads, facades, etc.).
Note: when using this projection method, at least the polygon boundaries must lie in a planar area to avoid reprojection distortion.
Depth-based: this method leverages 3D information of the mesh geometry to enhance the drawn regions of the orthophoto by selecting the cameras in the list on the right. It is advisable to use it when dealing with bumpy or irregular surfaces (e.g., mining areas, urban scenarios, construction sites, woods areas, etc.).
– List of the Cameras (3) associated with the currently drawn regions. Among these cameras, it’s possible to select one [Reference] Camera that plays a central role in the editing process and the others cameras needed for the computation by the check-boxes. Only the selected cameras will be used during the editing process for color balancing.
– Options (4): this check-box will enable/disable the projection preview within the drawn region.
Click the “Compute and Replace” (5) button to finalize the editing operation. If the result is unsatisfactory, it’s possible to undo the operation with “CTRL+Z” or the “Undo” button, in the main 3DF Zephyr interface.
How to use the Editor tool
This example will explain the Orthophoto Editor workflow to improve the color balance of selected parts and remove unwanted subjects within the orthophoto.
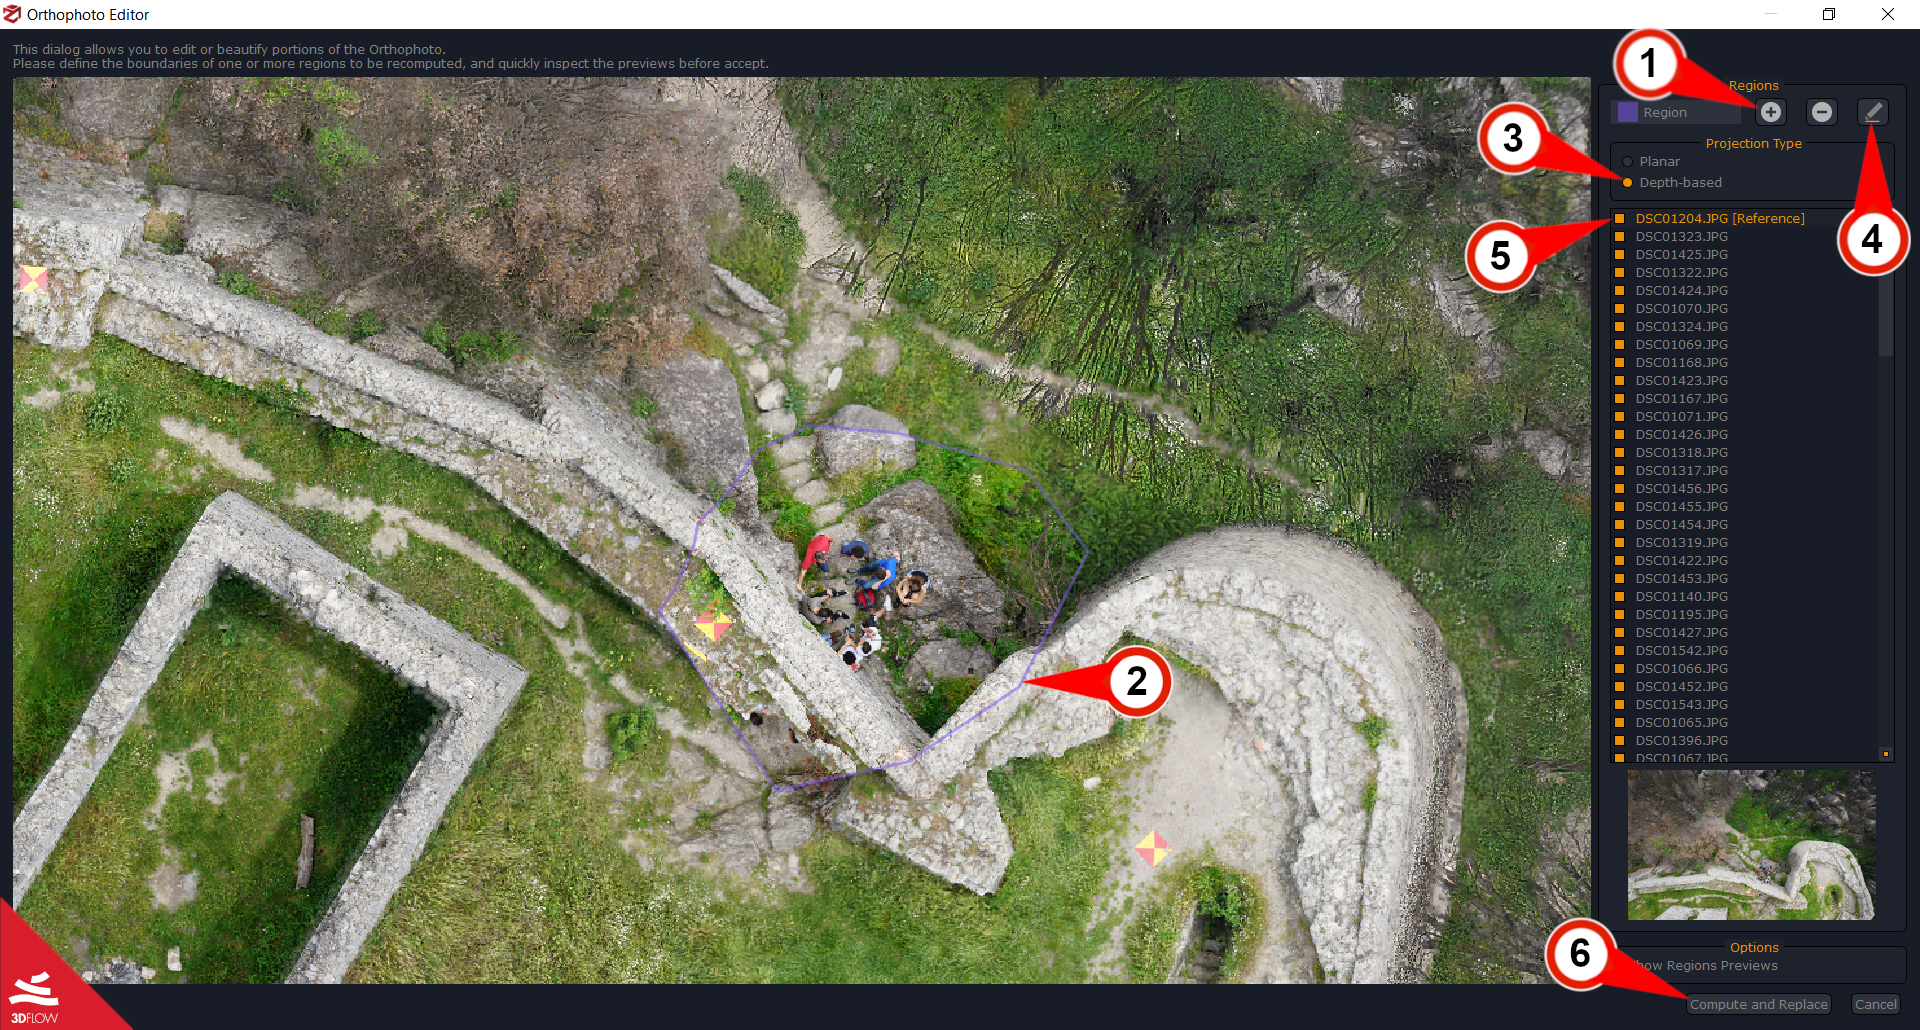
Click on the “Add Regions” (1) button, in the Regions section, and select the Orthophoto region (2) you want to improve. Click the “Add Regions” (1) button again to take more areas into account; if you need to delete a region, press the “Delete Region” button.
Once one or more regions have been created, choose the Projection Type (3) and click the “Edit regions” (4) button to run the process.
The editor tool will list all the visible cameras for each region in the Camera List (5). You can select the [Reference] camera to be used in the computation of a specific region by double-clicking it.
As you can see, the [Reference] camera has changed to allow removing people from the orthophoto. The output preview in the regions is available as soon as the Show Regions Preview check-box is enabled.
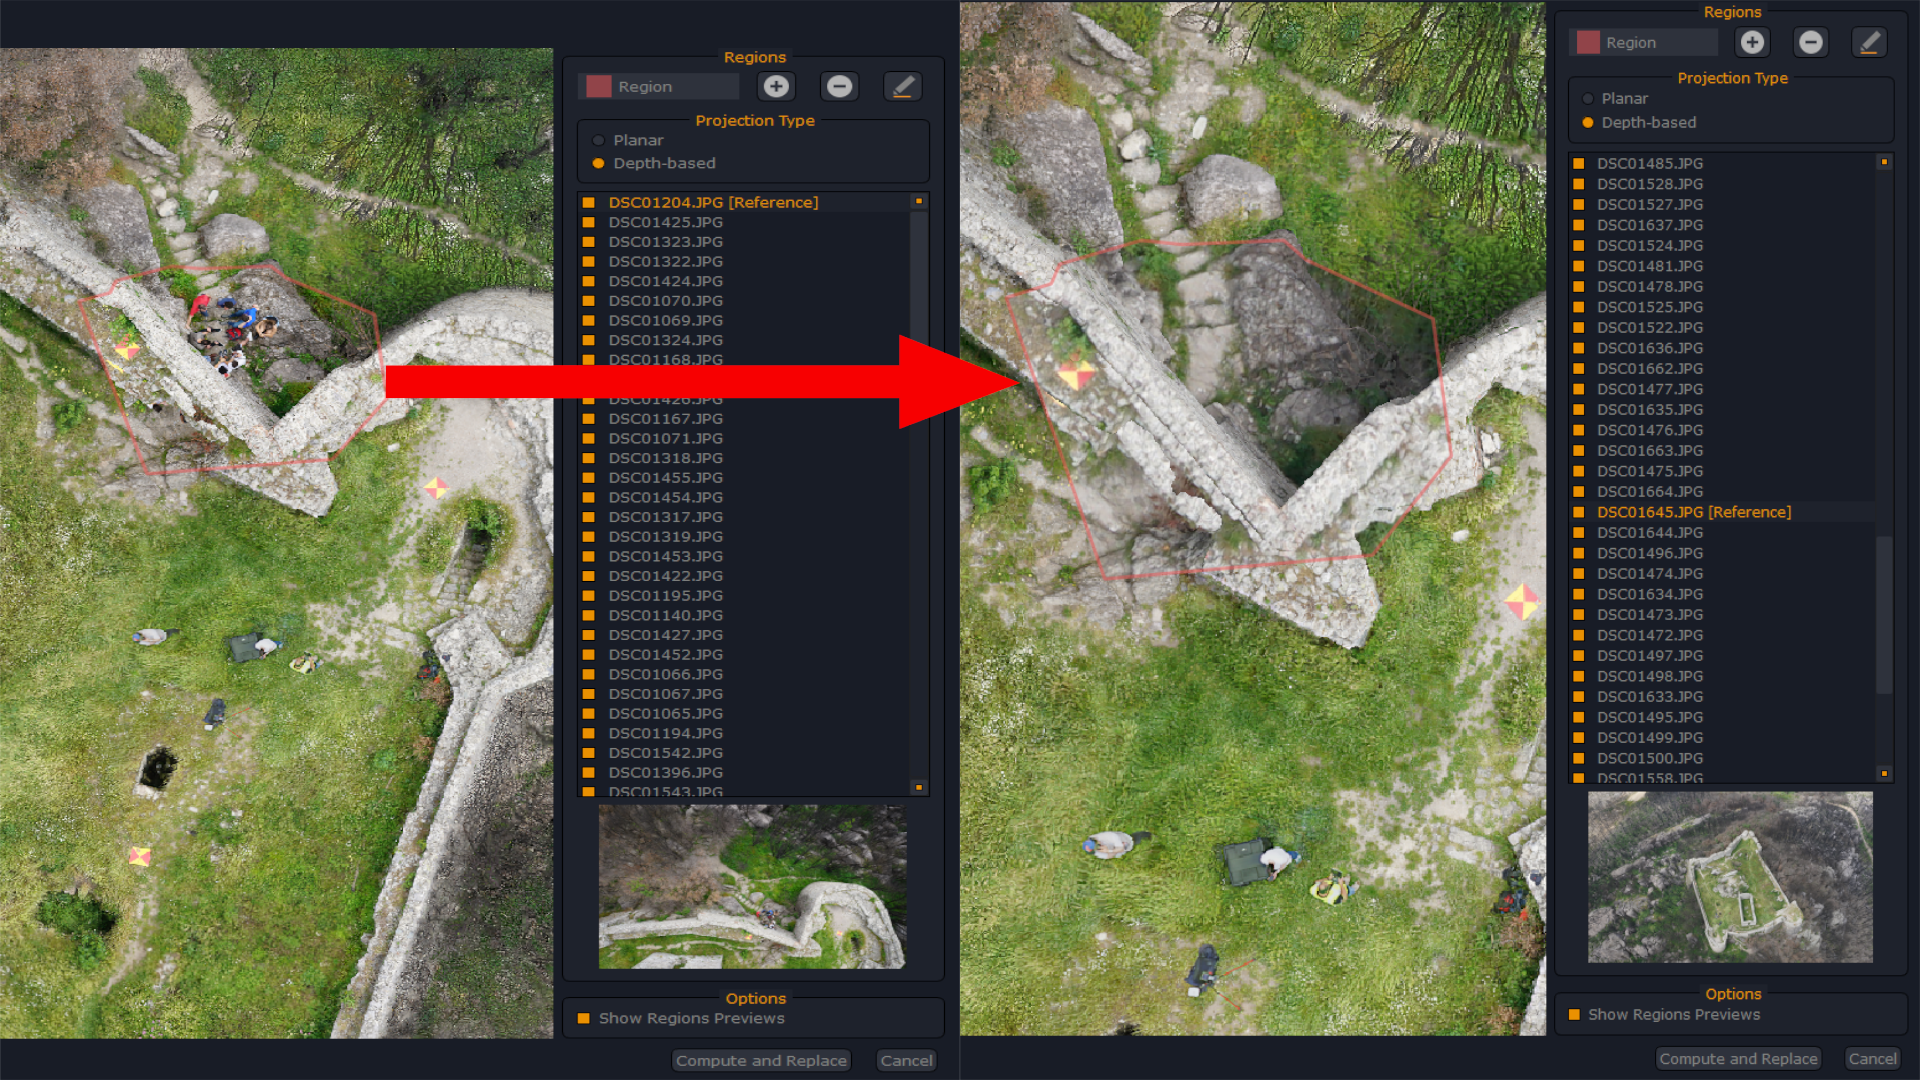
Click the “Compute and Replace” (6) button to complete the workflow.