Tutorial #A09 : Shape from silhouette tutorial
Shape from Silhouette
Welcome to the 3DF Zephyr tutorial series.
In this recipe you’ll learn the workflow that is available in 3DF Zephyr Pro to generate a dense point cloud using the shape from silhouette function.
This feature is available in 3DF Zephyr Pro and 3DF Zephyr Aerial only.
Intro
You can download the dataset (JPGs and masks) from the following link, as well as the ZEP file (requires 3DF Zephyr 3.0 or newer to open):
 | Dataset & zep Download : Bottle (119MB) |
Step 1 – Understanding when the Shape From Silhouette function can help
The shape from silhouette algorithm can help a lot when dealing with extremely reflective surfaces and even transparent or translucent surfaces. Obviously, the resulting point cloud/mesh will not retain its translucency (that should be setup as material in another software, such as blender) and the texture might be odd-looking, however, it’s a great way to keep intact the geometry of your subject.
The drawback is that the shape from silhouette algorithm works by carving voxels in 3D space: this means that the resulting point cloud/mesh will have a lot of sharp edges (the more masked pictures, the smoothest the surface) and that concave object with complex geometry might have extra, unwanted points.
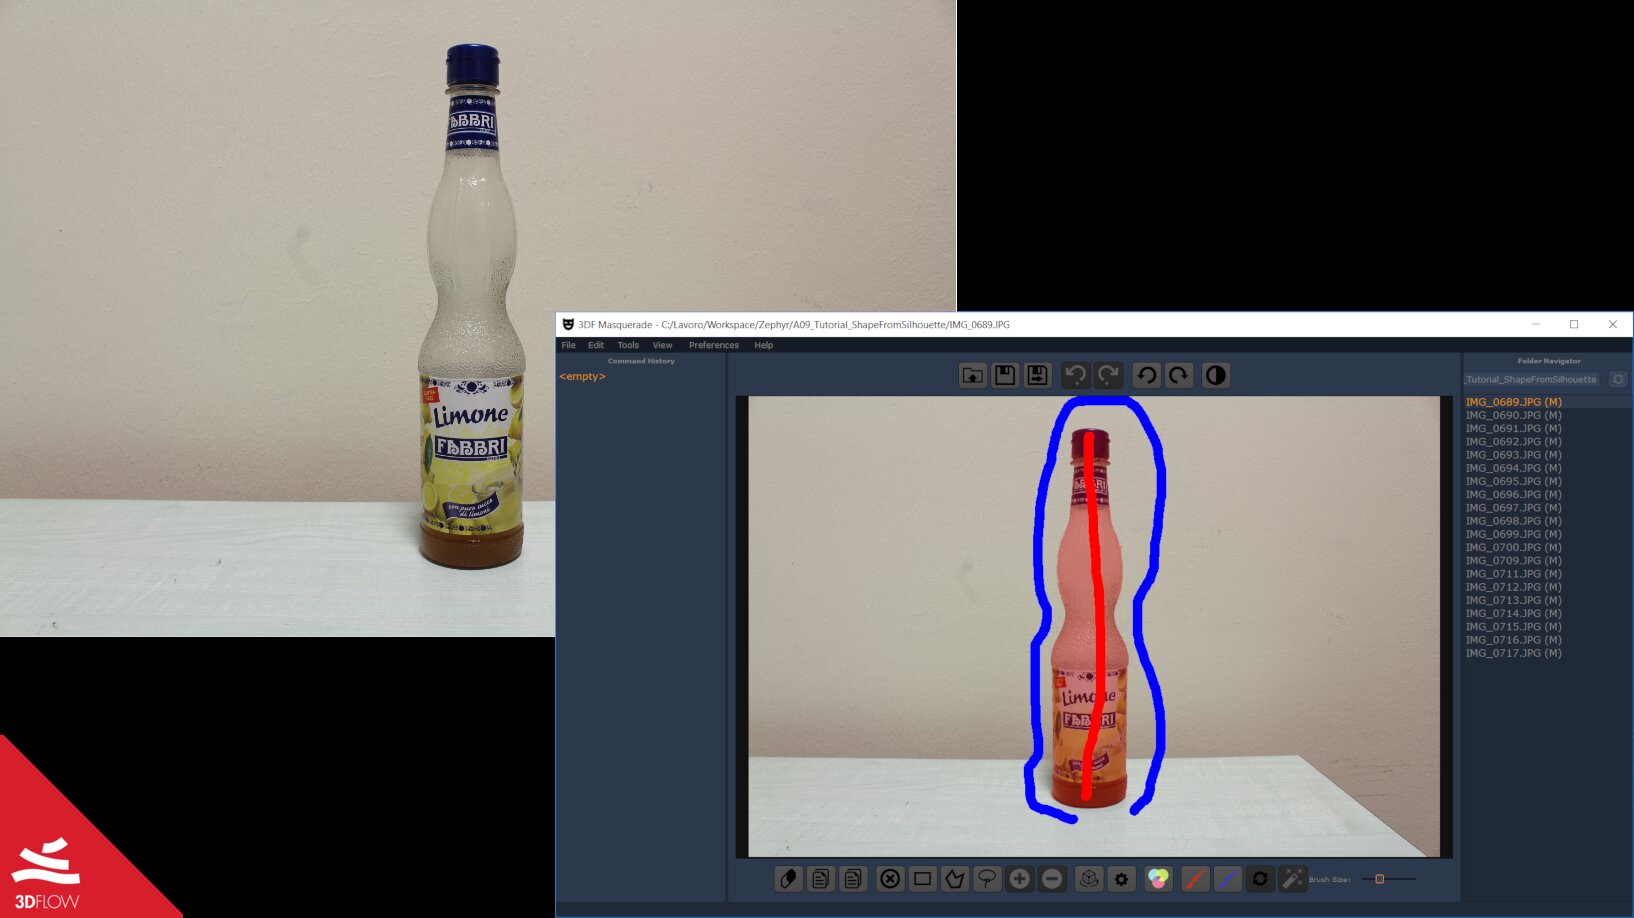
Shape from silhouette requires full-view masking: the structure from motion phase can be completed without masks (not in this example, as it’s been used a turntable-style scenario) so always remember to load the masks from the workspace menu in order to enable the shape from silhouette option.
Partial views of the object will be automatically discarded.
“Full view” means that the photo and mask must see the object in its entirety, as the following example:
Step 2 – Actual computation
Tips for mask generation: try to be conservative: missing masked parts will create holes in the dense point cloud, while “expanded” masks can be okay since other masks will carve them out by subtraction.
After making the required masks, when generating a dense point cloud make sure to switch to “Advanced mode settings” (1).
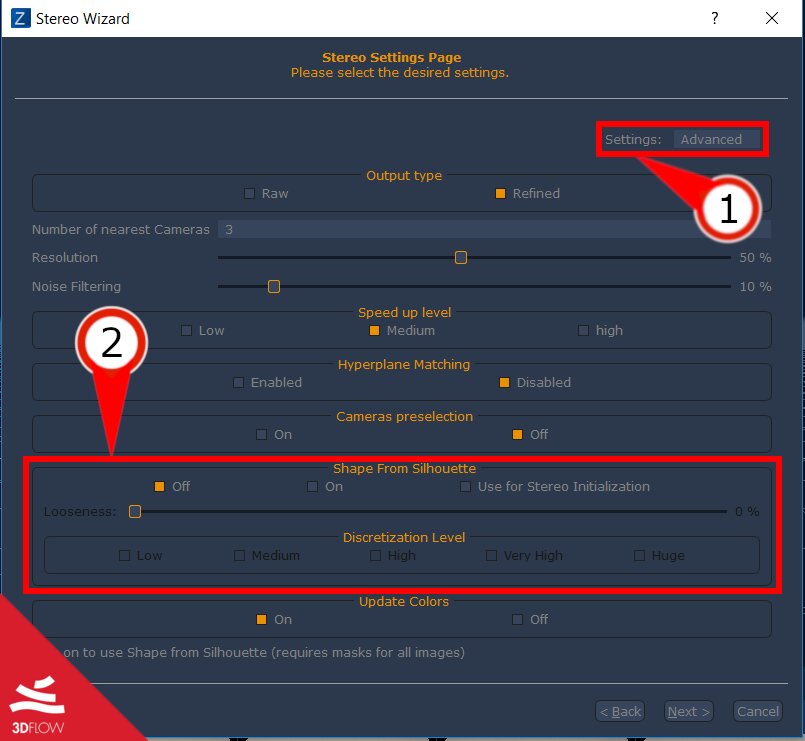
- off – will compute the dense point cloud using the classic multi view stereo approach
- on – will compute the dense point cloud using the shape from silhouette approach
- use for stereo initialization – will initialize the dense point cloud with the SfS approach, and then run the classic MvS approach
Make sure to set the discretization level accordingly to the desired dense point cloud. Usually, medium or high works well enough. Higher discretization levels may take a very long time.
Output and Final notes
Below, the expected outcome of this tutorial. As you can see, the plug of the bottle did not retain a very good geometry: making better masks in that area would help, as well as adding more pictures from the upper orbit.
Shape from silhouette example
by 3dflow
on Sketchfab