Tutorial #A15 : How to set up multi-camera groups for underwater 3D reconstruction
How to set up multi-camera groups in the new project wizard for an underwater dataset
Welcome to the 3DF Zephyr tutorial series.
In this guide, you will learn how to set up groups of images specifying translations, distances, and rotation parameters relations between the cameras during the new project creation.
This tutorial cannot be completed using the Free or Lite versions of 3DF Zephyr!
Summary
- Introduction
- How to set up the camera images in groups
- Adding internal camera parameters to the workflow
- View and export camera groups parameters
Introduction
During the Zephyr New Project creation workflow, you can define stereo or camera rig relationship parameters, including Distance, Translations, and Rotations. While the software automatically organizes images into linked groups, it is still possible to modify these groups or insert custom relationship parameters manually.
This workflow is helpful for underwater scenarios covering camera groups setup and the applying of intrinsic calibration parameters to perform a complete underwater 3D reconstruction with Zephyr.
To follow the steps, you can download the underwater sample dataset below, acquired by a stereo camera system mounted on a Deep Trekker ROV. Please download and extract the dataset on your computer from this link:
Download tutorial dataset

Set the folder images order and reassign the reference group
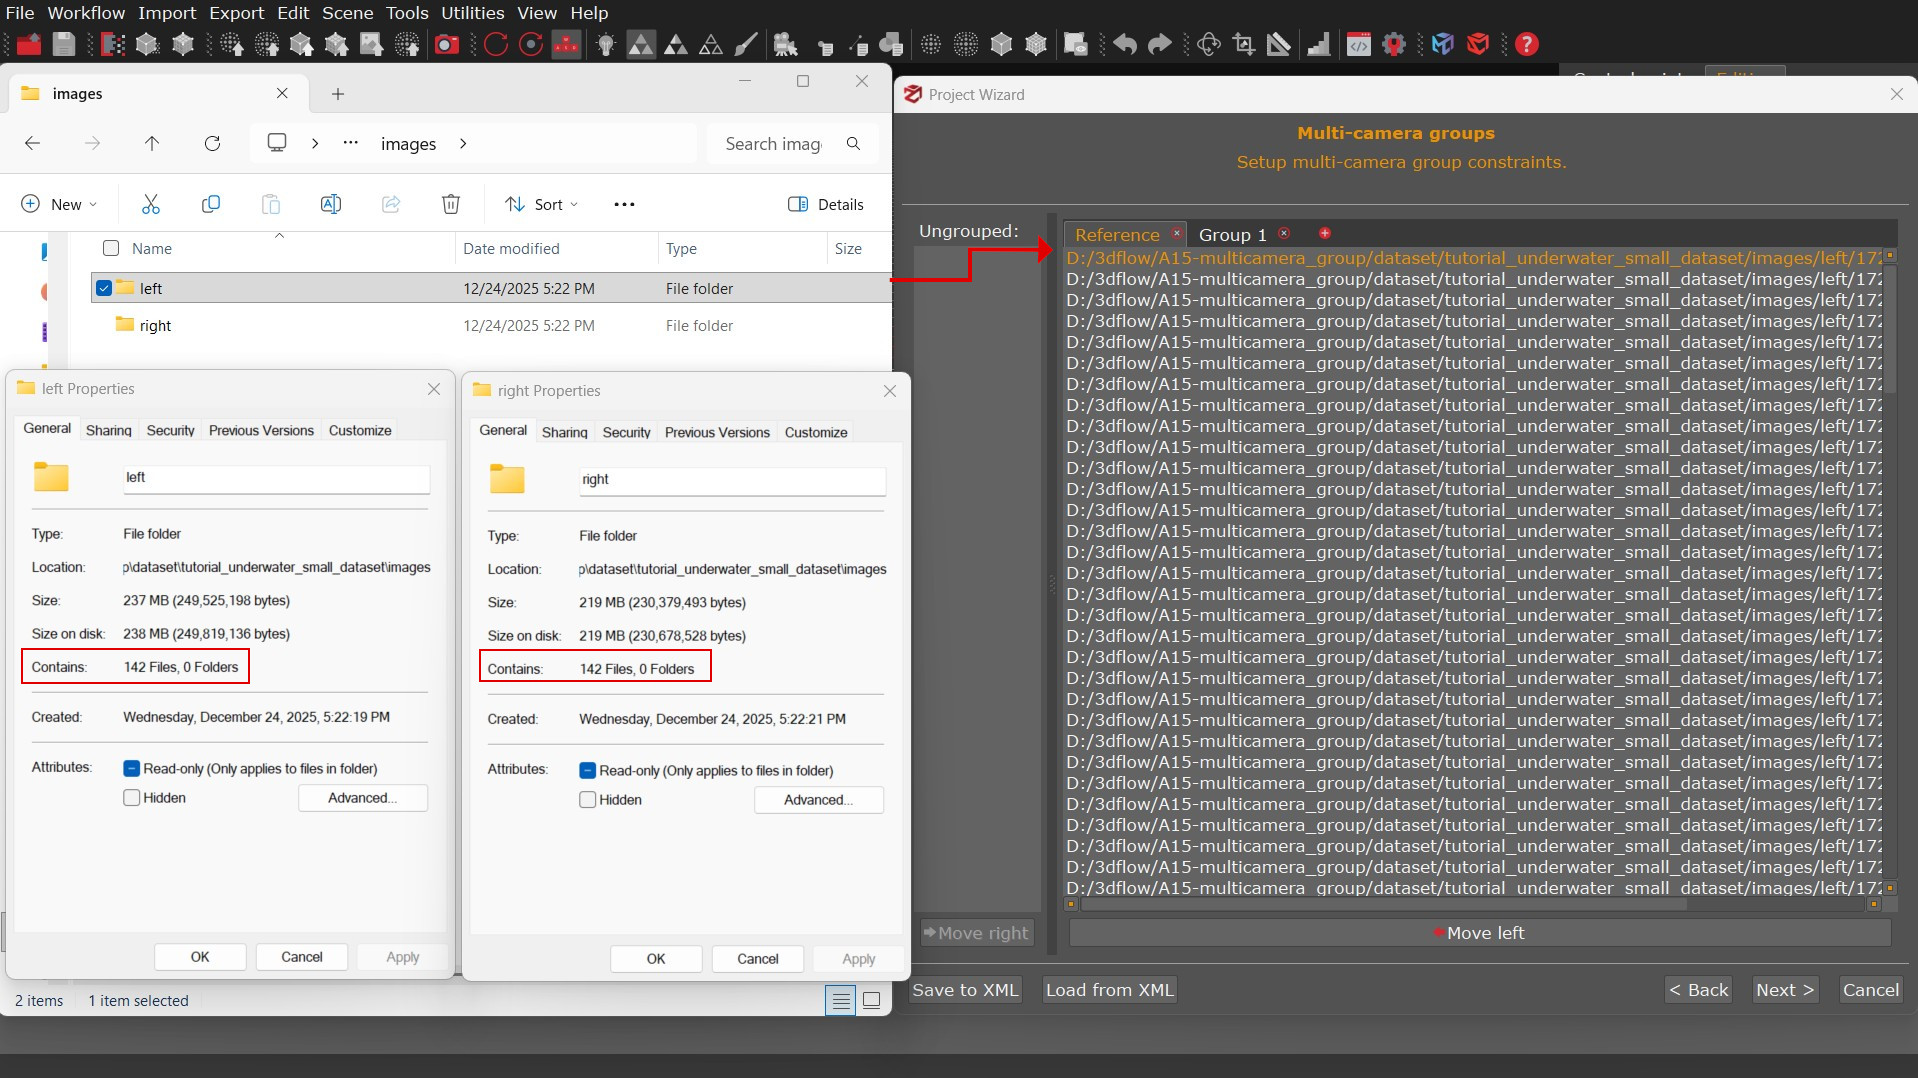
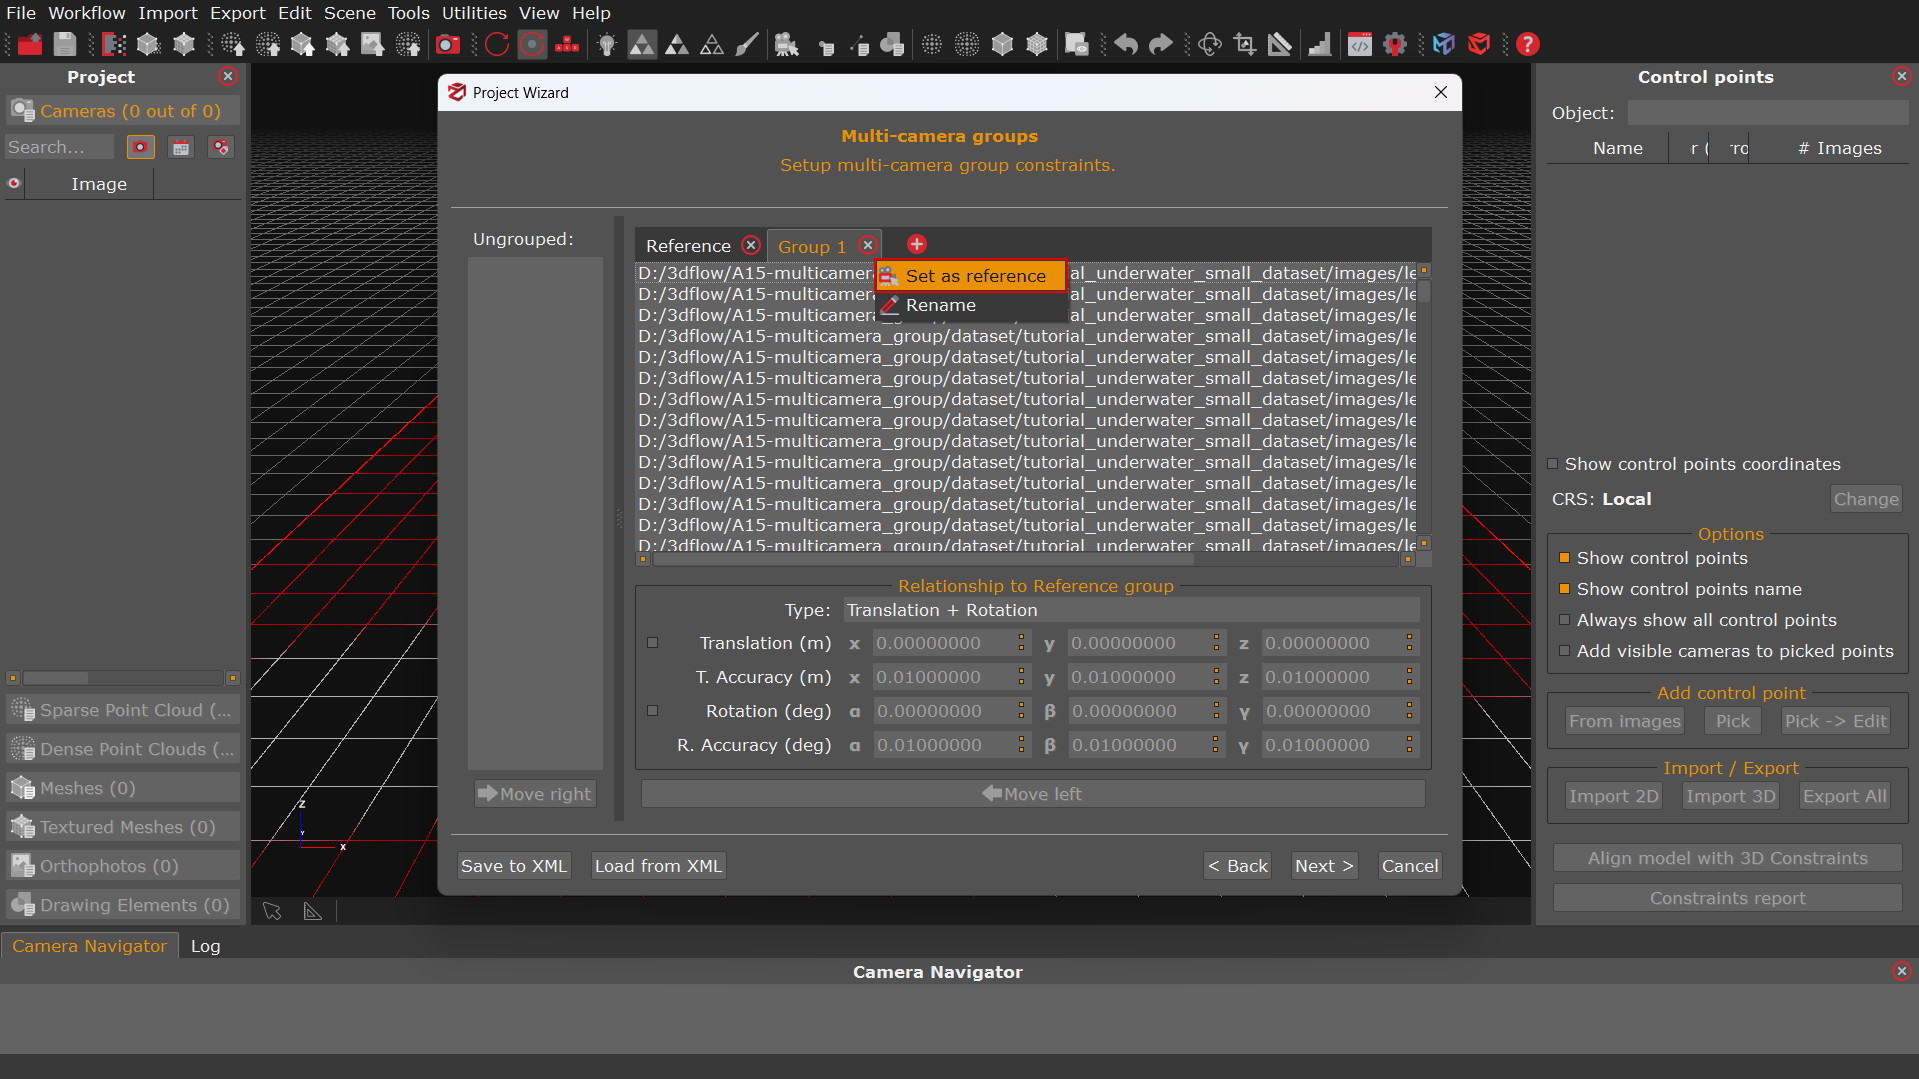
Images from each camera must be stored in distinct directories, with each folder containing the same number of files. This structure will allow 3DF Zephyr to automatically identify camera groups and ensure consistent parsing between them. Then the software will assign the first folder alphabetically as Reference by default, and subsequent folders in numbered Groups; however, users can manually reassign the reference status to a different group if necessary.
For example, in the tutorial dataset, images in the Left folder are automatically sorted as Reference, while those in the Right folder are sorted as Group 1.
How to set up the camera groups
To begin the workflow, click on the menu “Workflow” > “New Project”.
In the New Project Wizard page, select the check-box “Setup Multi-Camera Groups” (1), then click on the “Next” button.

In the second Photo Selection page, click on the “Add folder” button [
Clicking the “Next (2) button, Zephyr will prompt you to decide if you want to link the images in groups. Click “Yes” (3) to open the Multi-camera group page.

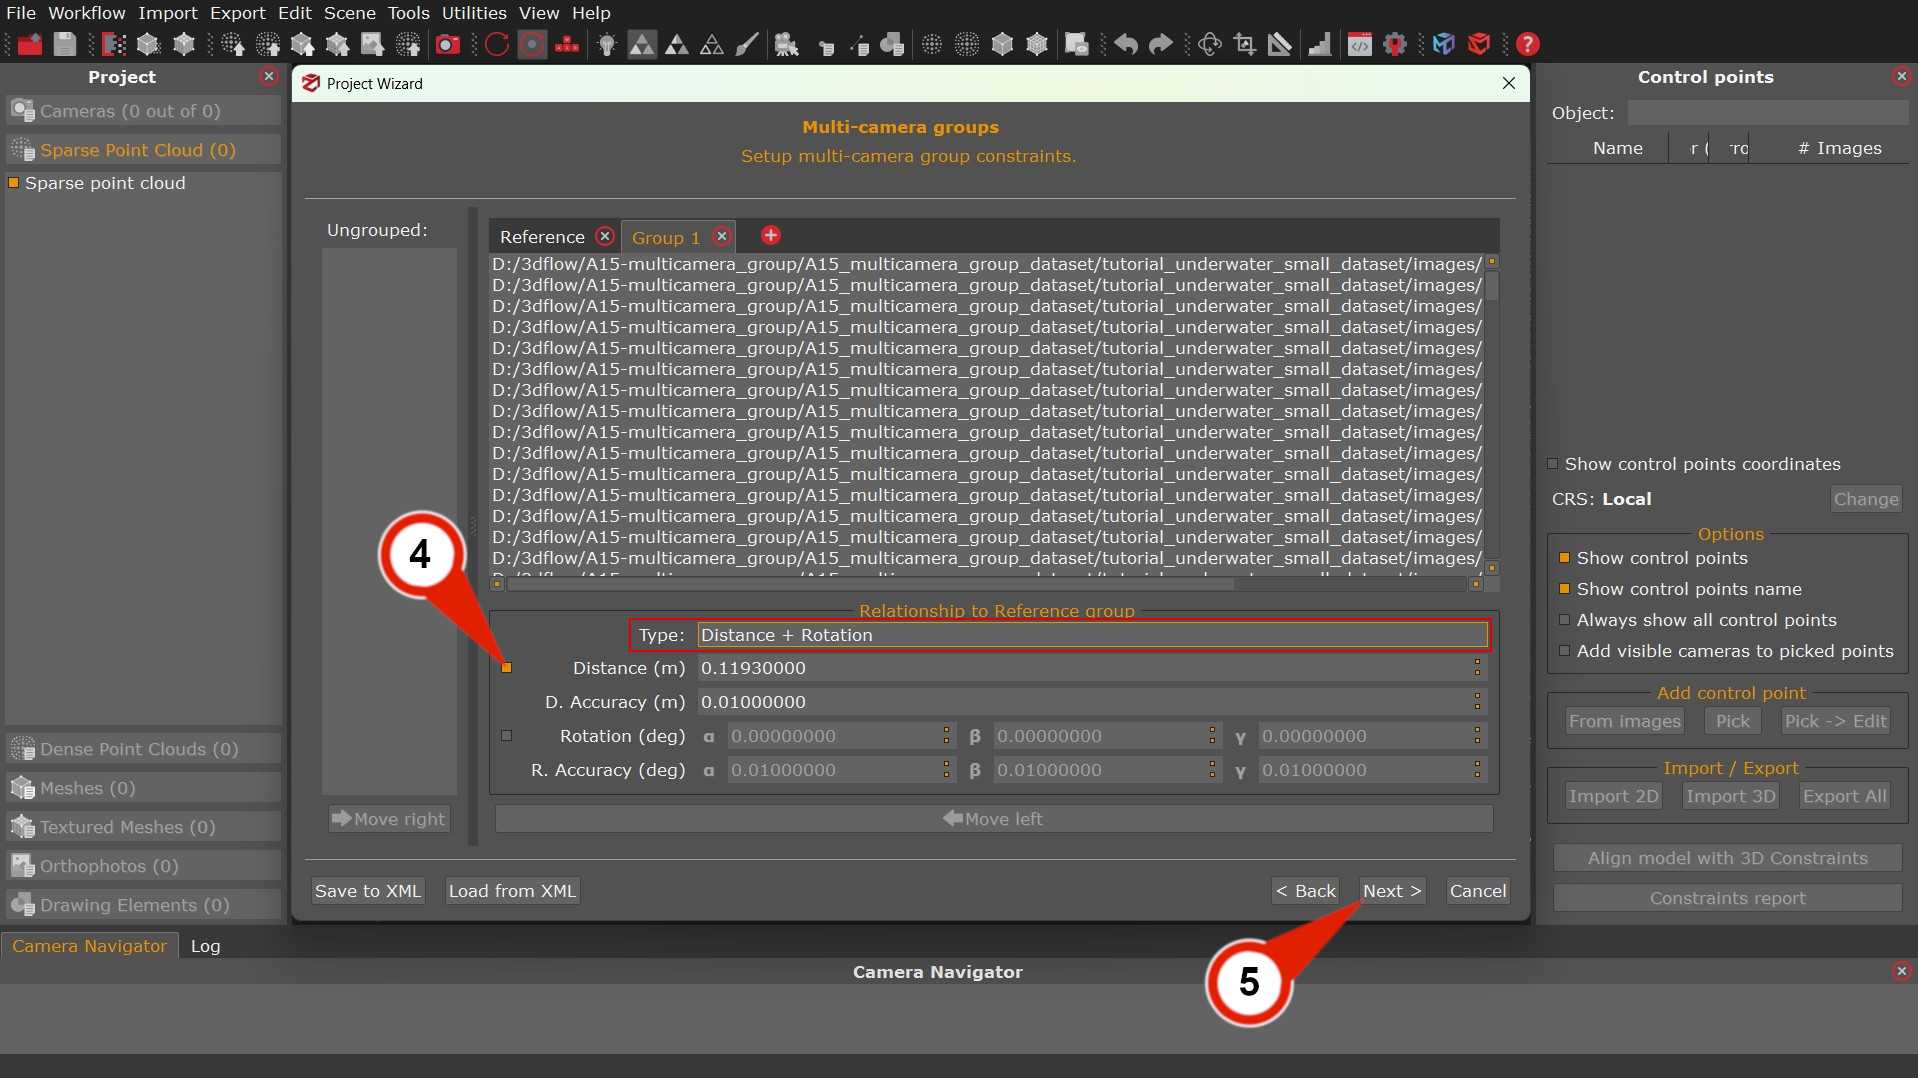
On the Multi-camera Groups page, “Distance + Rotation” option is available for selection in the Type section. By enable the check-box “Distance (4)” will be possible to insert a fixed measure and accuracy between camera groups. The value below can be used as example:
- Distance (m): 0.11930000
- D. Accuracy (m): 0.01
Clicking the “Next” (5) button will allow to continue in the Calibration page.
How to use and save translation parameters
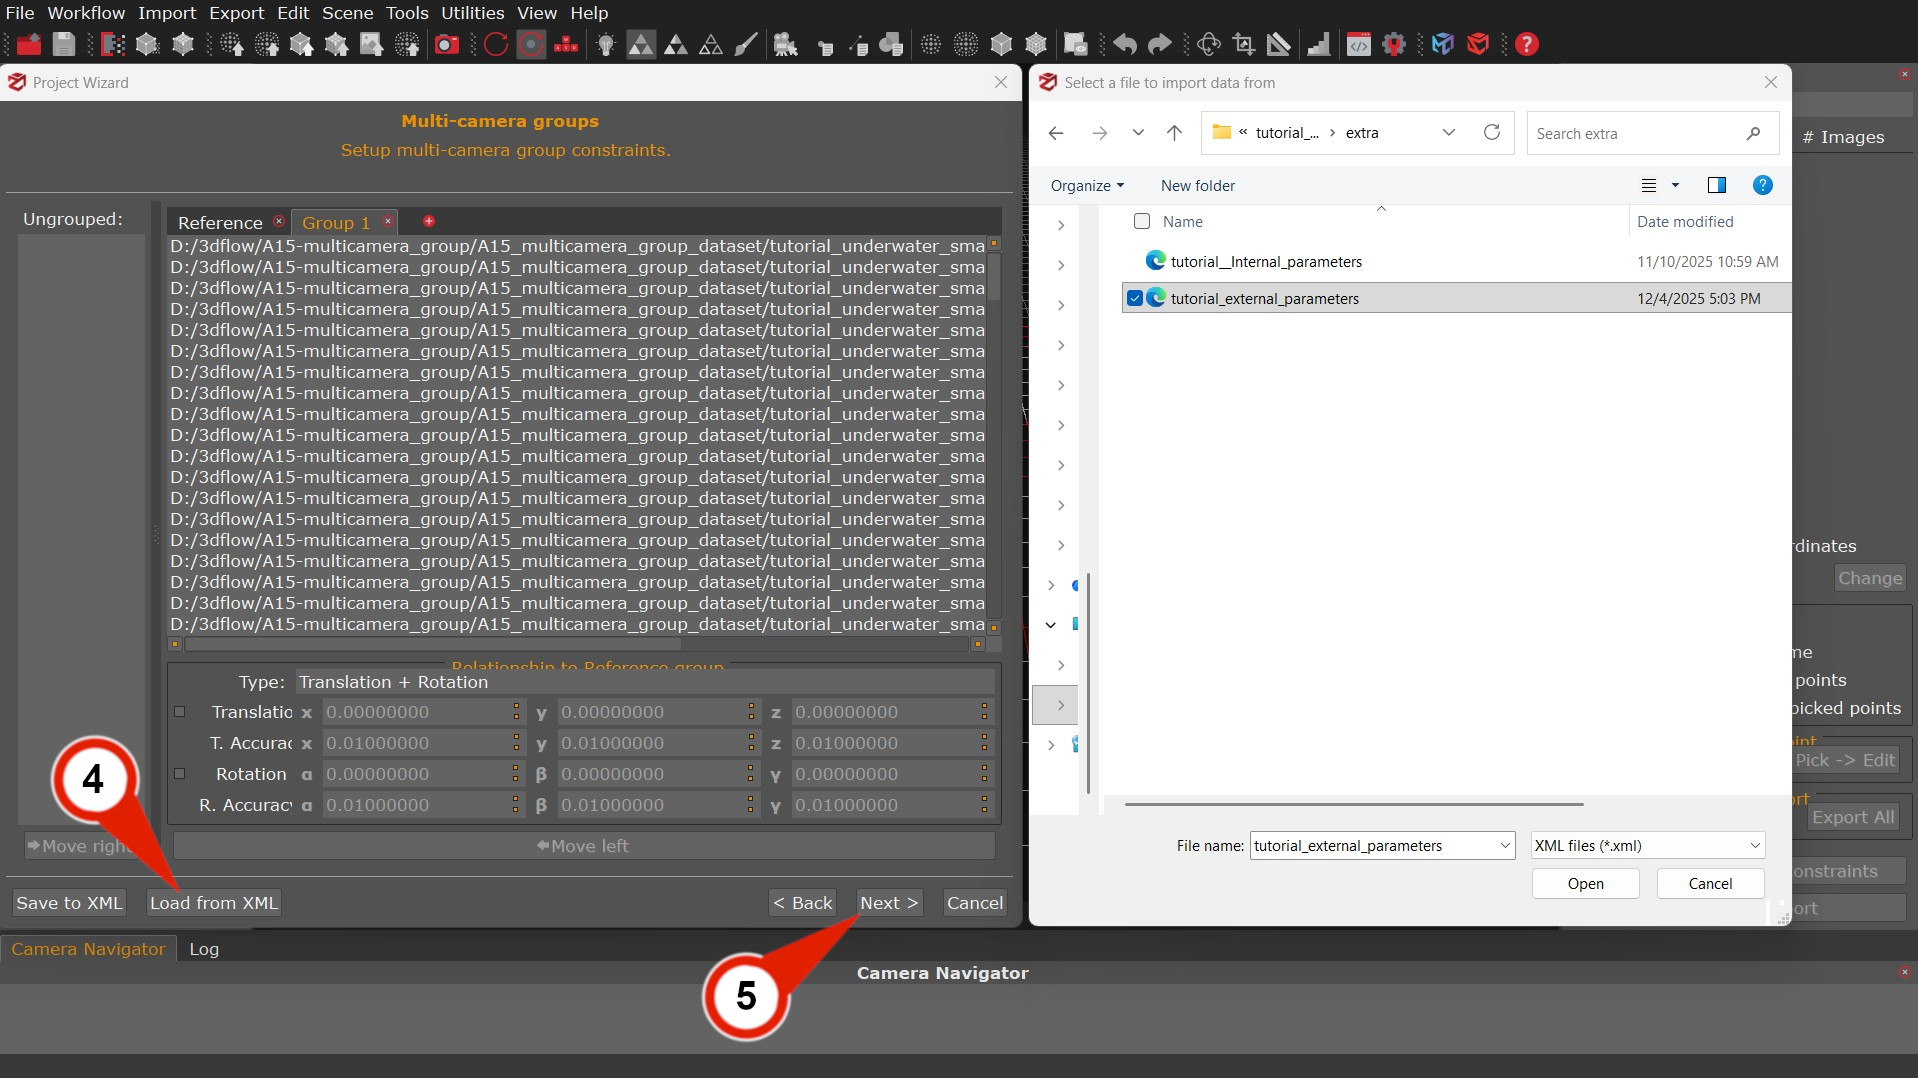
The “Translation (m)” checkbox enables the manual input of x, y, and z translations parameters for a selected group in relation to the reference camera, and allows specifying the accuracy for each axis. In addition to translations, you can enable the “Rotation (deg)” checkbox to set rotation parameters using Euler angles for the X, Y, and Z axes.
Once inserted, save the parameters in a .XML file for quick use in future processing.
Clicking on the Load from XML (4) button make possible to import the tutorial_external_parameters.xml file, then with the “Next” (5) button you will proceed to the Calibration page.
Adding internal camera parameters to the workflow
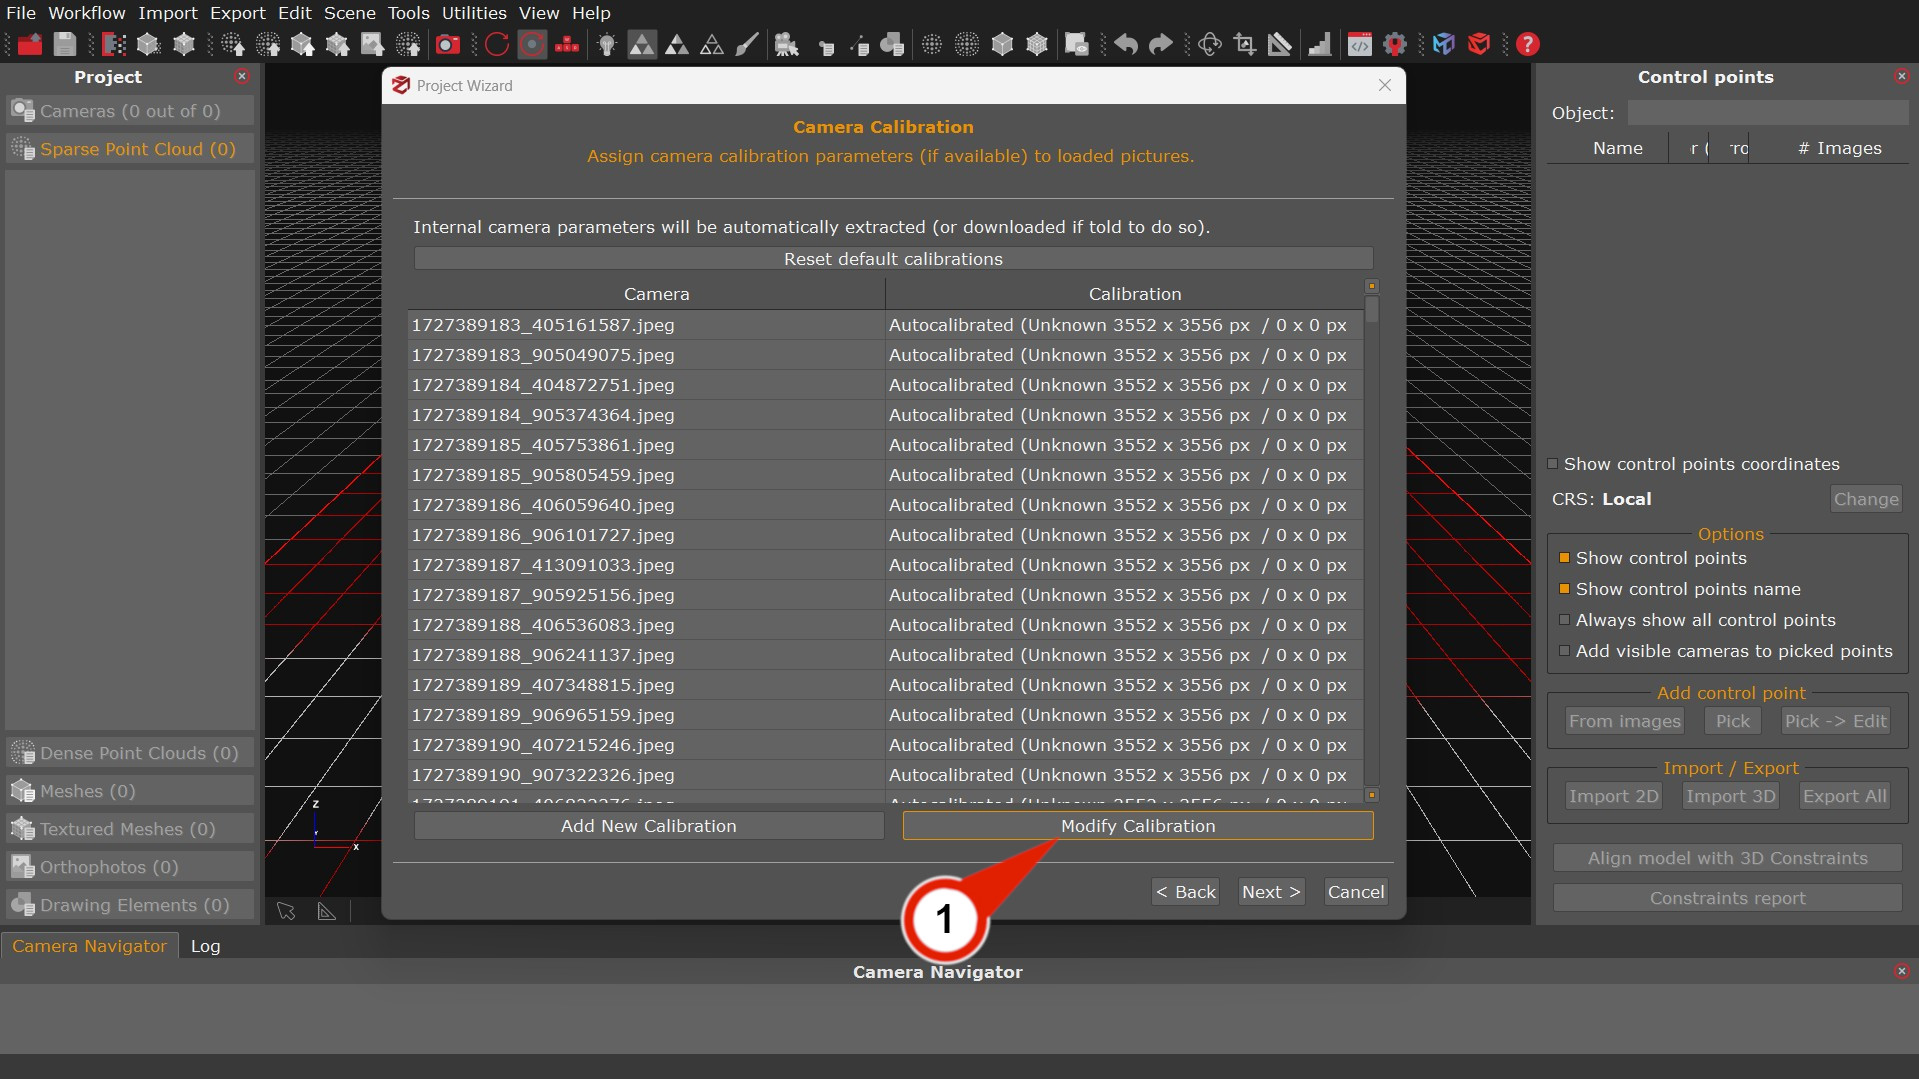
In the “Camera Calibration” step, Zephyr can operate with auto-calibration by default; however, in underwater multi-camera setups, it is often advantageous to provide the intrinsic parameters, such as focal length, principal point, lens distortions, etc. Depending on the situation this will improve orientation accuracy and consistency among the cameras.
In the Calibration page, click on the “Modify calibration” (1) button.
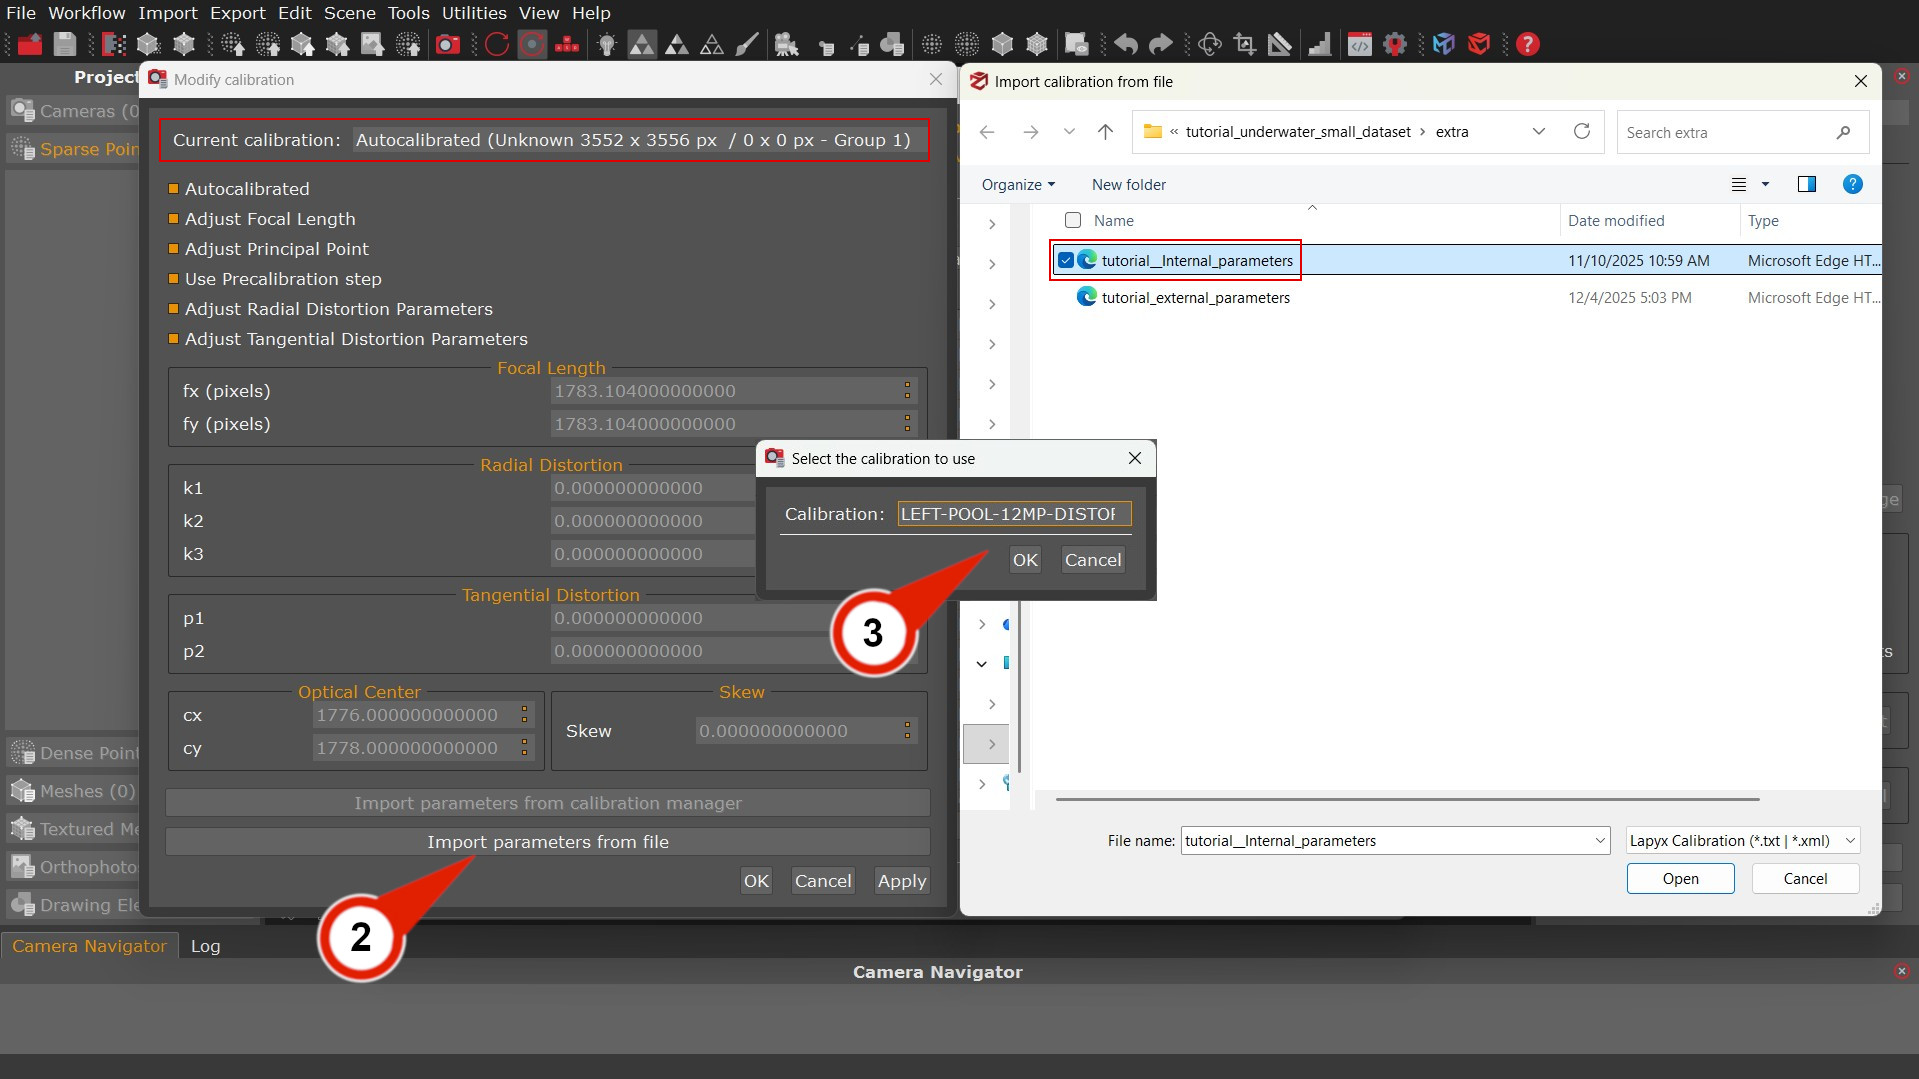
In the opened window, be sure that the Current calibration drop menu has the Group 1 selected – this group corresponds to the calibrations of the Left camera group. You can click on the “Import parameters from file” (2) button and select the tutorial_Internal_parameters file.
A pop-up window will show the selected calibrations parameters to import: LEFT-POOL-12MP-DISTORTED (3), than click the “OK” button to complete the import action.
In the Current calibration drop menu, select the “Group 2” (4) – this group corresponds to the calibrations of the Right camera group. The importing action should be repeated by pressing the “Import parameters from file” (5) button, and choosing the same tutorial_Internal_parameters file. This time in the Select calibration pop-up window, the RIGHT-POOL-12MP-DISTORTED (6) parameters should be selected instead. Click the “OK” button again to complete the import action.
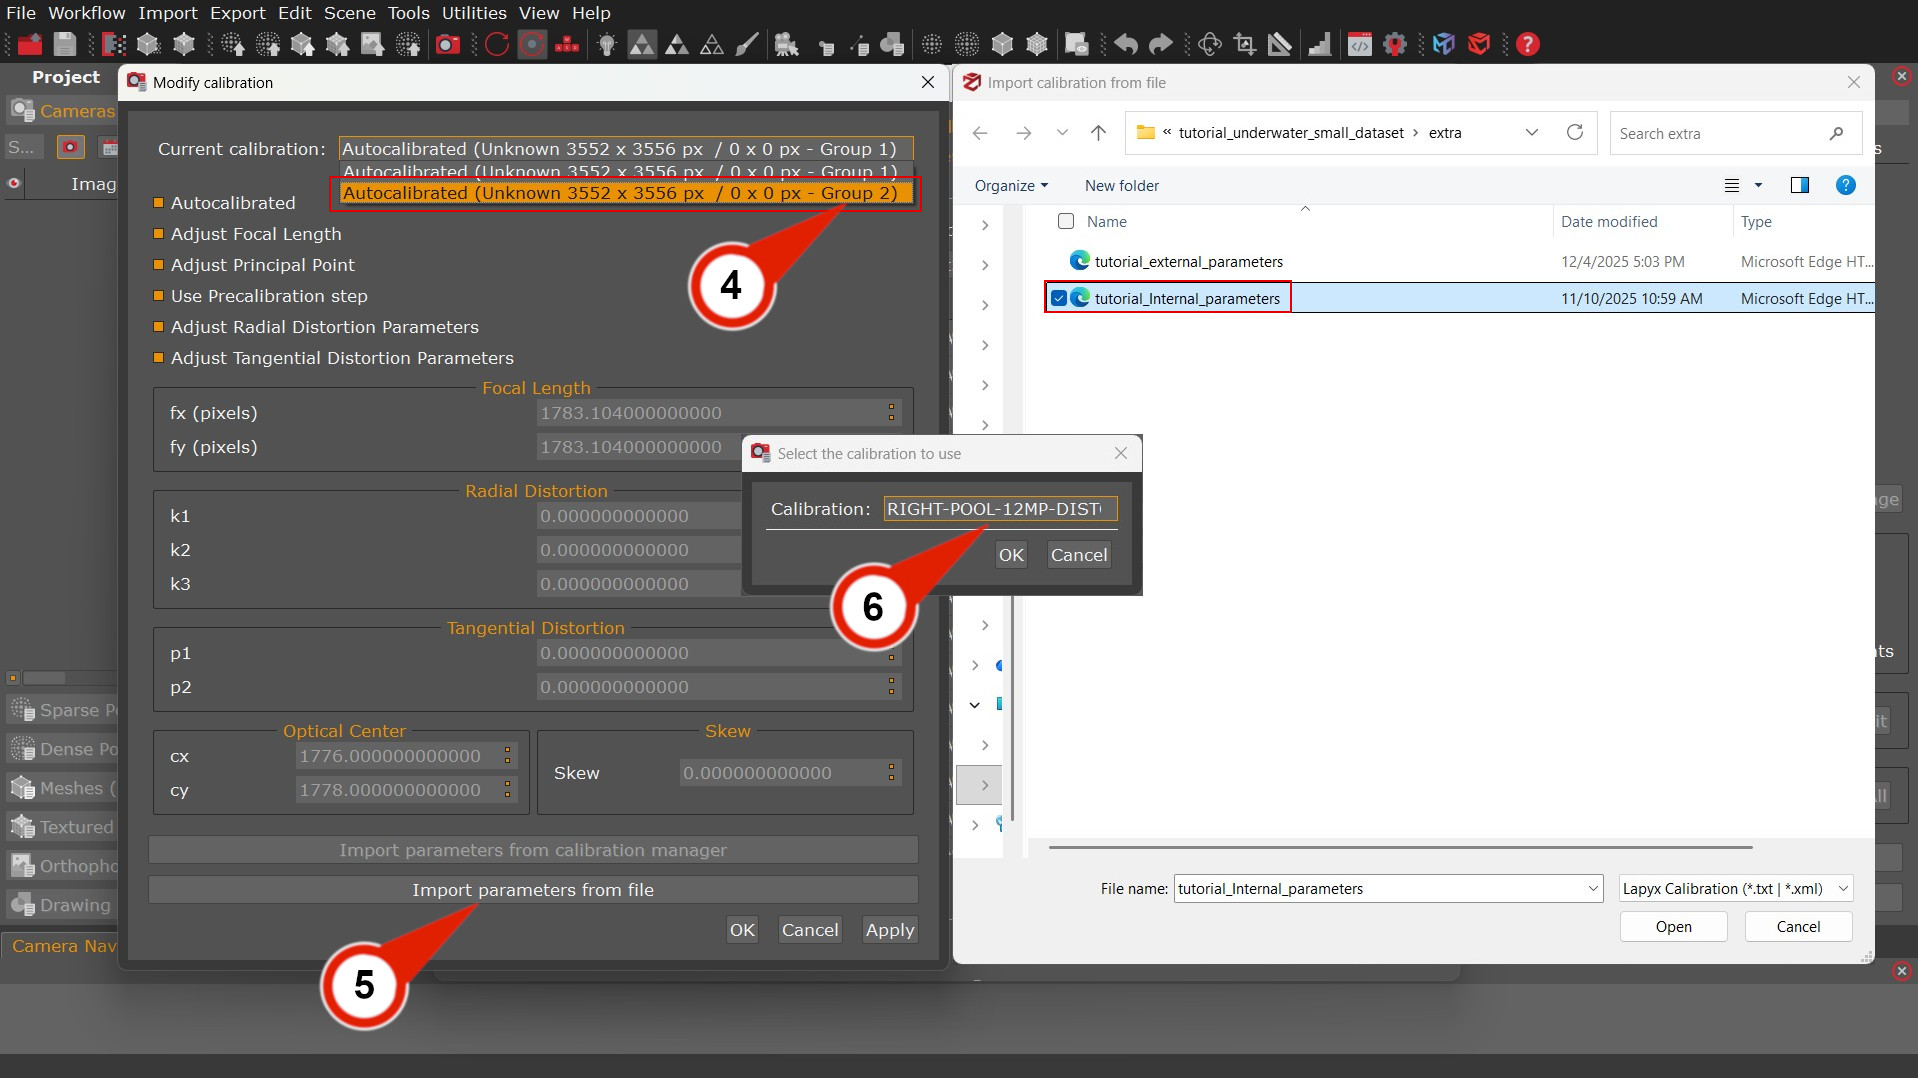
In the main Modify calibration windows, the Automatic calibration checkbox, and the Pre-automatic calibration check-boxes will be automatically disable. This means that Zephyr will leverage on the imported calibration parameters.
Click the “OK” button to close the Modify calibration window and continue.
To finalize the New Project creation workflow, you can click the “Next” button in the Calibration page. In the Camera Orientation page, it is possible configure the settings by selecting Category: General and Presets: Default. Press the “Next” button to continue.
On the last Start reconstruction page, launch the computation
by clicking on the “Run” button.
View and export camera groups parameters
Once the sparse point is created, you can view the initial and final parameters.
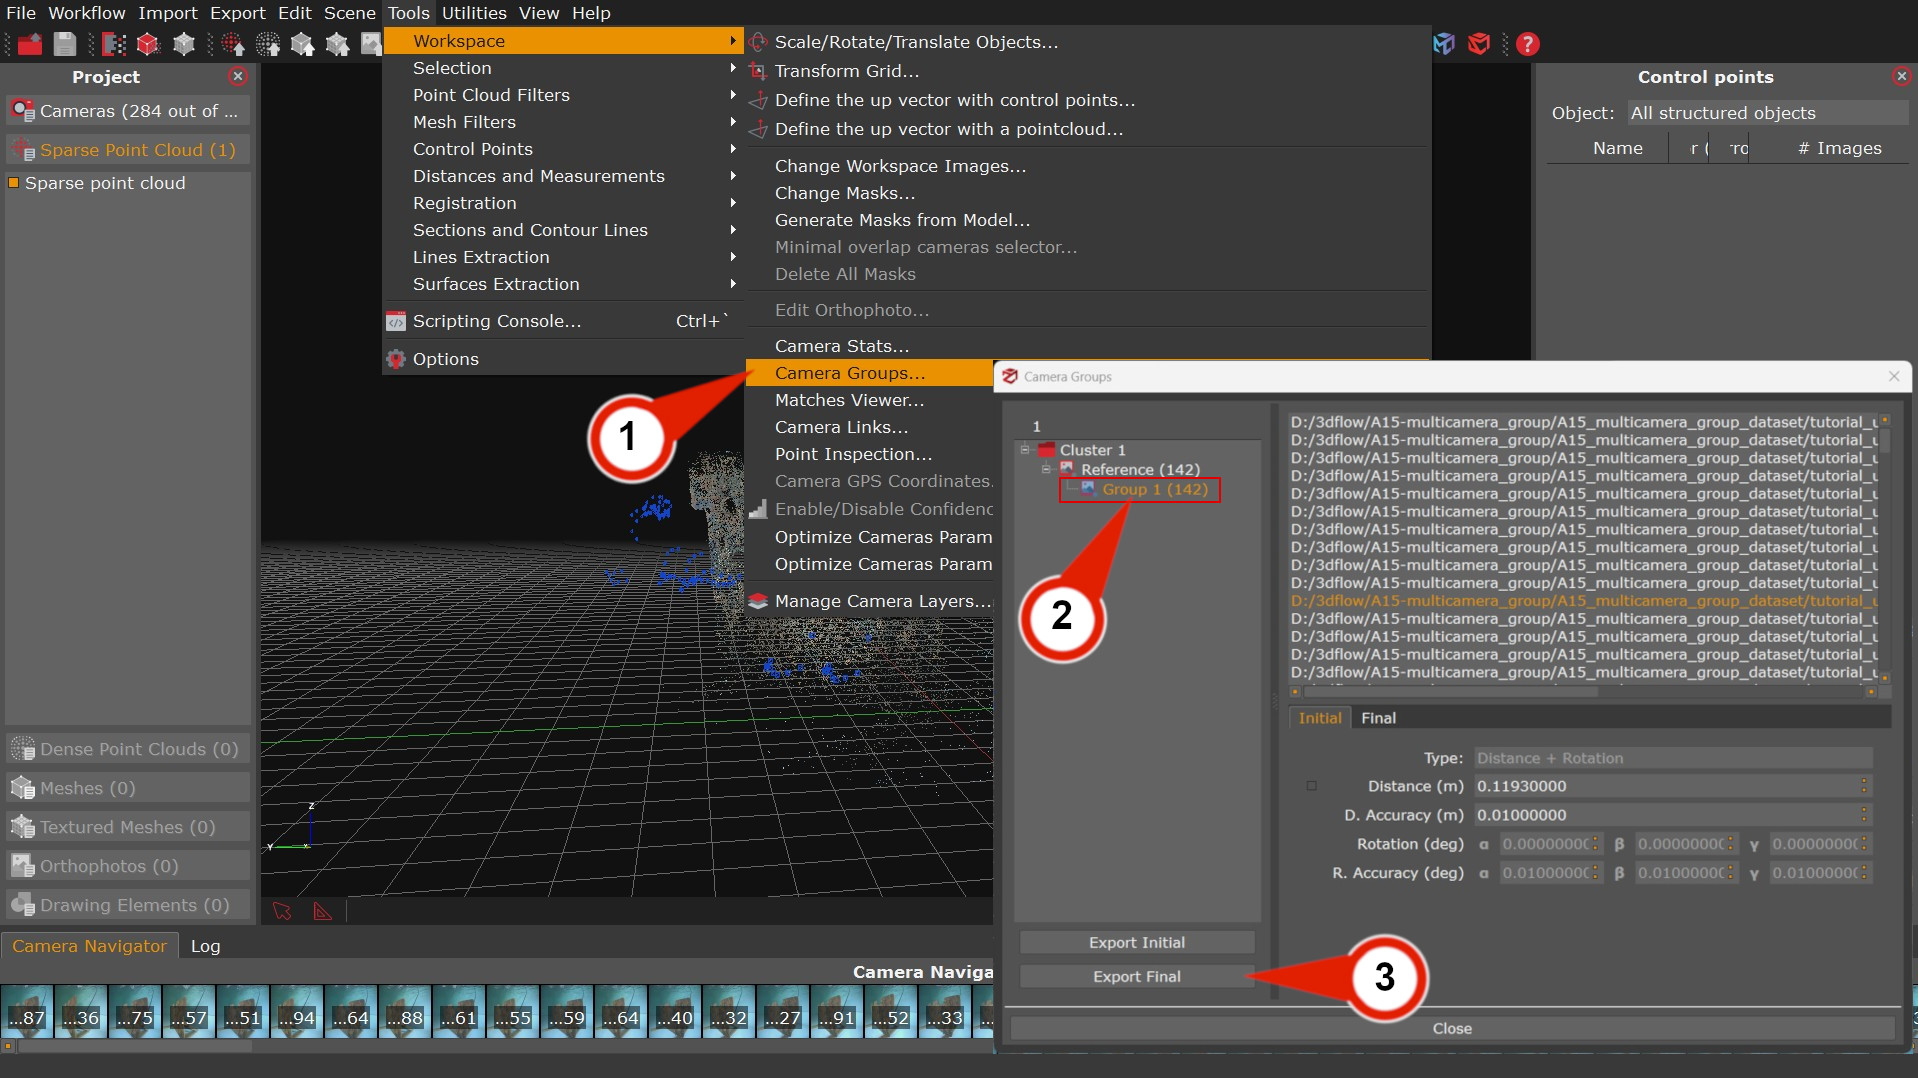
Following the path: Tools > Workspace > Camera groups (1), by opening the Camera Groups Manager.
By selecting “Group 1” (2) will be possible to view the images and the Initial and Final parameters associated with them.
The “Export Initial” and “Export Final” (3) buttons allow exporting the parameters in .xml file, the input rig parameters, and the final rig relationship. When the rig parameters are not known in advance, it might be useful to let Zephyr extract the rig relationship on a first run and re-run the project with the final parameters.