Tutorial A07/2 : Control point registration
Control point registration
Welcome to the 3DF Zephyr tutorial series.
In the following tutorial, you will learn how to register a non-structured point cloud and align it with a dense cloud derived from photogrammetry using control points. This is the second part of three tutorial on the subject.
Intro
When dealing with very noise photogrammetry point cloud or excessively planar surfaces (building facades), you may want to use control points prior to the ICP alignment.
In this case, the alignment via control point takes just a few clicks and can vastly improve the results.
Step 1 – Take control points
The first step is to put at least three control points on the first point cloud you are dealing with. Depending on what you are doing, you might want to move the photogrammetry point cloud rather than the laser point cloud. Regardless of this, you will have to then apply the same control points over the other point cloud.
In this example, we start by importing the unstructured laser scan point cloud inside Zephyr. After this is done, it is then possible to rescale the imported point cloud and position it near the photogrammetry point cloud ( although this is not mandatory )
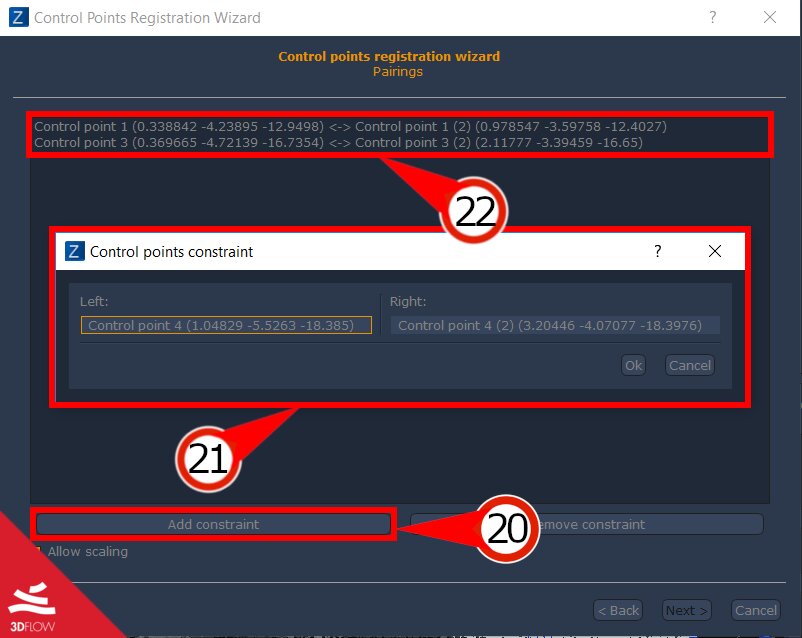
The next step is now to select three control points. You may pick the control points with any method, although using images is advised. Try to select control points that later on you will able to easily recognize and select on the other point cloud: usually, edges work very well. Keep in mind that you should also select points that are displaced on all three axis.

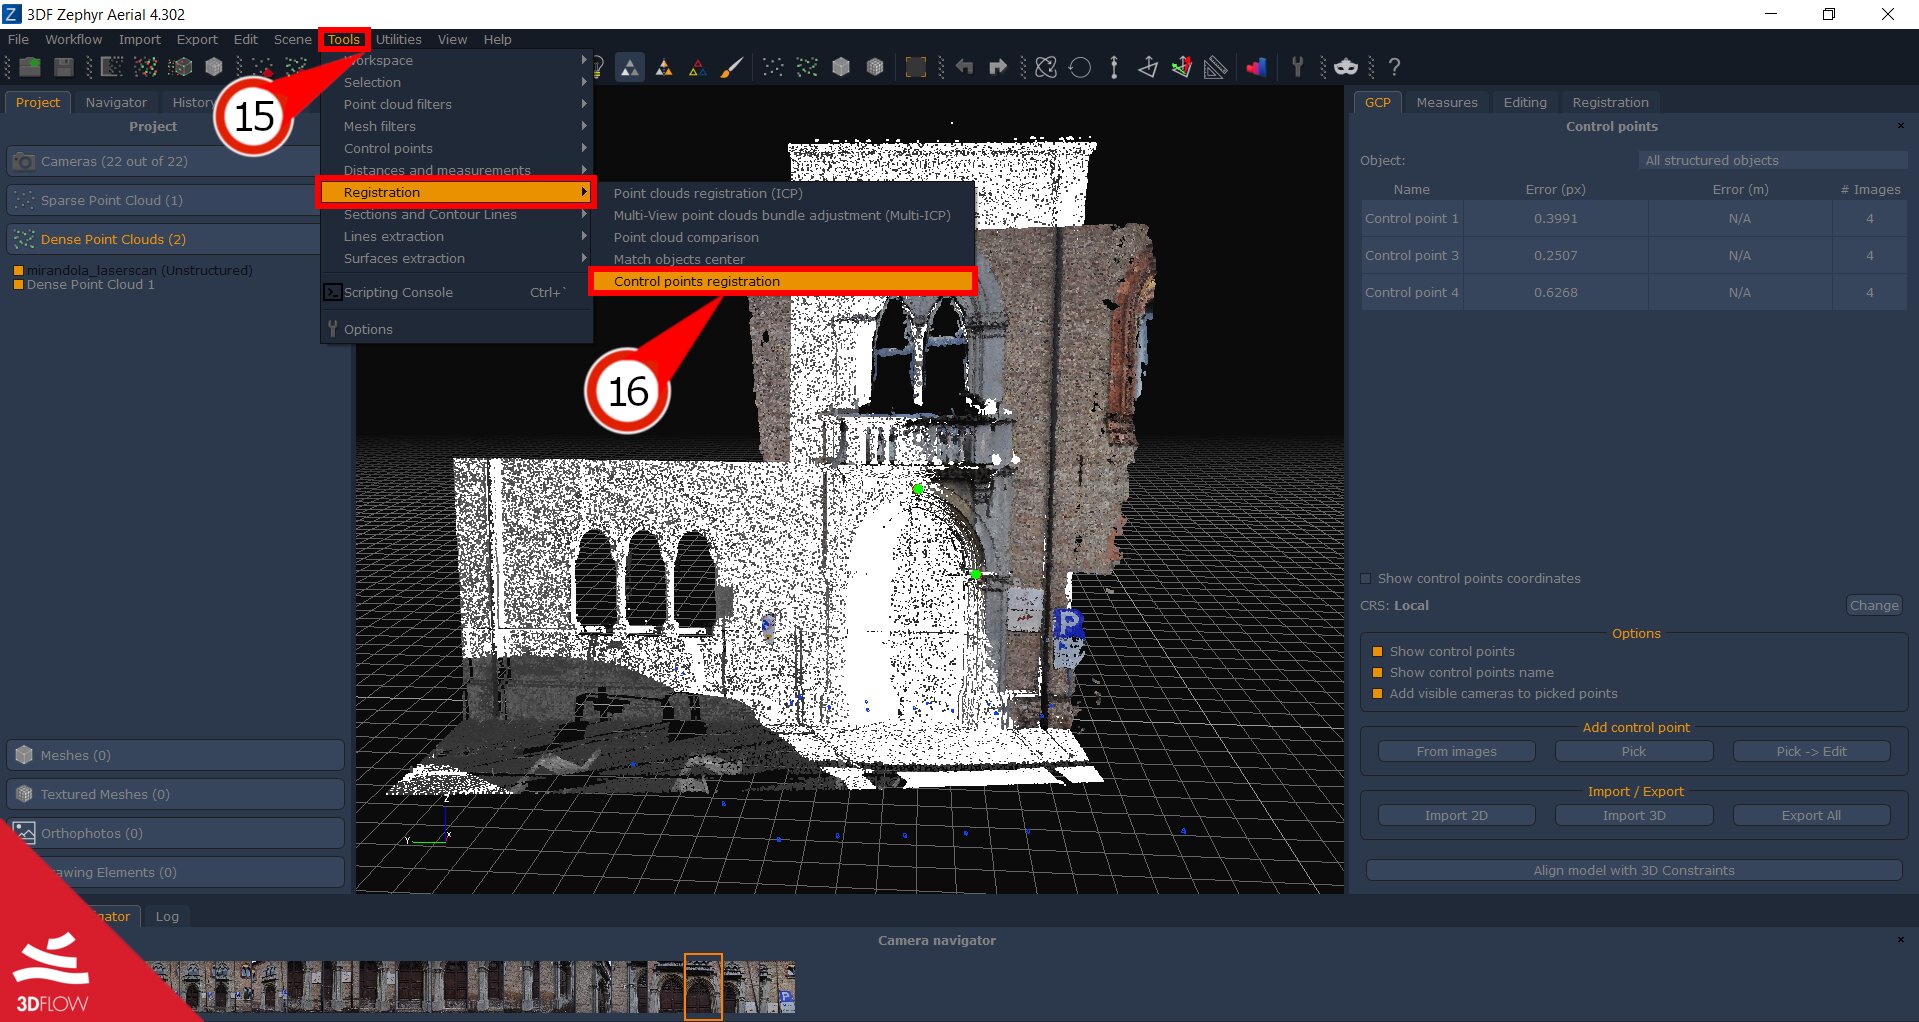
Step 2 – Control point registration
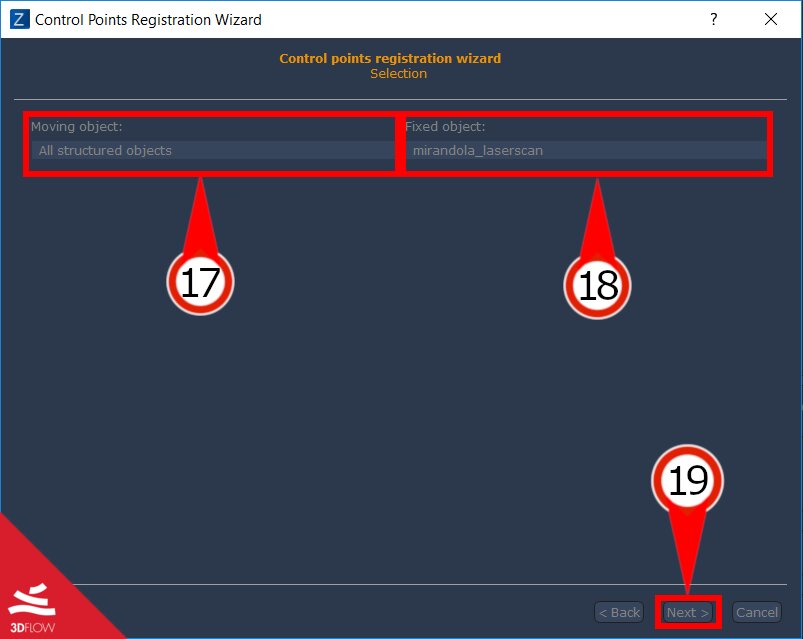
Select which object will be the “Moving Object” (17) and which one will be the “Fixed Object” (18). then click on the “Next” button (19).